Paper quilling is a great technique for adults and older children to try at home. You can start by using materials around your house and then branch out into professional-quality materials to take your projects to the next level.
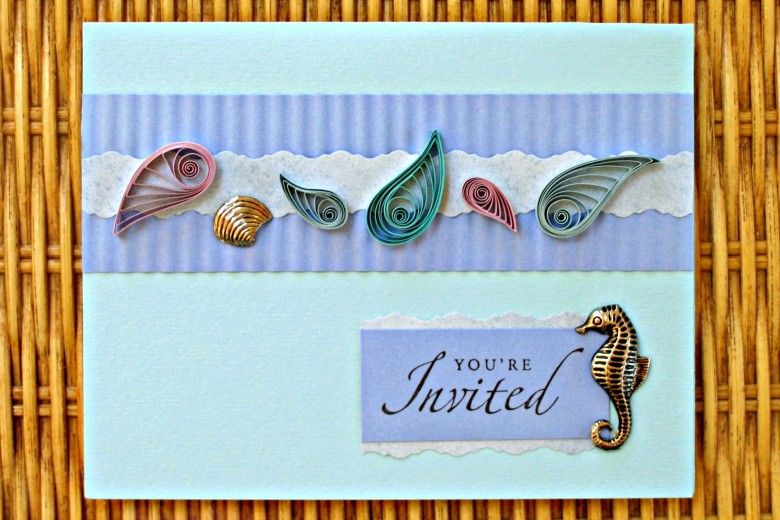
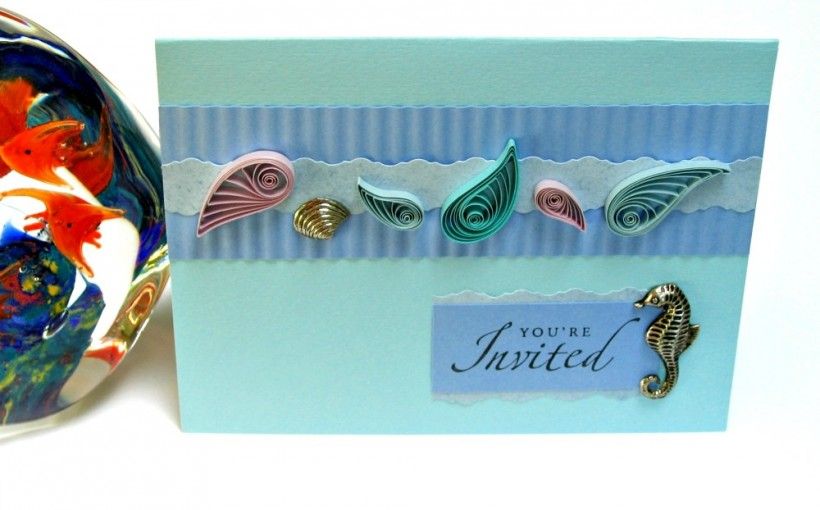
In the below article, guest artist Ann Martin shares a tutorial for a quilled invitation to set the stage for a beach or pool party. It's an easy way to try your hand at creating basic teardrop coils that look like seashells. If you’d prefer to use these designs for another occasion, just switch out the sentiment you write or stamp on the card.
There’s no need to shop for special card or quilling supplies. The materials listed below were used for the pictured card, but you can make adjustments using whatever materials you have at home.
Image
DIY Paper Quilling
Quilling Supplies:
Pearlized quilling paper: 1/8 inch, aqua, light green, lavender (or cut 1/8” strips from sheets of text-weight pearlized paper, or any paper you have)
Quilling tool: A needle or slotted quilled tool will work. If you don’t have a quilling tool, you can try using any stiff wire or a cocktail pick or toothpick.
Detail scissors
Ruler
Tweezers (to handle quilled coils)
White glue, such as tacky glue (grips well on pearlized paper)
Paper piercing tool or cocktail pick (to apply glue to quilled coils)
Plastic lid or waxed paper (to use as a glue palette)
Damp cloth (to keep fingers glue-free)
Card Making Supplies:
Card stock (light blue, medium blue)
Text weight paper (light blue)
Paper cutter with scoring blade
Double-stick tape or glue stick (to adhere layers)
Decorative edge scissors (waves or Victorian)
Paper crimper
Sentiment rubber stamp
Black ink pad
Metal charms, such as shells and seahorses (the ones used below were from Custom Quilling a while ago, but they can also be found at some craft stores and on Etsy)
Instructions:
Step 1: Cut an 8.5 x 5.5-inch rectangle of light blue card stock. Score at the midpoint to make a top fold card.
Step 2: Cut and crimp a 6 x 1 5/8-inch piece of medium blue card stock. Adhere to the card and trim excess at ends with scissors.
Step 3: Cut the top and bottom edges of a 6-inch long rectangle of light blue text weight paper with decorative scissors to measure about 5/8-inch wide. Adhere to the center of the crimped strip, trim the ends, and adhere to the card.
Step 4: Stamp a sentiment on a piece of medium blue card stock, then trim it to make a 2 1/4 x 1-inch rectangle, centering the sentiment. Use decorative edge scissors to cut the top and bottom edges of a light blue text weight paper rectangle that is a bit larger than the card stock rectangle. Adhere it to the back of the card stock, trim the ends, and adhere to the card.
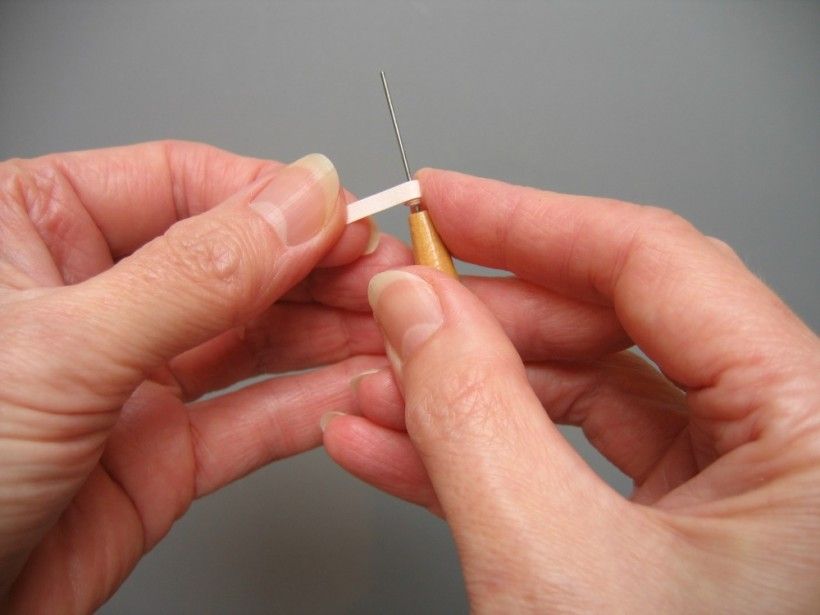
Step 5: Quilled shells: Make three 16-inch shaped teardrops and two 8-inch shaped teardrops in various colors of pearlized paper. To make a shaped teardrop, dampen fingertips slightly (if needed) and place one end of a paper strip (16-inch or 8-inch) across the needle of a quilling tool. Using the thumb and index finger of whichever hand feels most comfortable, roll the strip around the needle using even tension while holding the tool handle with your other hand. Be sure to roll the paper, not the tool.
Image
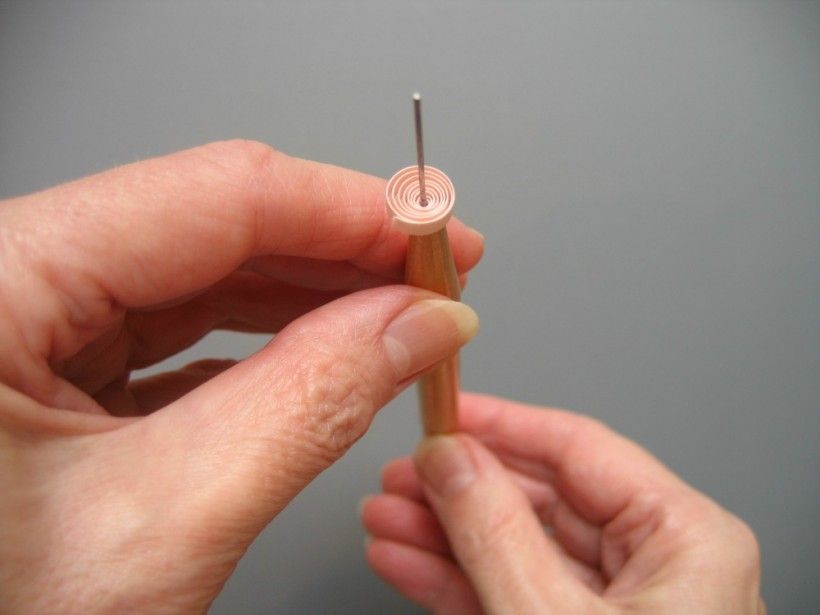
When the strip end is reached, allow the coil to relax and slide it off the tool.
Image
DIY Paper Quilling
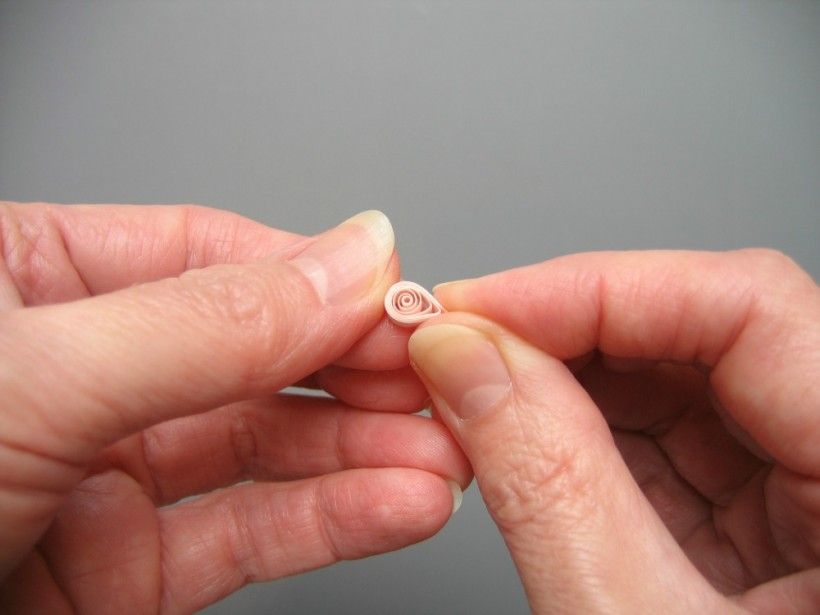
Pinch the coil to make a teardrop. Trim excess strip length at the point and secure the end with a small amount of glue, holding it in place for a moment to allow the glue to set. Grasp the point between your thumb and index finger and curve it gently.
Image
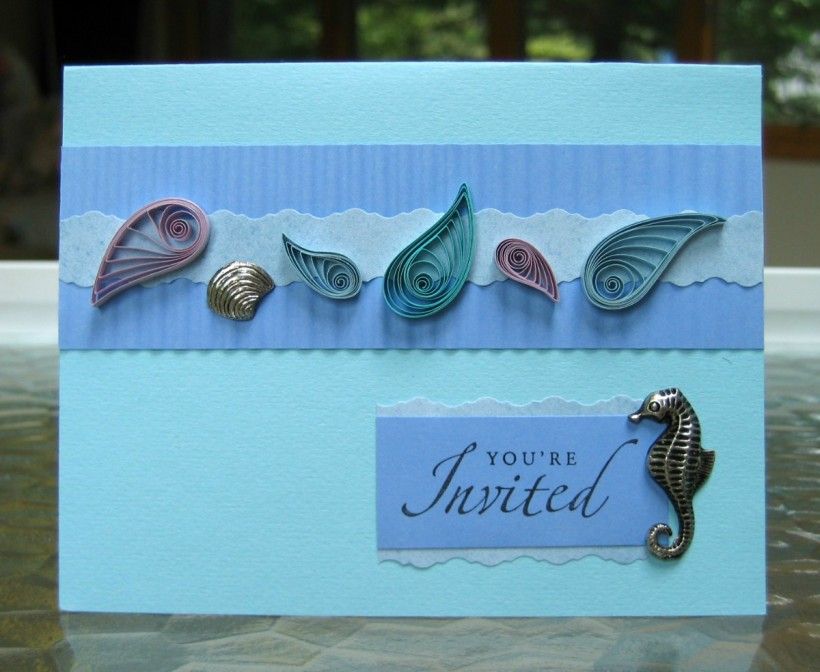
DIY Paper QuillingStep 6: Spread a thin layer of glue on a non-stick surface. Holding a teardrop with tweezers, lightly touch one side to the glue, then place it directly on the card where desired. Try not to slide it into position to avoid leaving a shiny snail trail. Glue the remaining teardrops in place, arranging them to look like sea-tossed shells.
Step 7: Lastly, apply glue to the charm backs and adhere them to the card.
Image
DIY Paper Quilling
To mail a quilled card, a regular envelope is usually fine. If you're concerned the card will bend, slide a piece of lightweight cardboard in behind it. Quilled coils are surprisingly strong and should travel well, but you may want to add a layer of bubble wrap. Check with the post office to determine if extra postage is required.
Ann Martin is a paper quilling artist whose work was featured in a 2008 exhibition at Brandywine River Museum of Art, The Spirit is Quilling: Rolled-Paper Filigree. She designs paper projects for books and magazines, and has written multiple books on paper crafting including The Art of Quilling Paper Jewelry. She has written for her blog, All Things Paper, since 2009.