Landscape Shadowboxes
Using a little imagination and creativity, landscape shadowboxes are a fun activity for all ages to make! Learn how to create your own shadowbox display by using simple materials found around your house. As you dream up your landscape, find inspiration from around your hometown, the surroundings of Chadds Ford or even from the art found inside the Brandywine River Museum of Art.
Not sure what to include in your shadowbox? You can also get ideas from our list below, inspired by our special exhibition Gatecrashers: The Rise of the Self-Taught Artist in America—on view through September 5, 2022.
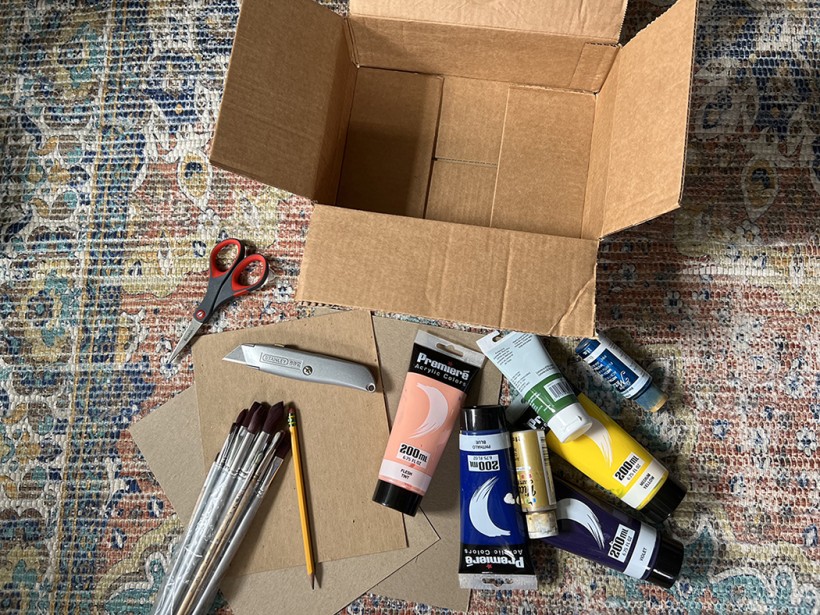
Supplies
Gather items you may already own:
- One large shoebox or one shallow shipping box (raid your recycling bin—many versions are possible!)
- Three pieces of thin cardboard or recycled cereal box or cardstock; the pieces of paper or cardboard should be cut close to the same size as the bottom of your box
- Coloring supplies of your choice; I recommend acrylic or craft paint, oil pastel, colored pencils or markers
- Utility knife or scissors capable of cutting cardboard, and adult supervision to use either
- Elmer’s Glue (not pictured)
Step 1:
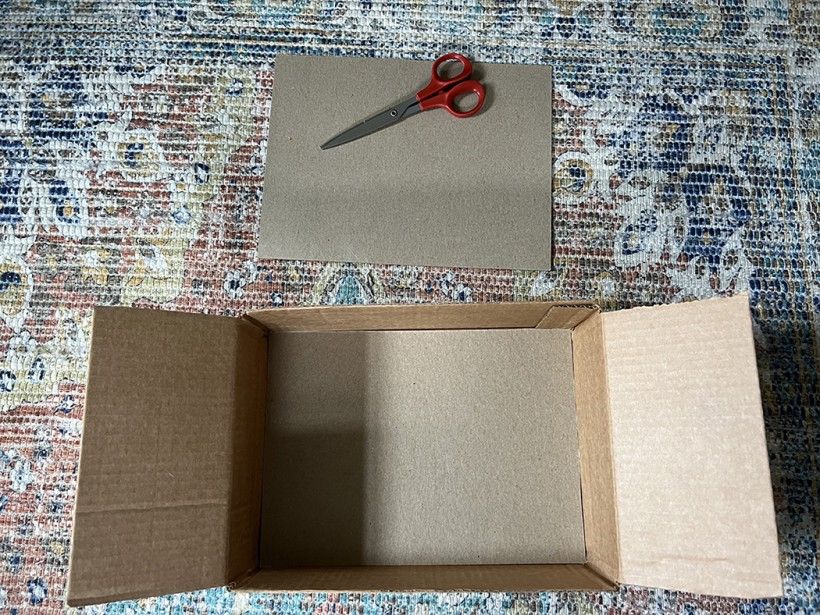
If your box has flaps, using scissors or a utility knife (with adult supervision!), cut them off. If you think you may want to incorporate the flaps into your design, you can also leave them or remove later. For the next step, select a piece of your thin cardboard or cardstock that will fit snugly inside the bottom of the box. It’s okay if the sides of the box have some imperfections; mostly only the top inside will be visible.

Step 2:
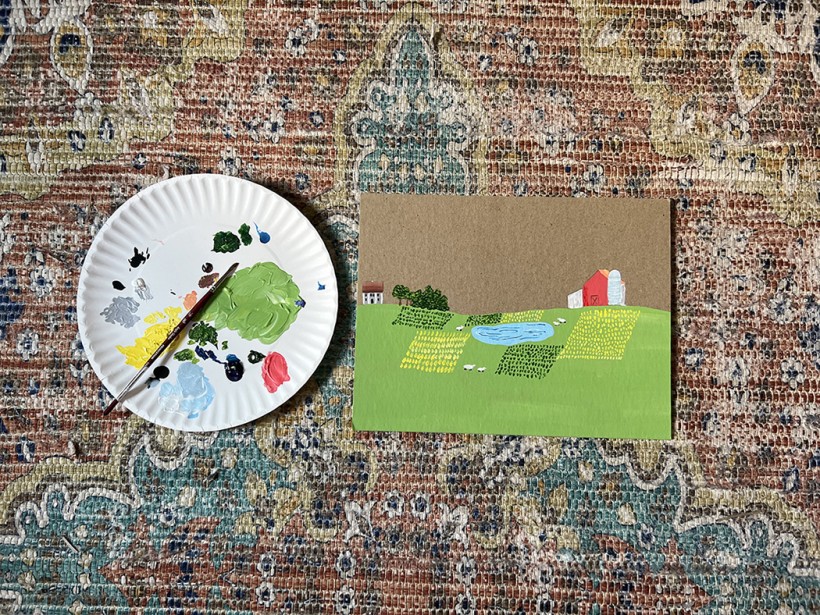
On that thin cardboard, paint a background (keeping in mind you will have two layers in front of this, so the bottom third won’t be visible!). It will be easier to paint the piece of cardboard before it is inside the box. Your background may include the sides of the inside of the box, if you would like. Once finished, glue your background into the bottom of the box (pro tip: if you background is about the same size as the bottom of your box, you may not need glue).
Not sure what to draw or paint? Here are some ideas based on the art found in Brandywine’s special exhibition, Gatecrashers: The Rise of the Self-Taught Artist in America.
- A location that is important to you
- Your favorite building
- An activity that is important to you or your area
- Your favorite farm animal
- Your favorite wild animal
- Something for the animals to drink and eat!
- Someone doing their job
- A means of transportation
- A symbol of heritage or patriotism
- Your favorite tree or plant
Step 3:
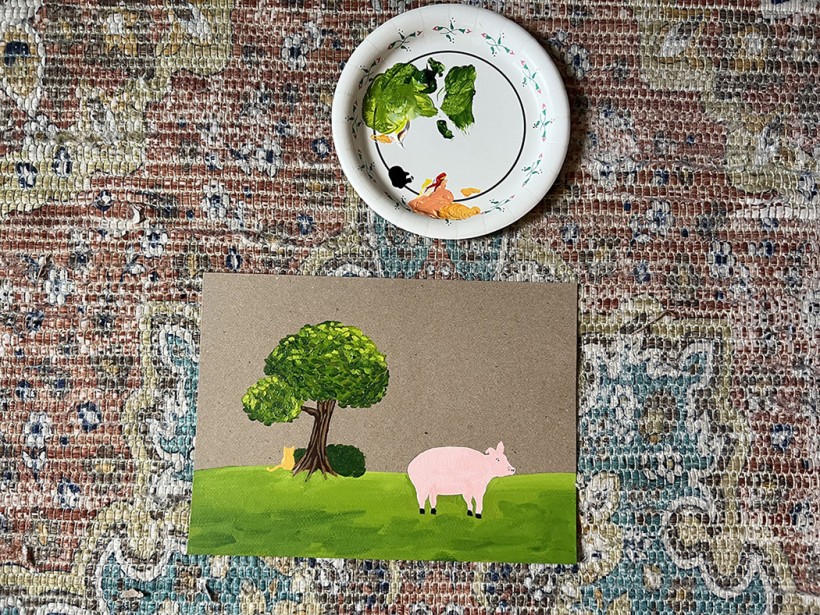
Decide on a scene for your middle-ground that will only occupy about half of the page. On another piece of thin cardboard or cardstock (thin cardboard is preferable), paint, draw or create your scene for the middle-ground.
Step 4:
On the last piece of cardboard/cardstock, create another scene—perhaps using some of the remaining items from the list of suggestions above. Focus the scene in the bottom third of the cardboard, although if one piece is taller (such as the tree shown here) that is fine, too—though it will block some of your other layers. Remember, you will be cutting this out so avoid an overly complicated shape. Try using a different medium from the background if you want to mix things up!
Step 5:
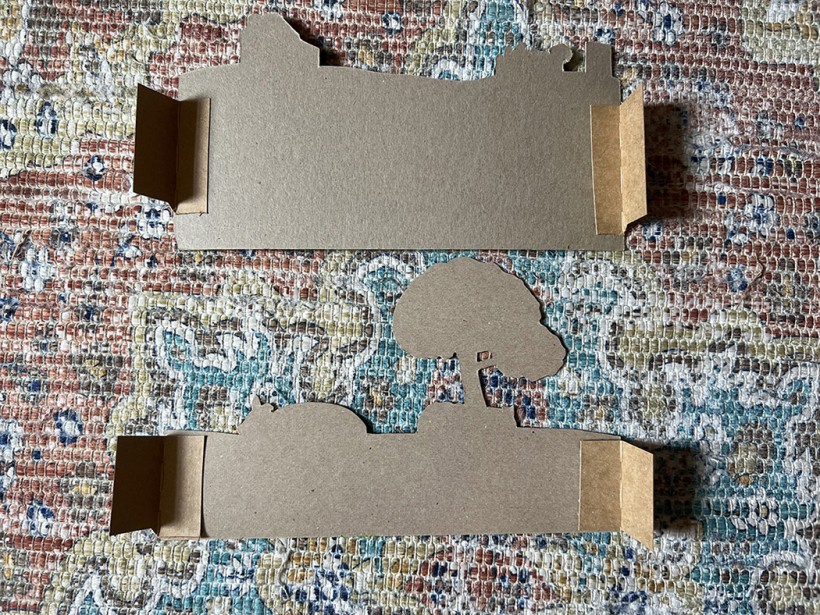
Cut out the middle and foreground images, removing all the negative space. Flip them over and attach tabs to the back. It is easiest to recycle tabs from a cardboard box you already have, like a cereal or pasta box, but to create your own tabs you could take a thin piece of cardstock and fold it in half lengthwise. Glue half the fold to your cut out. The other half will later be glued to the inside of the box.
Step 6:
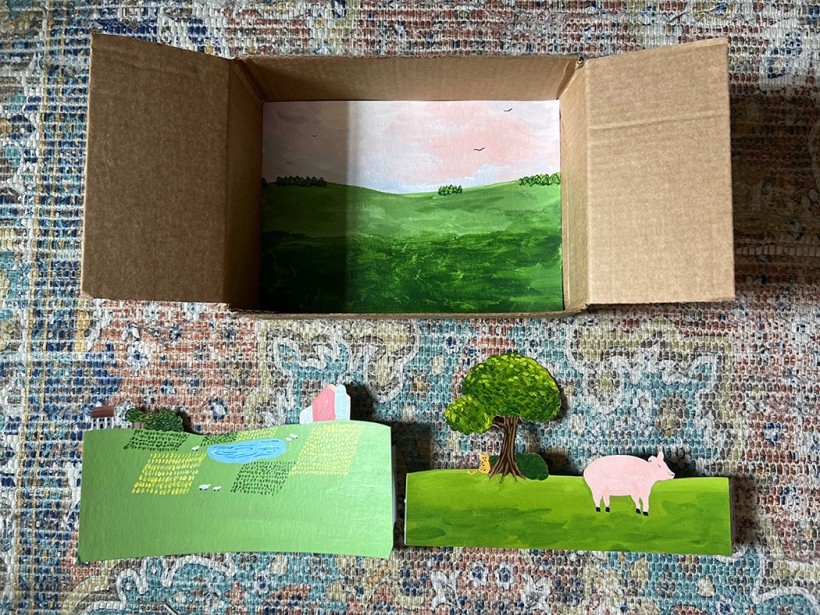
Your background scene should already be either fitted or glued against the bottom/back of the box. Decide what distance apart you would like the middle-ground and background. Put Elmer’s glue on the tabs of your middle piece and angle it into the box, affixing the glue tabs to the sides. You may need to hold it in place for a few minutes. Do not worry if there are small gaps between the bottom and the side of the box—they will not show. Repeat the process with the foreground piece.
Step 7:
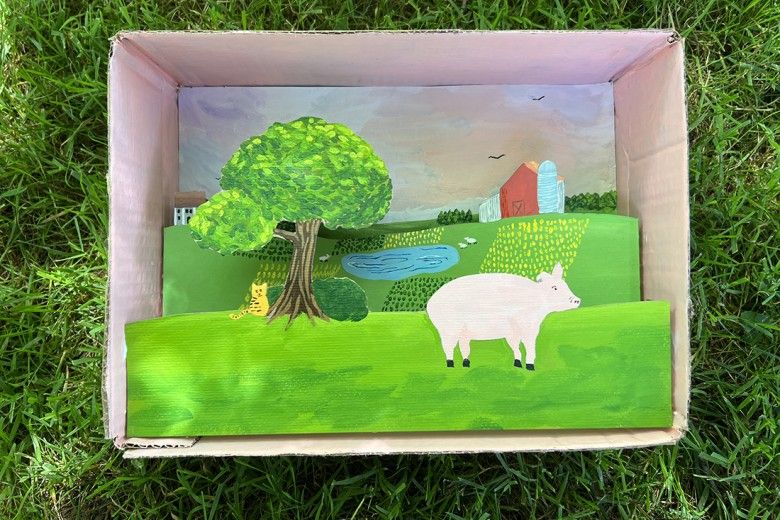
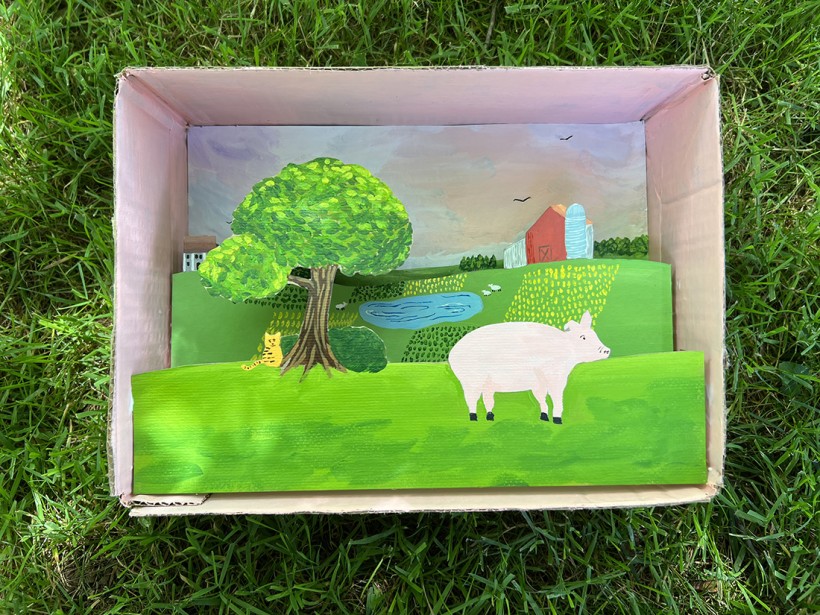
Your box is now complete! You can embellish it further or decorate the outside of the box if you like, or you can find a nice place to display it!