Spring has certainly sprung and each day you will start to see more and more flowers when you go outside. The Brandywine collection has many paintings inspired by flowers, both in the wild and as a still life in a vase.
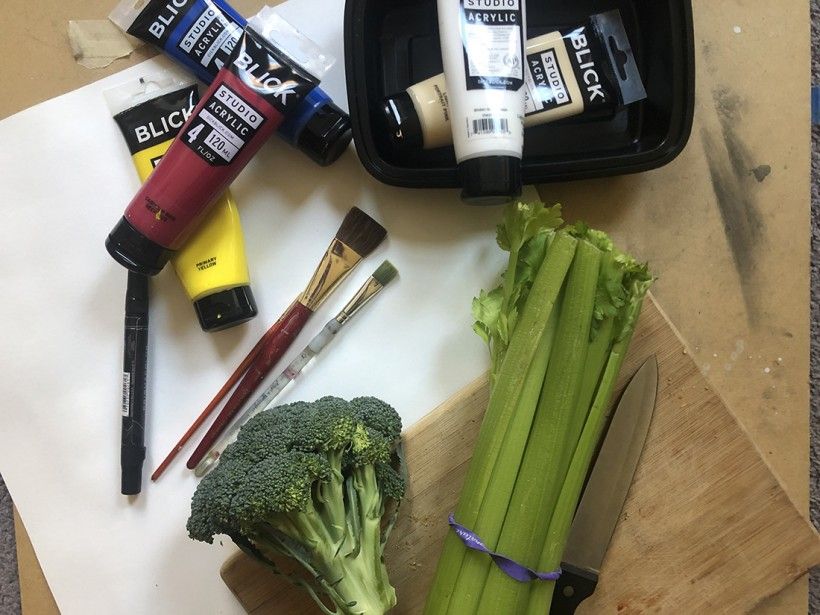
Palette (paper plates or scrap paper will do the trick)
Acrylic or tempera paint
Paintbrushes
Celery
Rubber band
Q-tips
Other veggies (optional)
Knife
Cutting board
Colored pencils, markers, crayons etc. (optional)
Image
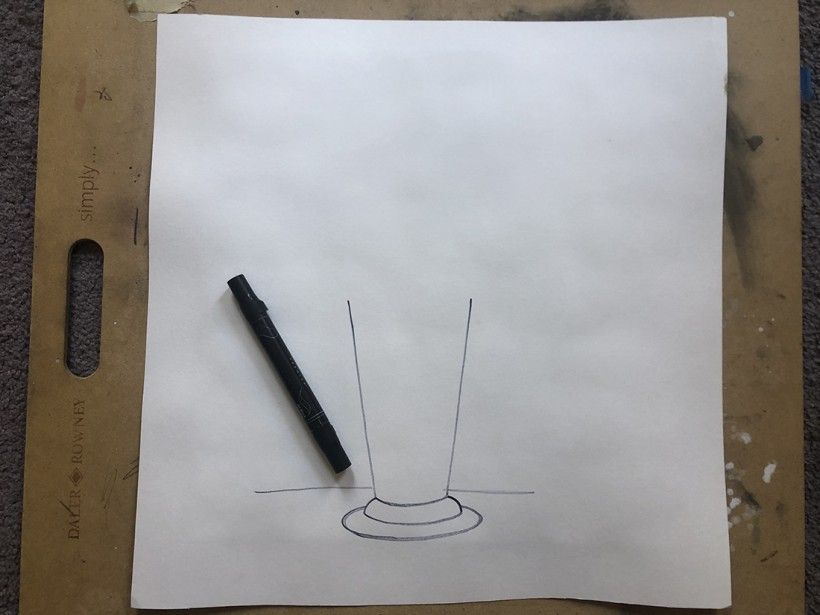
Step 1:
Before we assemble our bouquet, we need to design the vase to put them in. Begin by drawing the outline shape of your vase and two lines coming from the side to represent a table.
Image
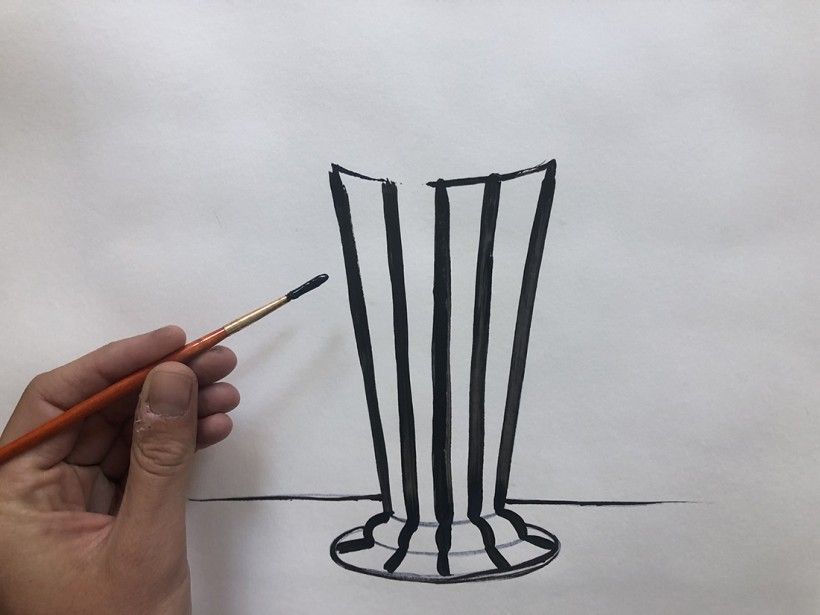
Step 2:
After you have drawn your vase and table, use any medium you like such as paint, colored pencils, crayons, etc. and design your vase using any type of pattern you wish.
I chose to use black paint to make a simple striped pattern.
Image
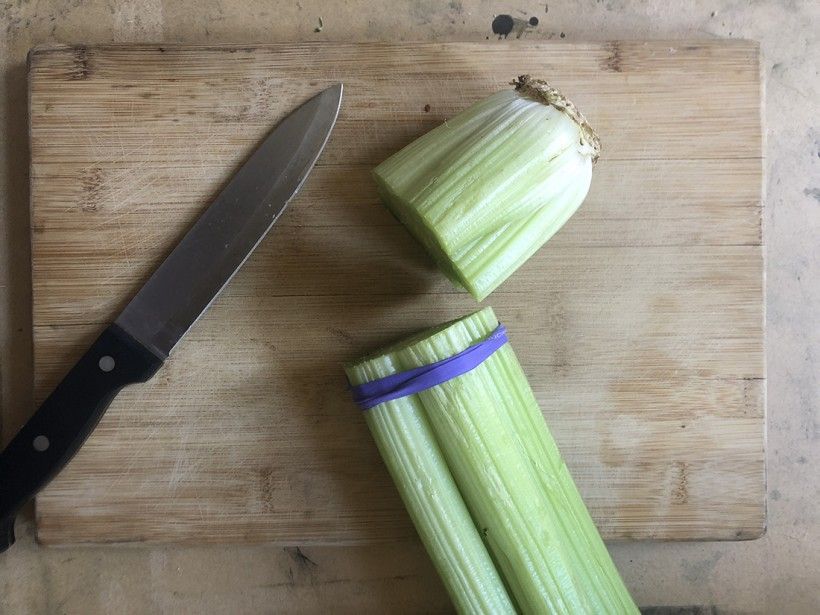
Step 3:
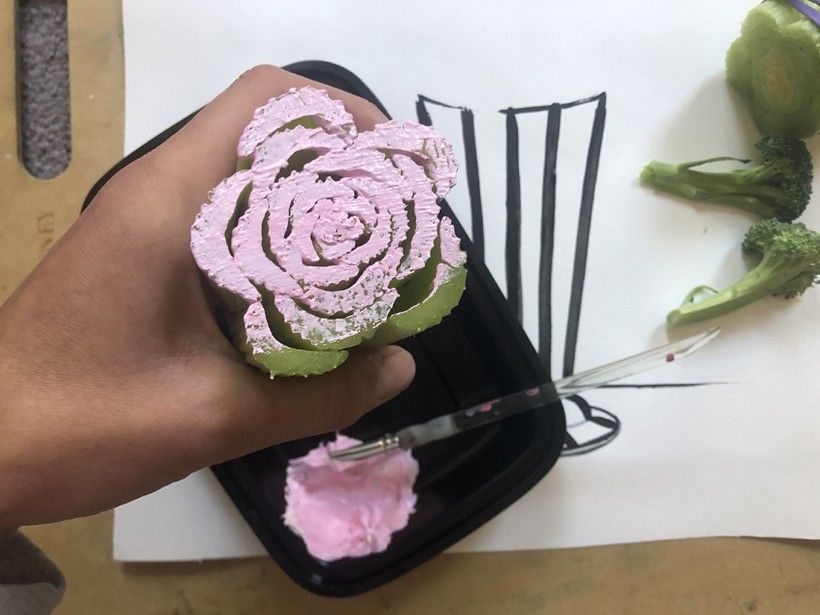
With the help of a grown up, tie a rubber band tight around the entire bunch of celery stalks and cut the bottom part of the celery stalk off (make sure you leave it long enough to hold onto…about five inches from the bottom). At this time, you can cut up any other veggies or items that you think would make an interesting stamp. I chose to also use broccoli but the possibilities are endless!
Pro tip: Flowers come in all sorts of different shapes and sizes. Don’t be afraid to experiment to see what an “unlikely stamp” may look like on a scrap piece of paper before adding it to your final bouquet.
Image
Step 4:
Apply an even coat of paint to your stamps with a paintbrush and stamp it on your paper around the top of your vase. Push down onto the paper being careful to not let it slide around.
Pro tip: Push your stamp straight down and then pull straight up to prevent the stamp from sliding on your paper.
Image
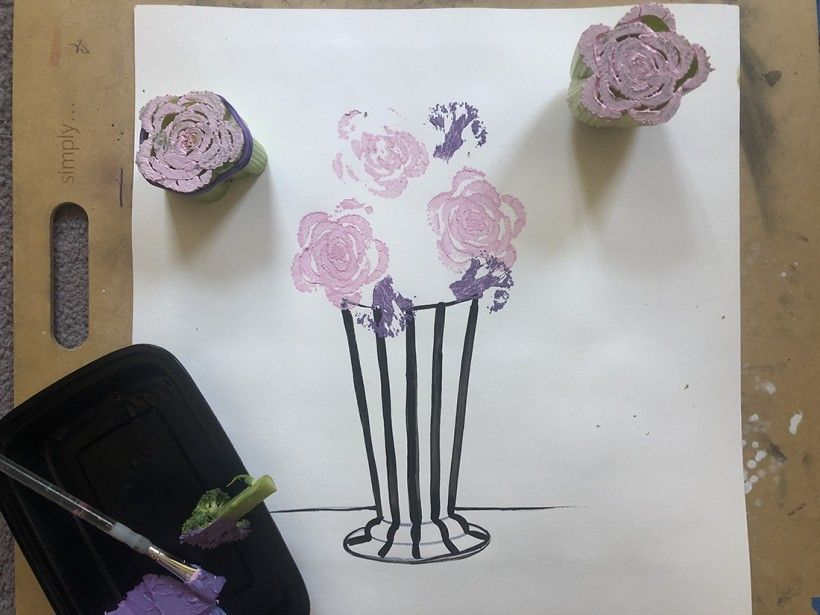
Step 5:
Continue stamping flowers onto your vase, adding new colors and stamps as you like.
Image
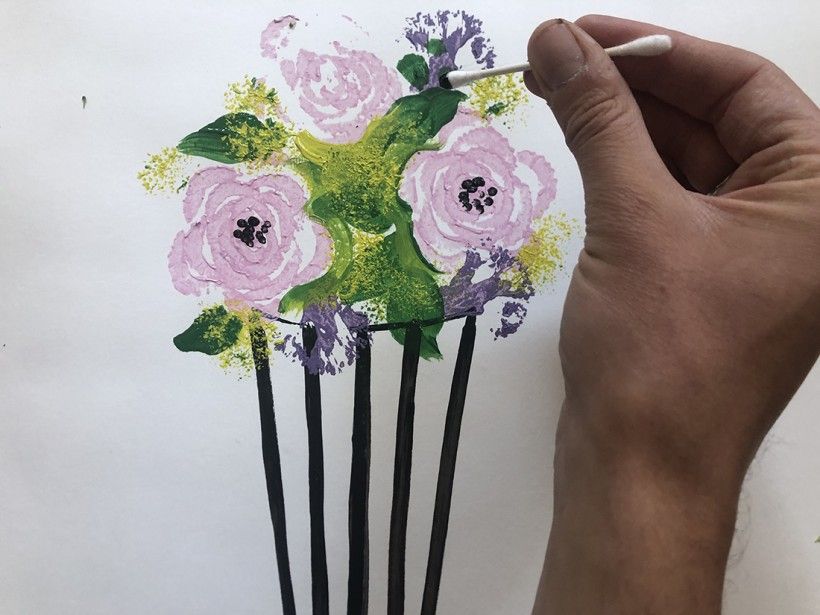
Step 6:
Fill in the spaces between the flowers with suggestions of leaves and stems using different shades of green paint. Another “unlikely stamp” you can use to finish your bouquet at this stage is a Q-tip. I used a Q-tip to add the centers of my flowers along with some different colored berries in my bouquet.
Image
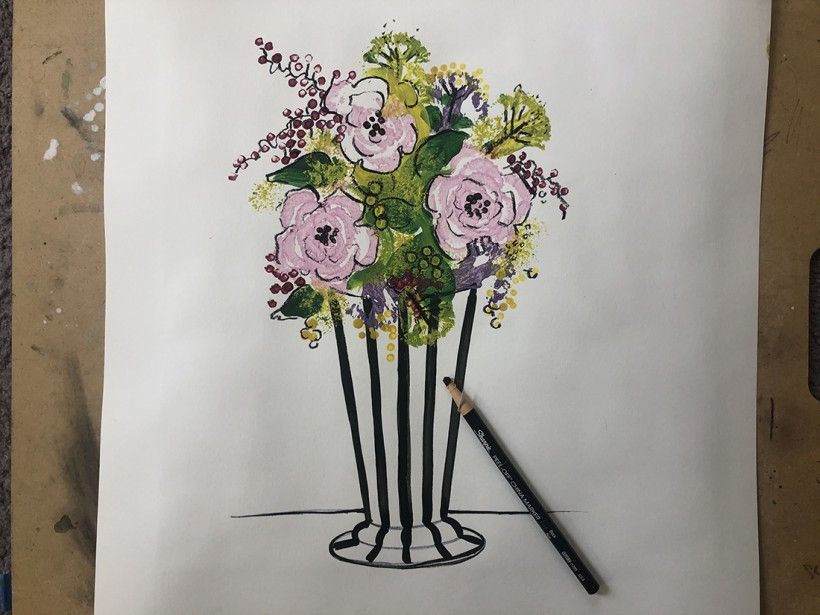
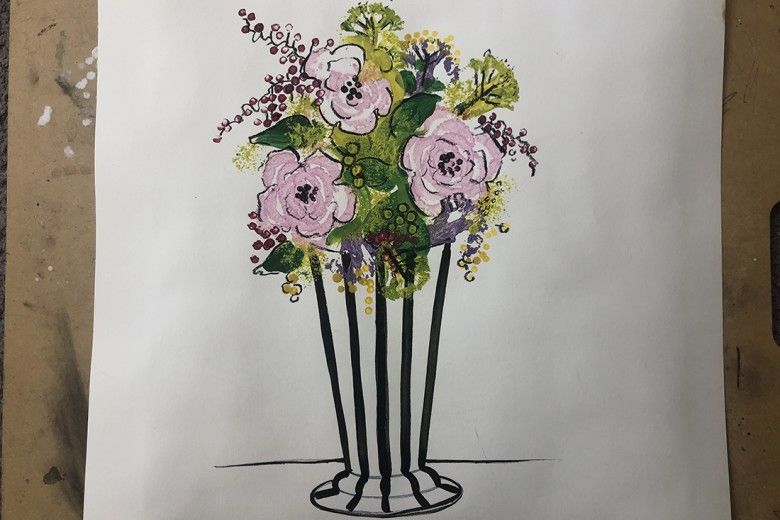
Step 7:
After your paint is completely dry, feel free to add in other details using any medium you like. I always like to finish off my paintings with black outlines to make parts of my composition really stand out! I left my background simple; however, thinking of where this bouquet is could be a fun and personal way to finish off the background of your masterpiece.
, Autumn Flowers, ca. 1926, oil on canvas, 35 × 30 in. © artist, artist's estate, or other rights holders. RIGHT: Caroline Louise Gussmann (1872 - 1952), Roses in Vase, 1894, watercolor on paper, 18 3/8 × 11 1/4 in.")