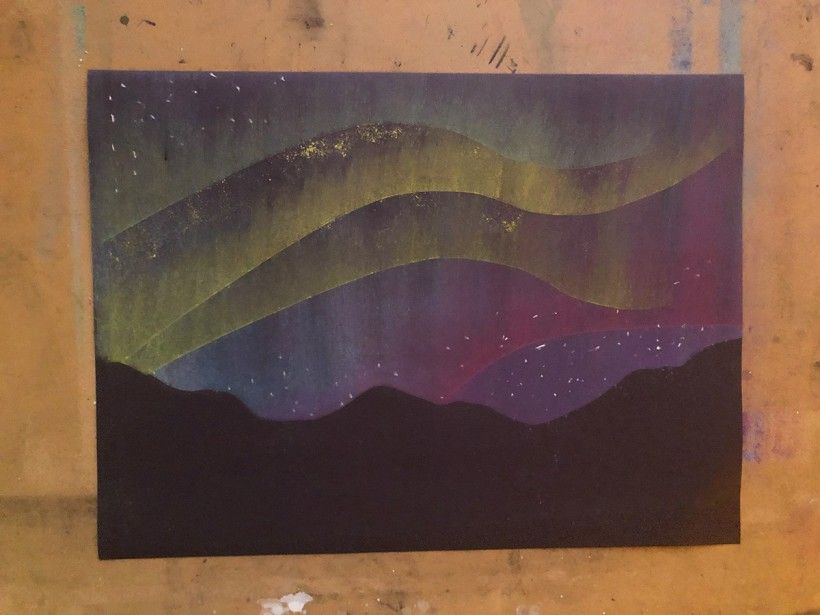
Magical Northern Lights
Aurora Borealis, better known as the Northern Lights, is a magical-like display of colors in the night sky. These nighttime light shows are usually seen in areas of the world that are in the northern hemisphere and close to the North Pole. It is rare that we will experience a Northern Light display in the Brandywine River Valley, which is a perfect reason for us to explore these colors of the night sky in our art!
Gather Your Supplies
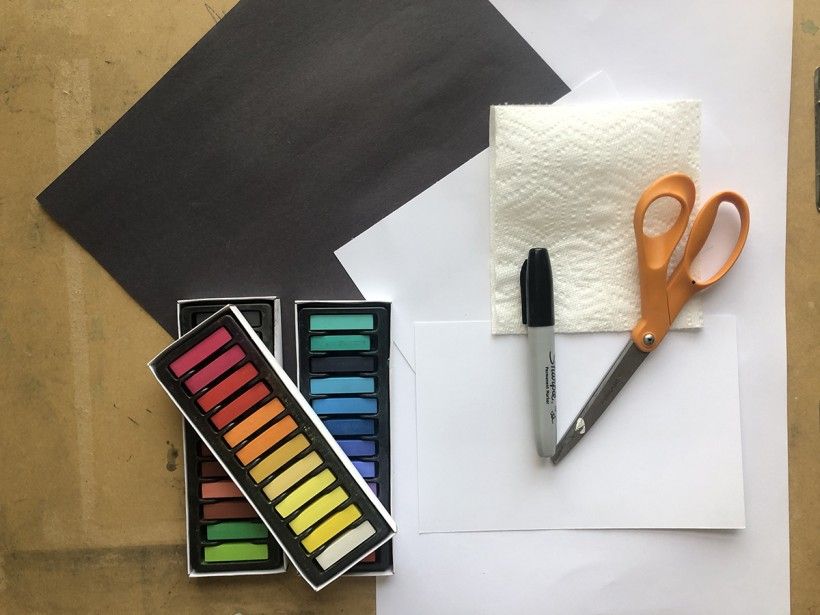
You will need:
- Black paper
- Scrap paper (cardstock/heavier paper works the best)
- Paper towel
- Scissors
- Writing tool (I used my handy-dandy Sharpie)
- Chalk pastels
- Tape
Step 1:
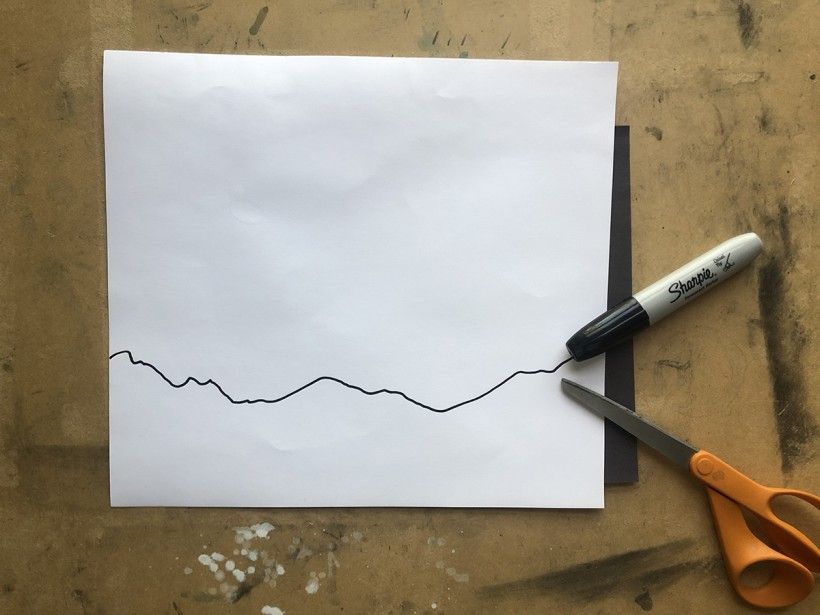
The first step is to separate the sky from the land. Using a writing tool, draw a horizon line on a sheet of scrap cardstock that is the same length as your black paper, cut it out and then tape it down to the bottom half of your paper.
Step 2:

Color the top edge of your stencil with shades of blue and white chalk pastel and then blend it up onto the black paper with a piece of paper towel.
Pro tip: Only blend away from your stencil, never back towards it. If you blend back toward your stencil your lines will not be clear.
Step 3:
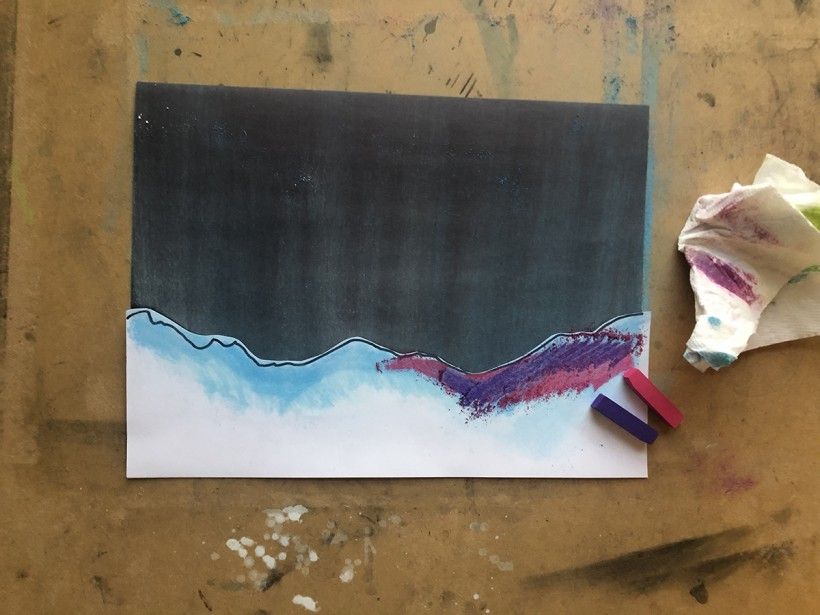
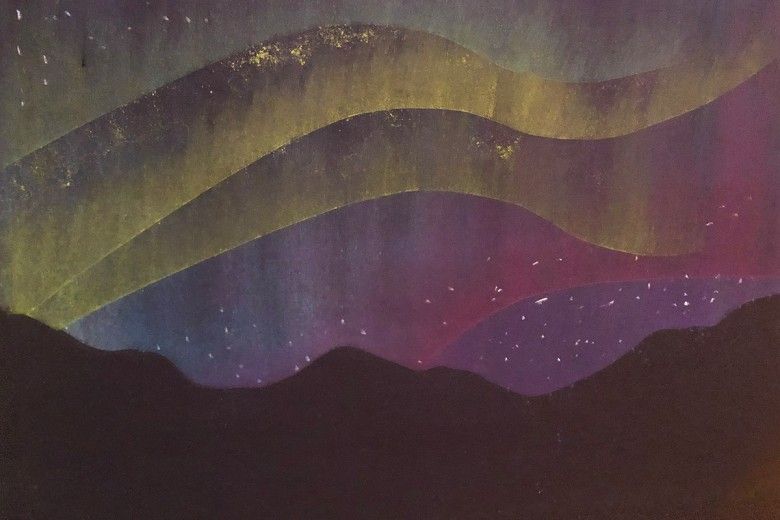
Choose part of your horizon to start the explosion of color. Many times, the Northern Lights are made up of different shades of blues, greens and yellows, as well as purples and pinks. Color a section of your horizon line stencil with a new color and blend up onto the black paper.
Pro tip: Don’t make your color span the entire horizon line in this step. The key is to have some color variation in the sky!
Step 4:
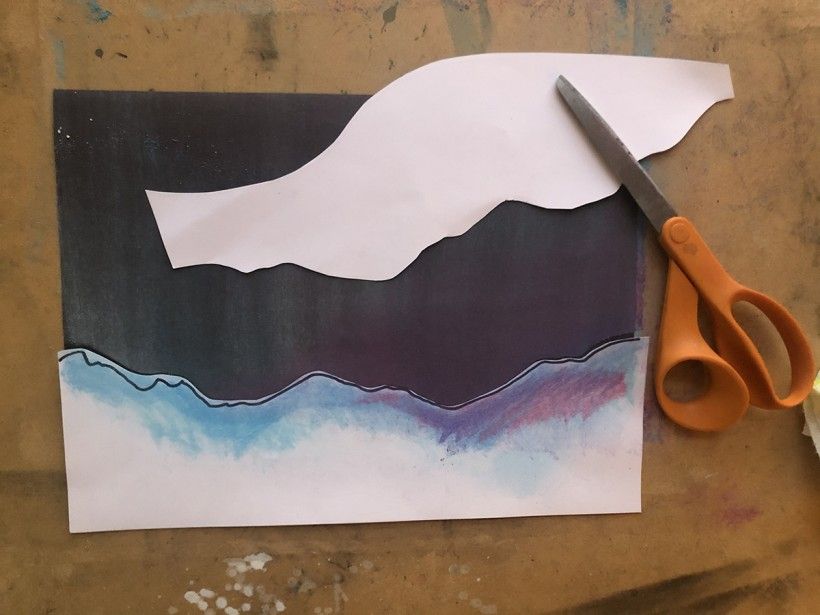
Draw and cut a wavy line out of scrap cardstock to make a new stencil.
Step 5:
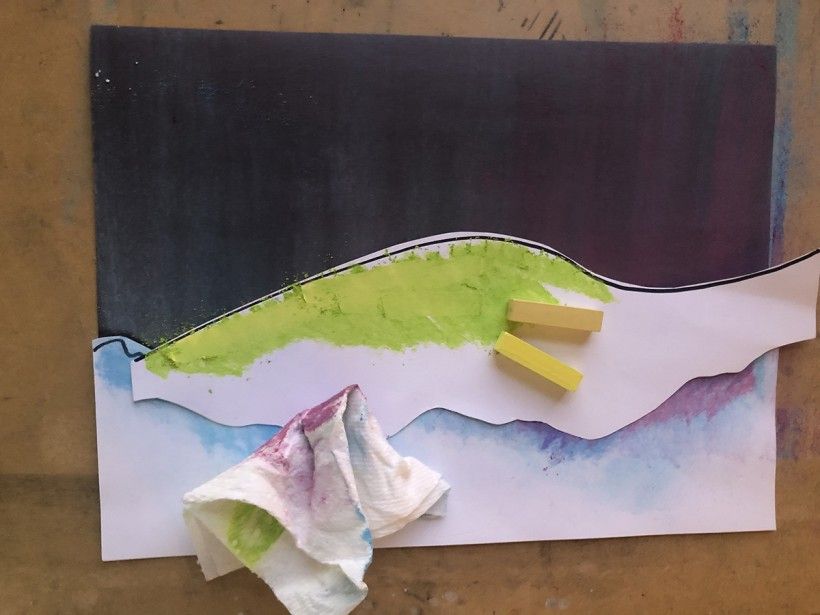
Place your wavy line stencil above the horizon line stencil, color the top edge of it with whatever color you choose and then blend up on the black paper. Repeat this step by moving your stencil higher on your paper, coloring the edge, and blending up.
Pro tip: Vary your colors and angle of the stencil after each step of moving up the paper.
Step 6:
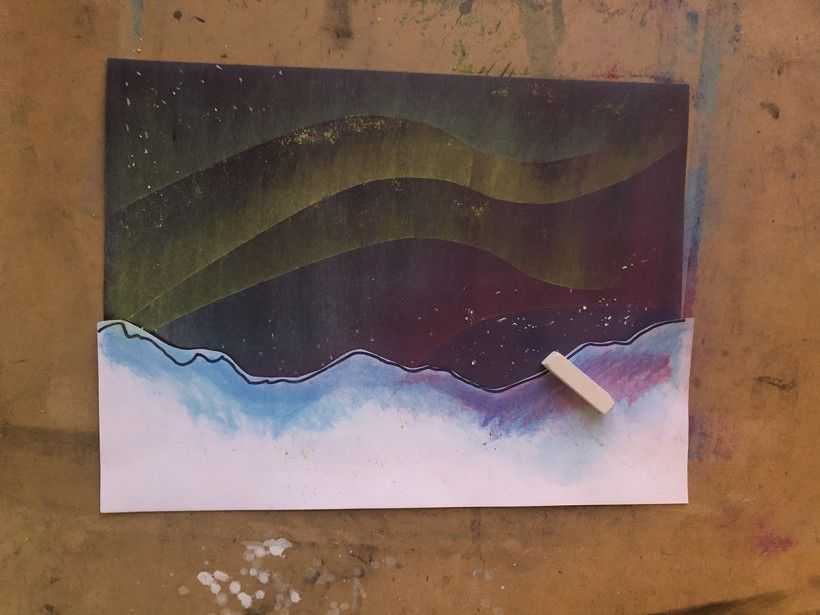
It wouldn’t be a nighttime sky without stars! Use white chalk pastel to add clusters of stars in the sky.
Future Fun: Imagine how this nighttime lightshow would look reflected in a body of water. How can you use this technique to show a reflection of the sky in your drawing?