It’s easy to make your own cardboard weaving loom at home. Add some yarn, natural materials and creativity and you will soon have a beautiful nature weaving to hang up and enjoy. To prepare for this project, gather up natural treasures you can find during your next nature walk, trip to the beach or adventure in your backyard. Keep an eye out for shells, driftwood, seedpods and dried flowers—anything that will add color and texture to your final product.
Image
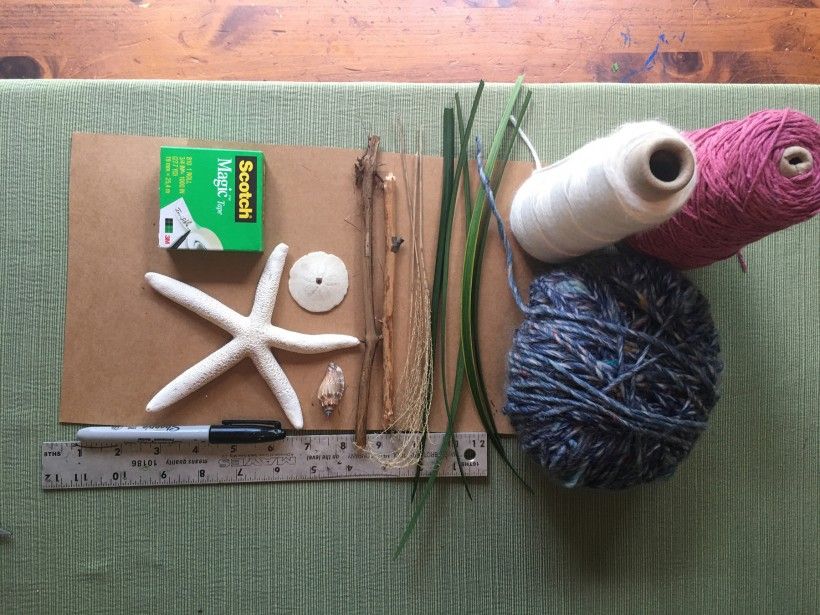
Supplies for homemade nature weavingGather your supplies:
Back side of a cardboard box or cereal box
Yarn (one or more colors)
Scissors
Ruler
Marker, pen or pencil
Tape
Natural materials such as shells with a hole, sticks, seed pods, grasses, dried flowers, driftwood, feathers, etc
Step 1:
Image
homemade nature weaving step 1
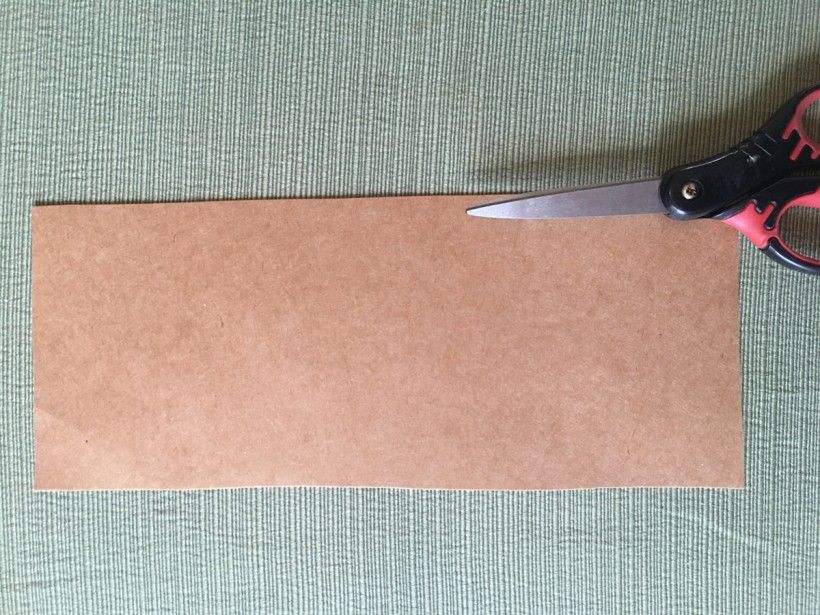
Cut a rectangular shape from the back of a cardboard box. The rectangle in this image is 4” by 10” but you can make the rectangle a little wider or longer if you wish.
Step 2:
Image
homemade nature weaving step 2
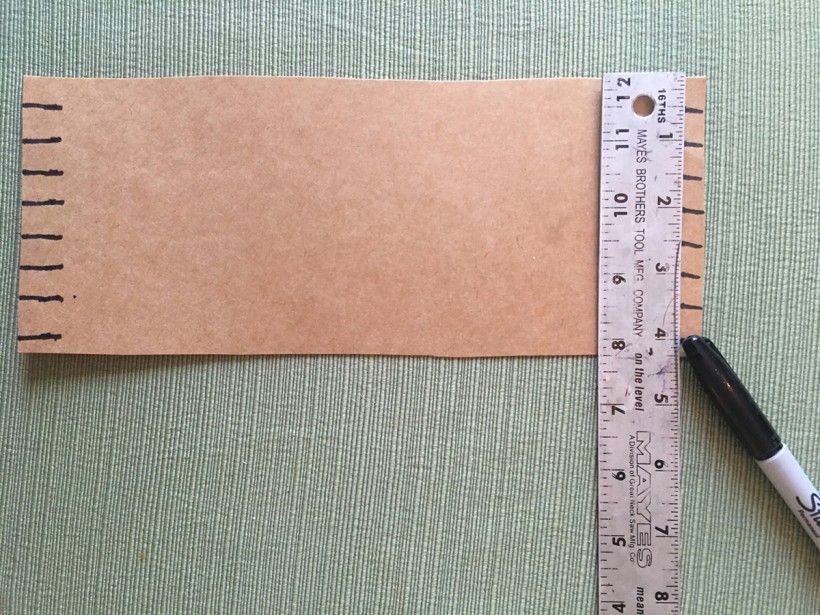
With you ruler and a marker, make a line every half inch along the top and bottom of the cardboard rectangle.
Step 3:
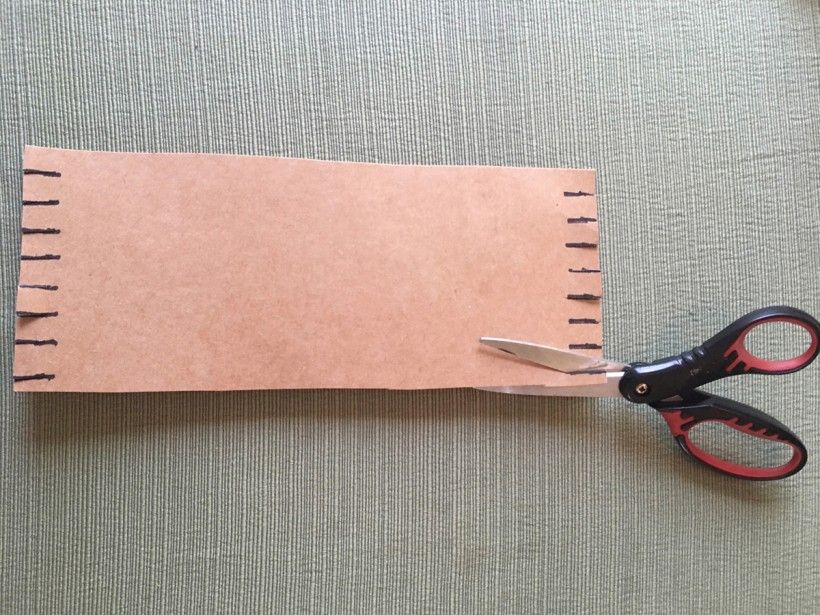
Image
homemade nature weaving step 3
Cut slits with scissors over marked lines on both ends of the loom, about ½ inch deep.
Step 4:
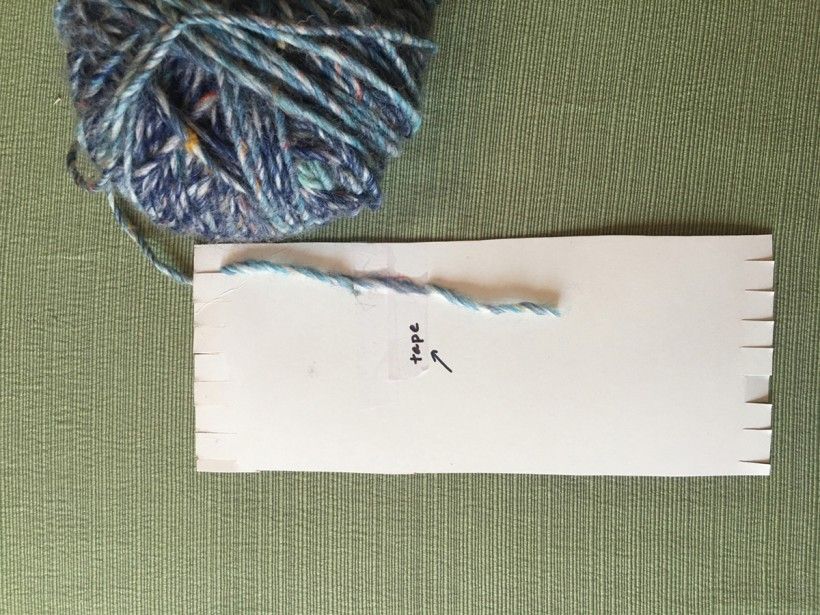
Image
homemade nature weaving step 4
Leaving the end of yarn attached to the ball or the skein, tape the end of the yarn to the back of the loom.
Step 5:
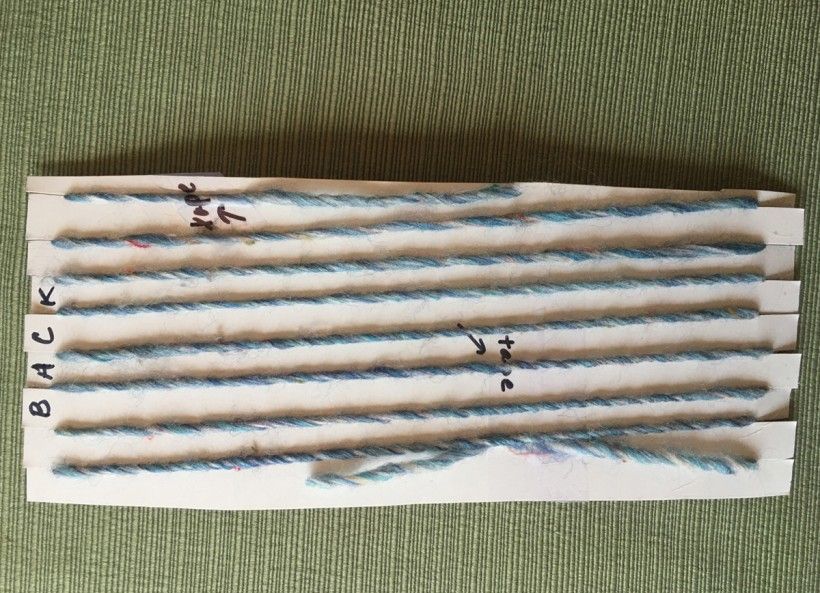
Image
homemade nature weaving step 5
Flip the loom over and loop the yarn around both sides of the cardboard, going in between the slits as you wrap the yarn around.
Step 6:
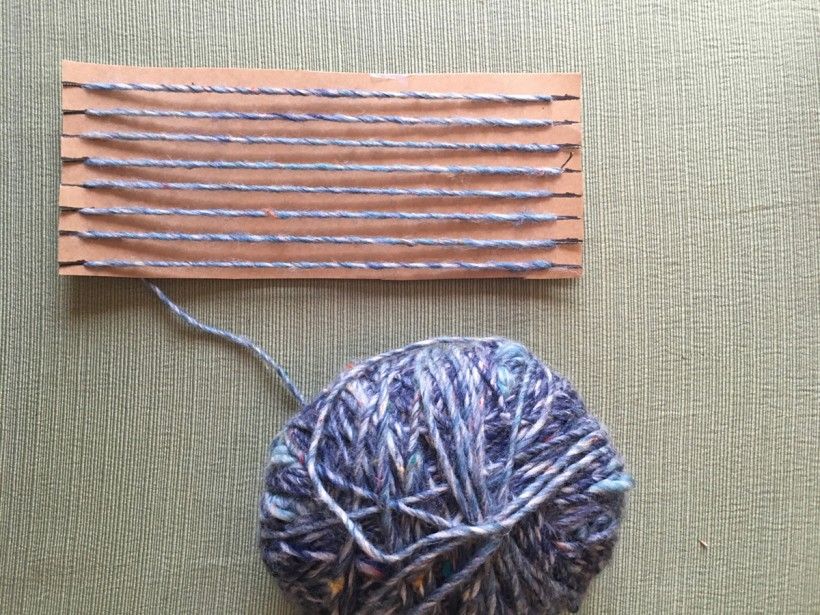
Image
homemade nature weaving step 6
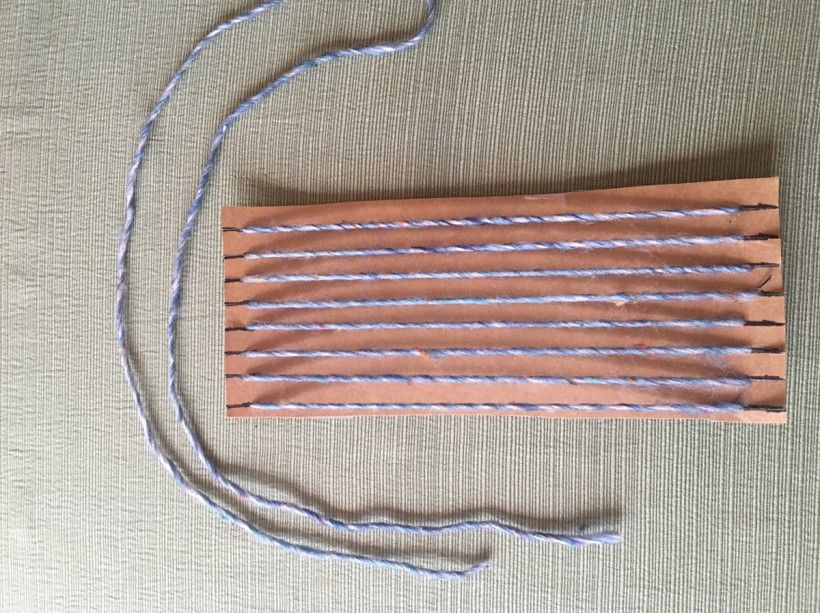
When finished wrapping the yarn around the loom, cut the yarn from the ball or skein and tape the end piece down on the back of the loom. You now have your warp completed, which will hold your design.
Step 7:
Image
homemade nature weaving step 7
Cut a piece of yarn as long as you can stretch your arms apart. This is about a yard for most people. You will use this piece to begin weaving back and forth. This piece of yarn can be a different color than the yarn you wrapped around the cardboard if you choose.
Step 8:
Image
homemade nature weaving step 8
Take the end of the yarn and start weaving it by going over the first sting and under the next. Continue to go over and under the strings until you get to the end of the row. Then turn and go back in the opposite direction—over, under, over, under. (If you have an even number of strings you will always start by going over the first string in each direction.)
Step 9:
Image
homemade nature weaving step 9
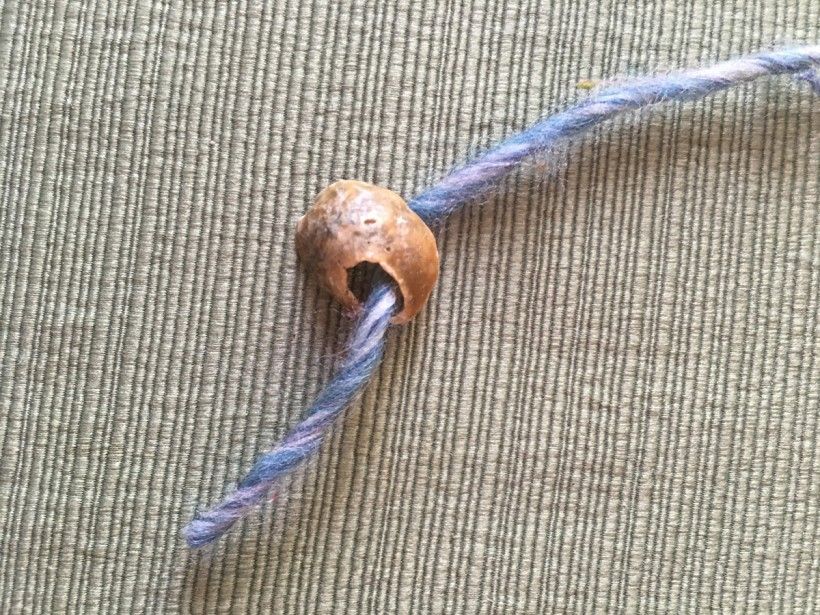
If you want to add a shell or bead or anything that has a hole in it, slip the end of your piece of yarn through the hole and then pull it into the weaving, going under the strings to place it where you would like it to go.
Step 10:
Image
homemade nature weaving step 10
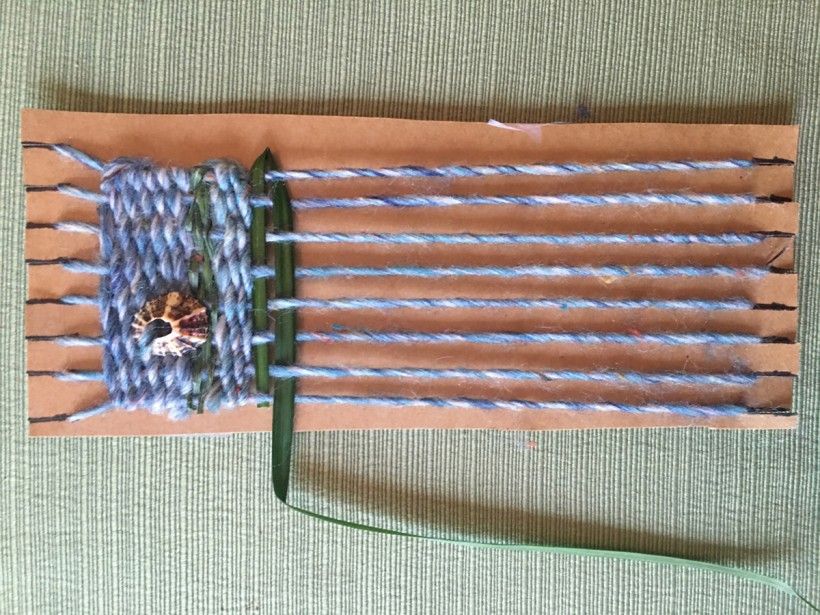
When you are ready to change colors or weave with grasses or other materials, snip your yarn off after the last completed row. Start with a new color. Push up with your fingers to tighten.
Step 11:
Image
homemade nature weaving step 11
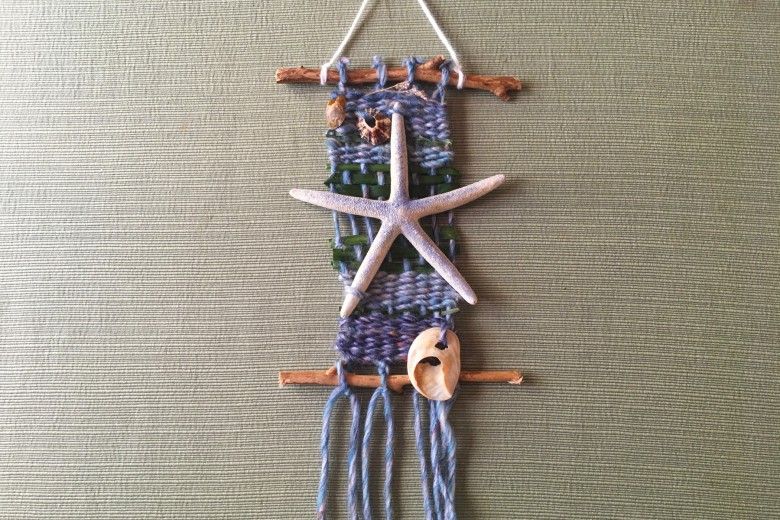
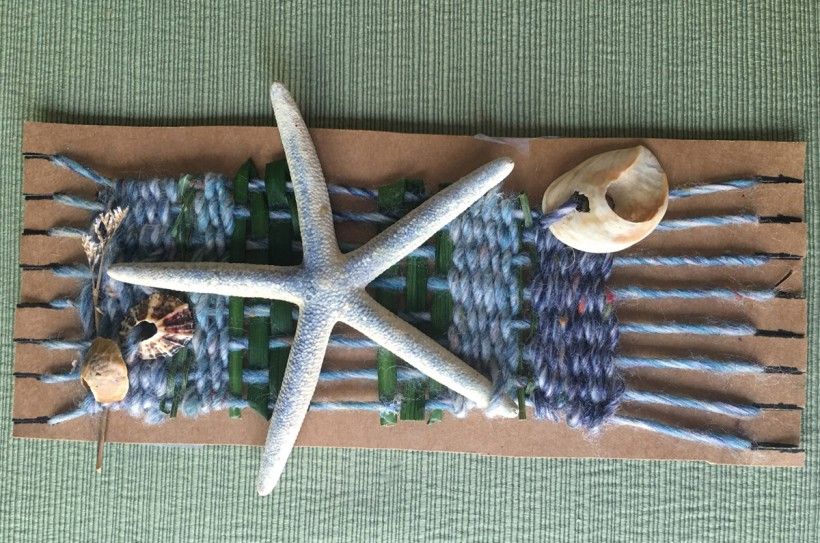
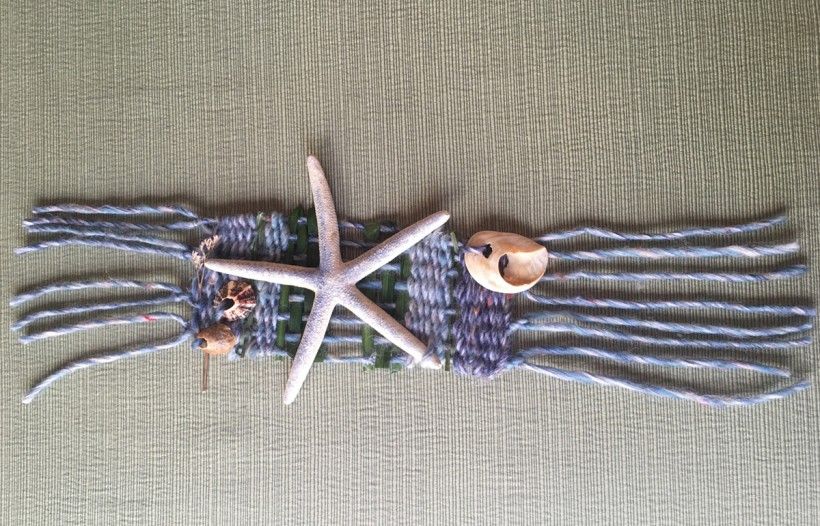
Continue weaving and adding shells, seeds or beads. This weaving example has a space in the middle, which will highlight an added starfish. The starfish was added by tucking the points of the starfish into the weaving.
Step 12:
Image
homemade nature weaving step 12
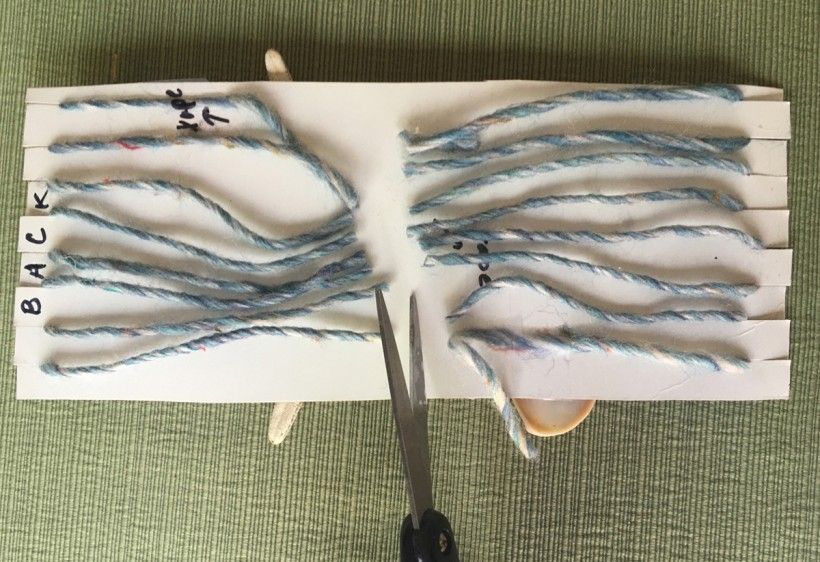
Cut the strings straight across horizontally on the back of the loom.
Step 13:
Image
homemade nature weaving step 13
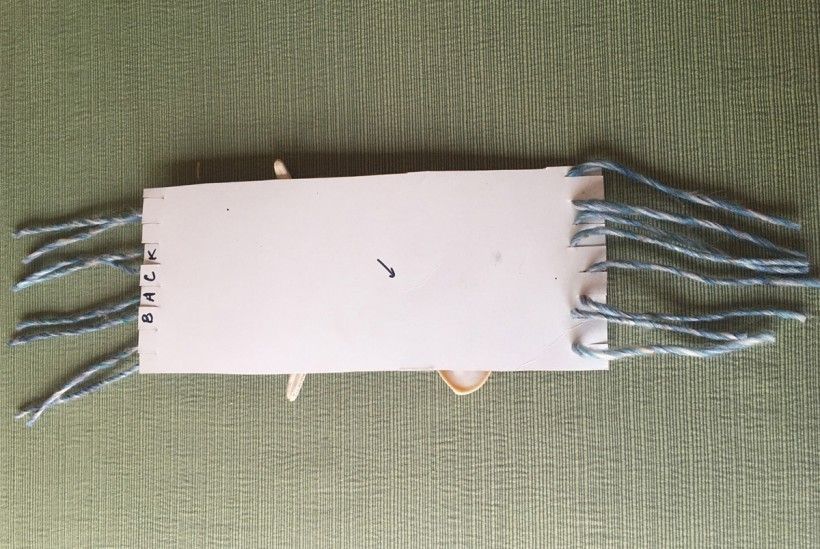
Pull the strings out of the slits on one end of the loom at a time.
Step 14:
Image
homemade nature weaving step 14
Tie every two strings together in a double knot.
Step 15:
Image
Homemade nature weaving
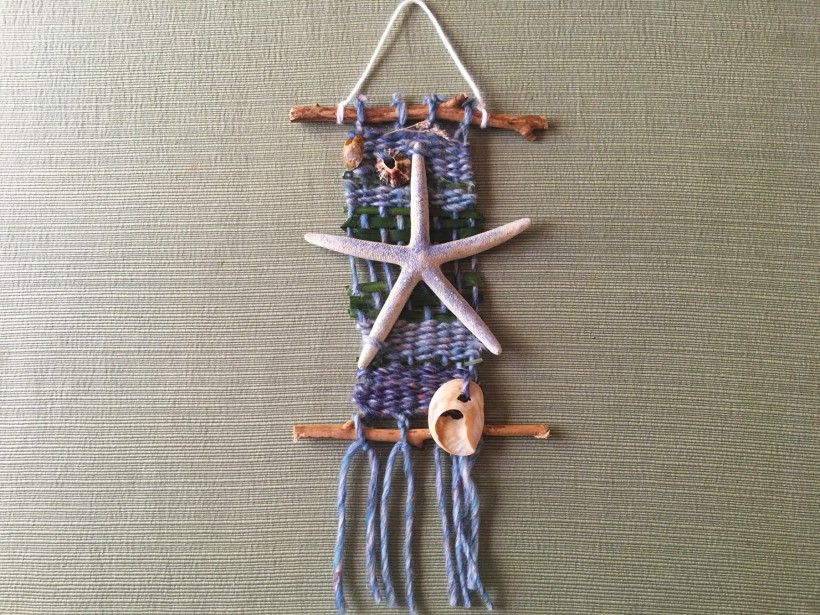
Tie strings in a double knot to sticks at the top and bottom. Add a string for hanging.
Now that you have finished your weaving, find a spot to show it off! You can reuse your loom with different colors and patterns. Try adding beads, feathers or dried flowers to your next weaving.