Exploring Nature at your Fingertips: Getting Started with iNaturalist
Searching for a space to explore nature at your fingertips? Look no further than iNaturalist! This free, leading nature app was designed to help users across the globe record and organize nature findings, meet other nature enthusiasts and identify flora and fauna.
Read along below for some basic tips and tricks to get you set up and confidently using iNaturalist wherever your nature travels lead you.
Goals and Mission
iNaturalist is a collaborative effort between the National Geographic Society and the California Academy of Sciences designed to appeal to a diverse audience of nature enthusiasts. This includes, but is not restricted to, hikers, hunters, birders, foragers, natural resource professionals, ecologists, and novice naturalists. By connecting these different perceptions and expertise of the natural world, iNaturalist hopes to create extensive awareness of local biodiversity and promote further exploration of the natural world. Furthermore, platforms like iNaturalist, can provide a space for unexpected discoveries that aid in providing a better understanding of biodiversity and the places most in need of protection.
Download and Register
Follow these steps to expand your knowledge of the natural world and begin connecting with the iNaturalist community.

- Download the iNaturalist app to your device(s)
- Apple users download the from the app here
- Android users download the app here
- Access the website login for additional features like guides, tutorials, and the ability to message other users.
- Make an account. Choose a preferred name and personalize your account with a profile picture if you choose.
Pro Tip: Note that that your username will be included in all your photo uploads, so be sure to select a name that suits for this purpose. iNaturalist also gives you the option to change your username if needed.
How to Make an Observation with Your Device
What are observations you ask? An observation records an encounter with an individual organism at a particular time and location. In a nutshell, when you upload a photo and add additional information, you are making an “observation”. Your observations will be public so that other users can see what you are observing and help with identification if you aren’t sure what you are looking at. Follow the steps below to make successful observations and increase your chances of getting a positive identification. To retain integrity of the community, iNaturalist requests that users only post original photos that you have taken yourself.
We’ve also included some pro tips from Norris Muth, Professor of Biology at Juniata College and avid iNaturalist contributor.
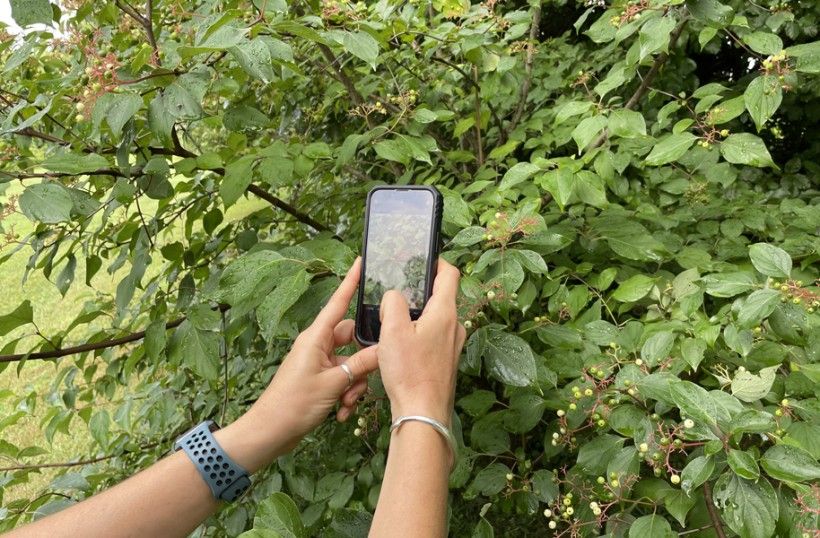
1. Observe
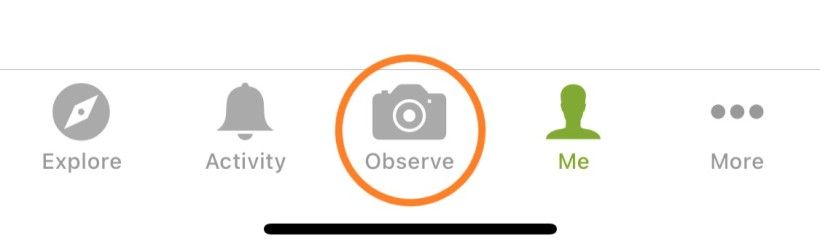
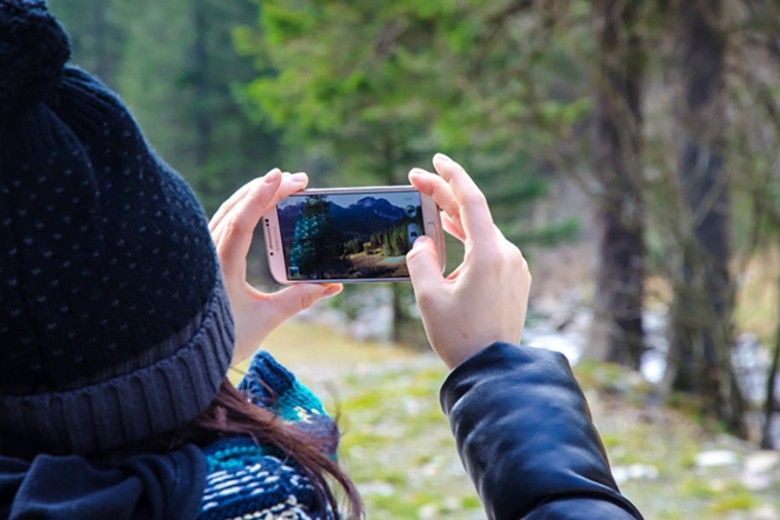
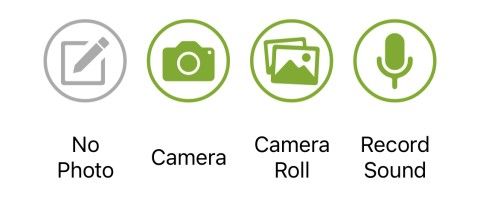
Tap "observe" and then take live photos or sound recordings. Another option is to add previously taken photos from your camera roll.
Your photo or sound recording will serve as evidence of the organism you are observing. You can observe anything from birds and plants to insects and lichen. These photos can also include encounters with signs of organisms like tracks, nests, or things that are no longer living. You can also create observations at inaturalist.org if you want to use a photo from a different source.
Pro Tips:
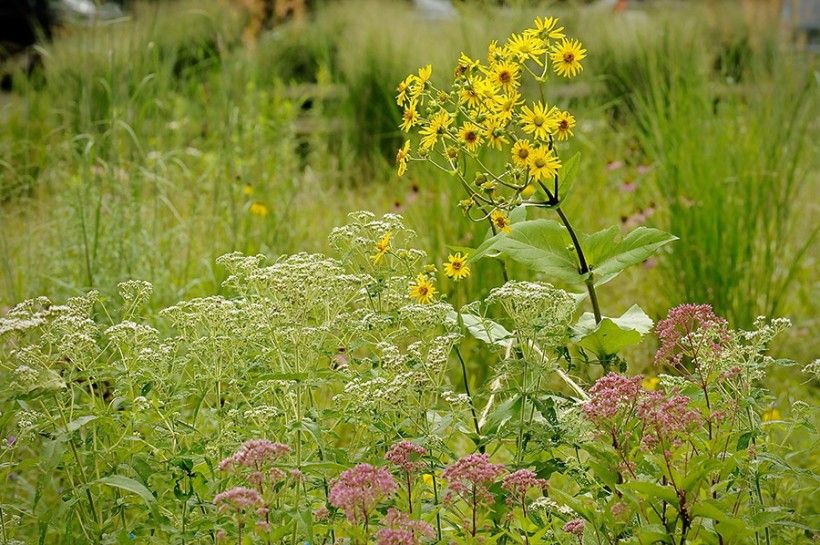
- Only use good quality, well-framed photos. Multiple photos are ideal for identification. For example, if you want to identify a tree, take a photo of the leaf, bark and flowers.
- If possible, use a contrasting background. For example, if you can safely place a caterpillar on a solid-colored rock rather than a leaf-covered trail, do it!
- Show some scale! Put something easily recognizable in your photos such a water bottle or foot to help the community better gauge the size of your organism.
- For smaller subjects, place your hand or an object like a clipboard behind them to help your camera focus.
- If the subject you are trying to photograph is in motion, use your camera to take a bunch of photos first. Then choose the highest quality photos to upload when you record your observation within the app.
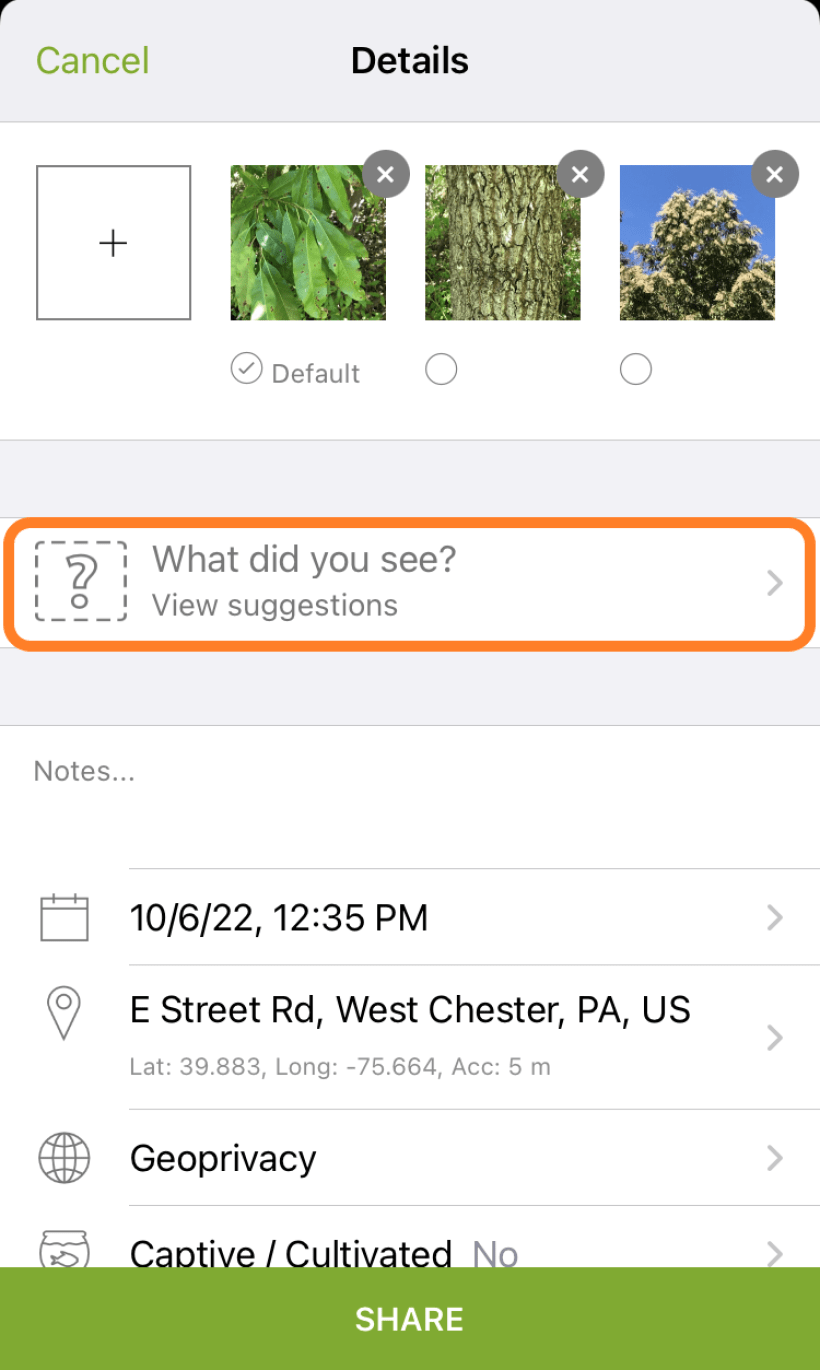
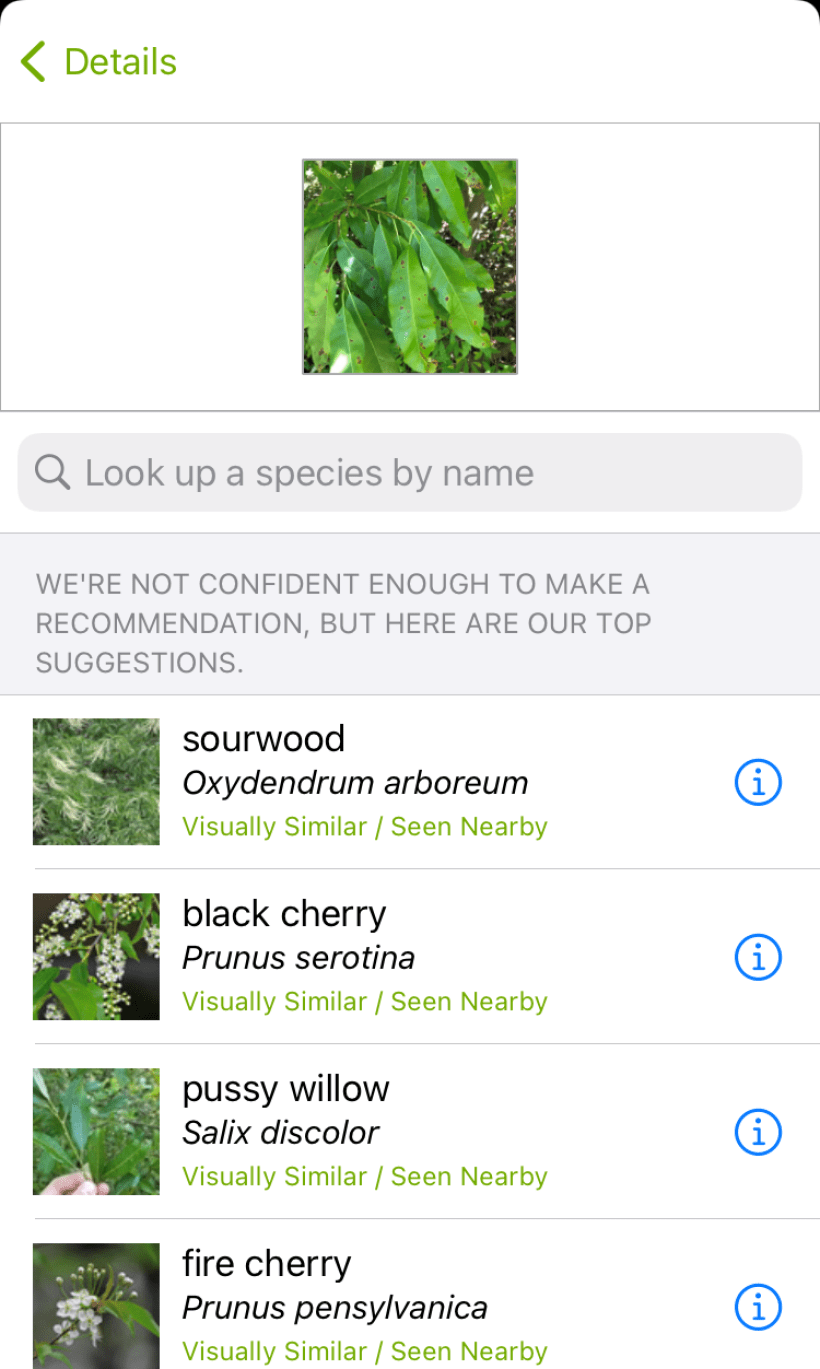
2. Identify what you saw
iNaturalist uses photo recognition software to help you identify the species in your photo. You can view the suggestions, read more about each species and search for additional species that may not show up in the initial suggestions. If you are not confident enough to make an identification, you can leave this field blank—other users will see your observation and make suggestions that are often more accurate than what the software suggests.
Pro Tips:
- Trust suggestions as a starting point, then verify through additional resources.
- If you know you are looking at an oak tree, but aren’t sure of the species, you can label your observation as being in the genus Quercus. This might help other users find your observation and narrow in on a positive species identification.
3. Notes
This field is located directly under the photo cache. Here you can include any specifics about the organism or other relevant details that might assist with identification. You can also ask questions or communicate with the greater iNaturalist community.
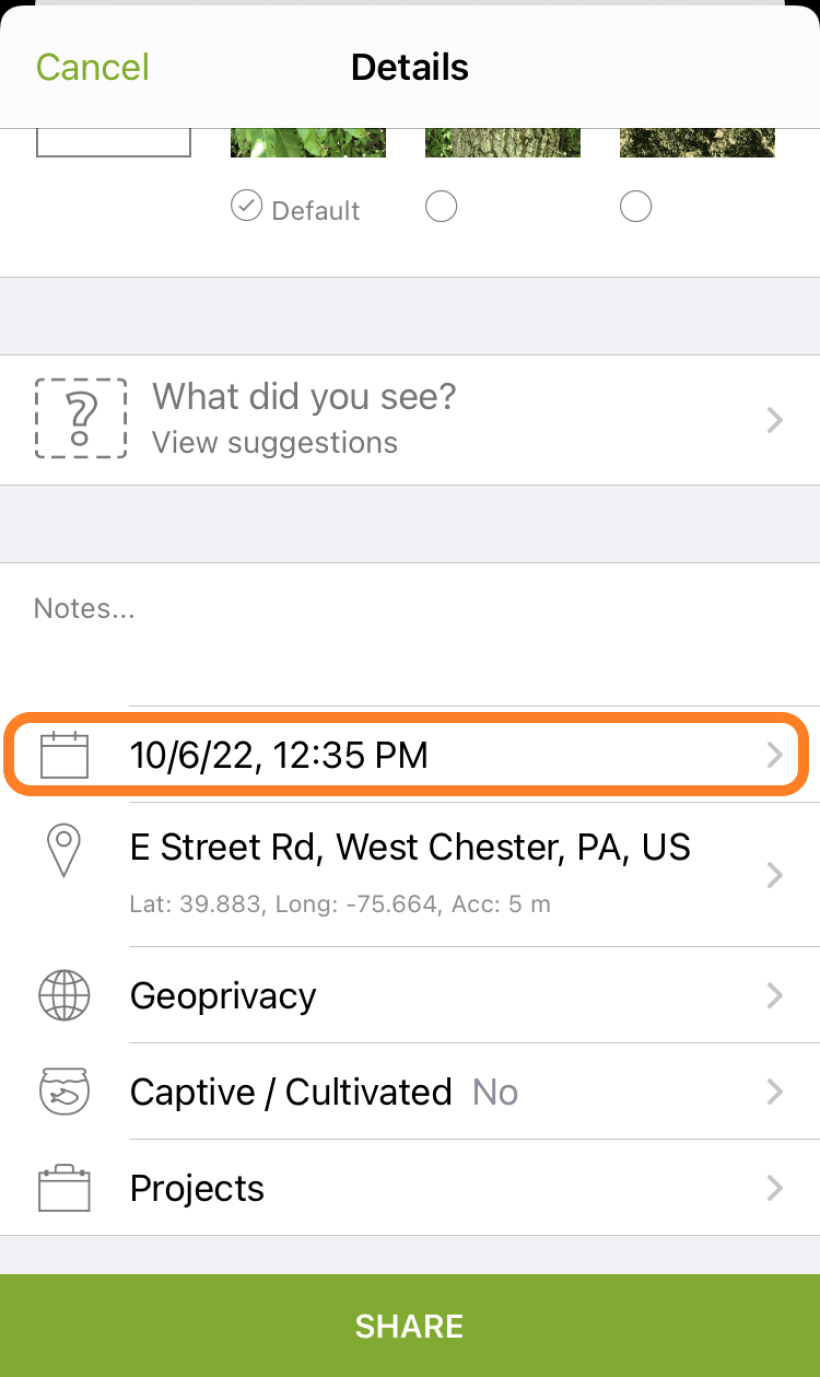
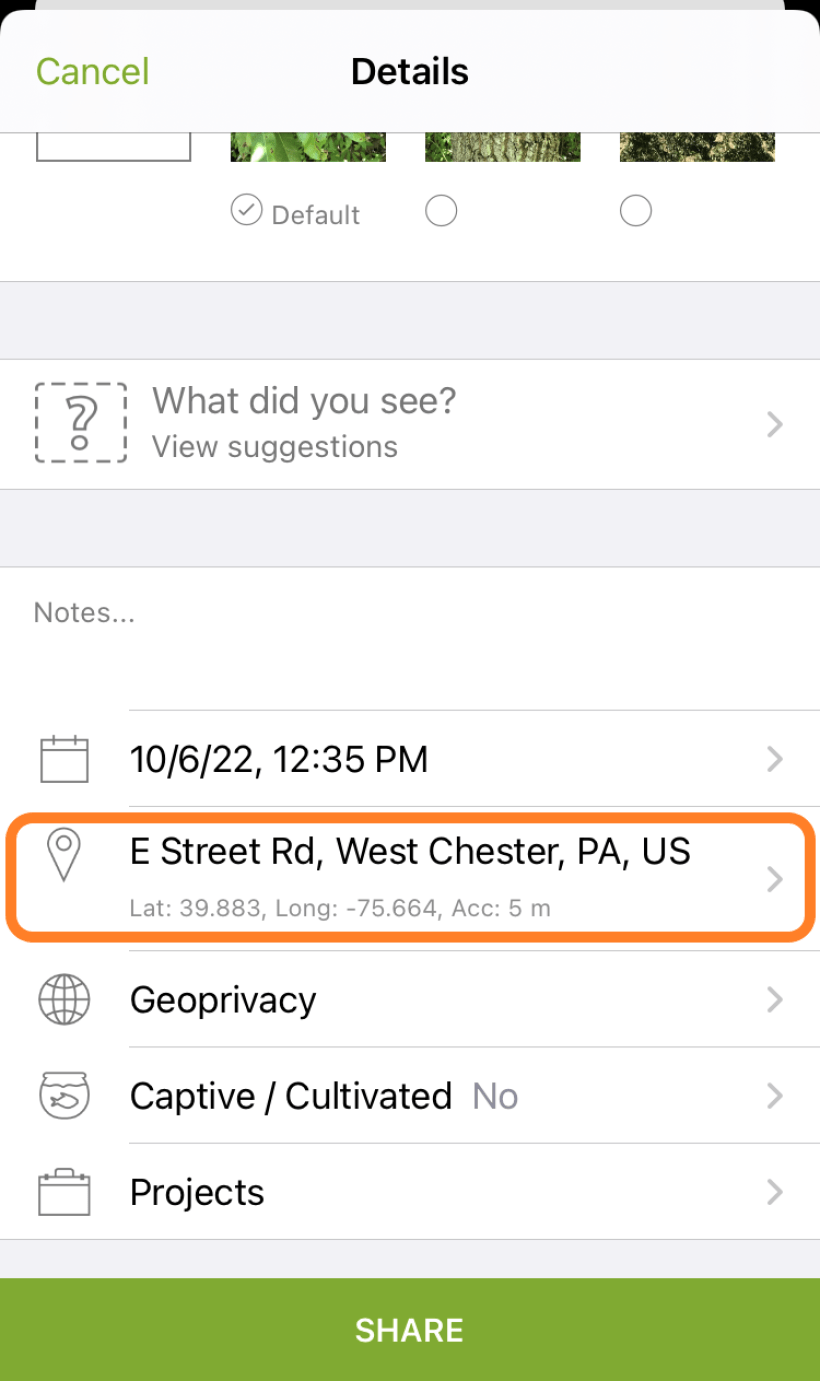
4. “When you saw it” and “Location where you saw it”
These two fields should automatically record the date the photo or sound recording was taken and location where it was taken. If you notice this doesn’t happen, it’s likely due to a setting on your smartphone.
- Android: Check app permissions in the Settings app.
- iPhone: Check Privacy in the Settings app.
Pro Tips:
- If you don’t want the app to continuously track your location, you can enable it to allow access only when using the app.
- Coverage can sometimes be a challenge in the field. Remember you can always upload photos later and manually change the location if it doesn’t seem accurate.
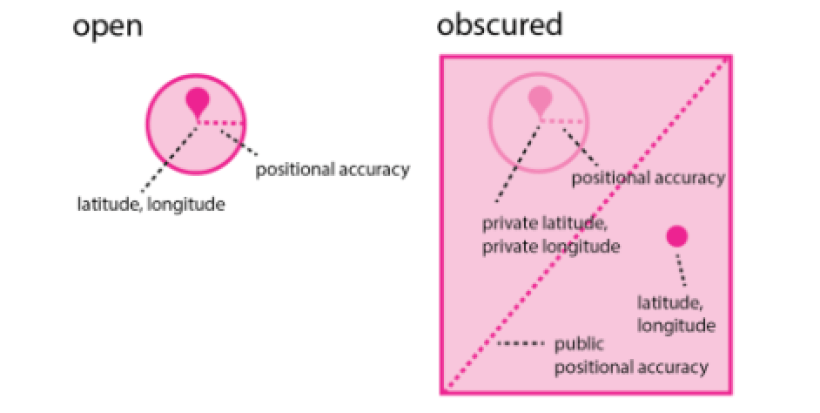
5. Geoprivacy
Located directly under "notes" is a geoprivacy section, which by default is set to “open.” By changing this field to “obscured” or “private,” you can restrict public access to this information. Only the observer can alter the geoprivacy setting on their own observations.
6. Captive / Cultivated
If the subject of your observation is captive/cultivated, indicate that in this field or reconsider posting this observation altogether. iNaturalist is primarily focused on observing organisms in the wild, not animals in captivity such as zoos, or cultivated garden plants, etc. An example of a wild organism is a bird on a tree in your yard, while a captive one would be a zebra in a zoo. And a cultivated organism would be hydrangea shrub planted in your garden as opposed to jewelweed growing naturally by a creek.
7. Projects:
Projects are a way to pool observations with other users based on location or species. Your observations will automatically be added to appropriate projects, but you can use this field to manually add it to other projects. Just click on the “more” button to view your account’s project page where you can browse projects you have joined, or search for others nearby.


Check out the Brandywine Conservancy & Museum of Art’s project or one of the projects we set up to track observations at our preserves.
8. Share Observation
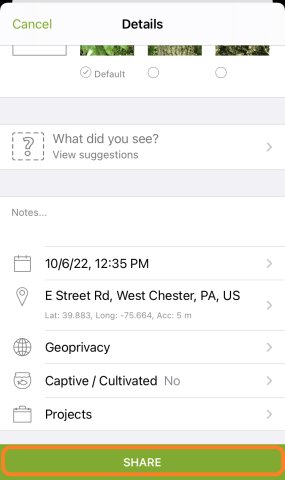
Select “Share” on iPhone or the “Add Icon” on Android to post your observation!
Your observation will begin uploading immediately. In the settings you can turn off the Automatic Upload feature so that observations are only uploaded when your device is connected to Wi-Fi. This is recommended if you are in an area with poor cell service or want to save cellular data.
9. Community Activity
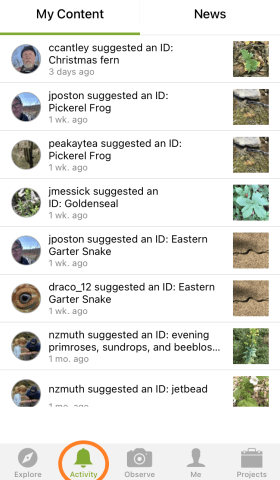
Check back for activity on your observation from the community or be notified by email to the address in your account settings.
Pro Tip:
- These comments from the community can potentially be an additional resource for accurately identifying the organism.
Deepen Your Engagement with iNaturalist
Remember, iNaturalist’s goal is to keep you connected with nature and they offer many ways to do so. Once getting your account set up, take some time to acquaint yourself by capturing high-quality photos, uploading observations and familiarizing yourself with the features of the app.
Bring on the Bioblitzes
Looking to support a more focused digital collection effort? Take part in a bioblitz! These organized “events” are an opportunity for the general iNaturalist community to be part of an effort within a particular location and noted range of time. Commonly the organizer(s) of a bioblitz will specify which taxa they would like participants to observe. For example, there might be a more general city bioblitz taking place for a weekend where participants are encouraged to make as many observations as possible to gather as much information in a short time. Or a bioblitz could be focused on pollinators spotted during the summer months at a community garden.
Additional Options
Know a younger budding naturalist interested in turning their nature knowledge up a notch? Seek by iNaturalist does not require an account and uses image recognition technology to identify the plants and animals photographed. To keep the ecological stakes high, users can also earn badges for seeing different types of birds, amphibians, plants, and fungi and participate in monthly observation challenges.