Inspired by the Brandywine’s new special exhibition “Ralston Crawford: Air & Space & War,” I wanted to make a craft that could merge Crawford’s multiple abstract languages—his loose, sketchy drawings and his hard-edge, geometric paintings. Handmade paper platonic solids seemed like just the answer!
What’s a platonic solid, you might ask? It’s a solid that has equally sized faces of all the same, regular shape meeting at each vertex in the same number. The most well-known example is the cube, but there are four others: the tetrahedron, the octahedron, the icosahedron and the dodecahedron.
With their sharp edges and space for painterly play, paper platonic solids are perfect for bringing together the two sides of Ralston Crawford’s artistic style into a fun mobile project you can hang up anywhere and admire. That said, you should feel free to transform your creations into anything you want—they can also be used as fun, oversized dice or stackable building blocks.
Note: this is a project is complex and may take a couple days to complete. For that reason, it’s more suitable for students grades 8 and up, but parents of younger ones can always do some of the heavy lifting (ex. measuring, cutting and hot-gluing) and let the kids get creative with coloring and design.
Image
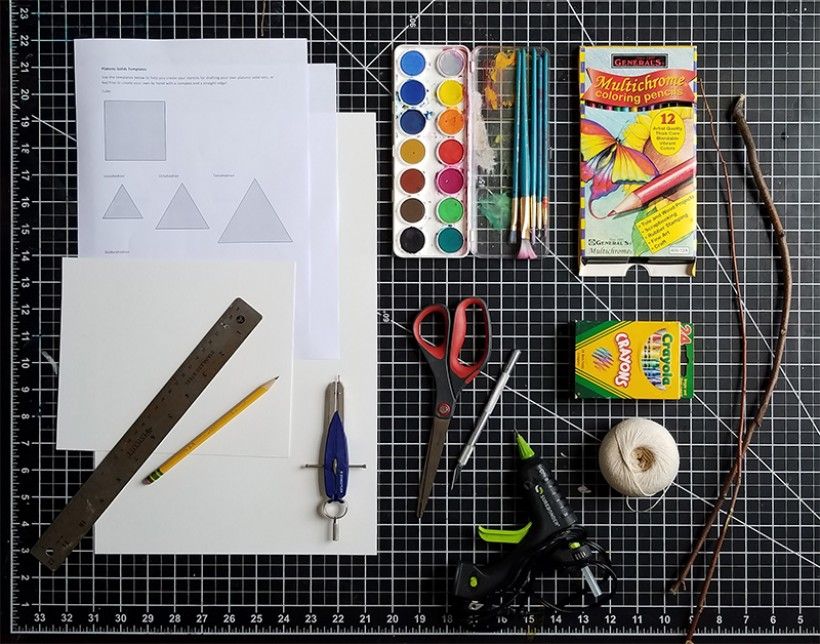
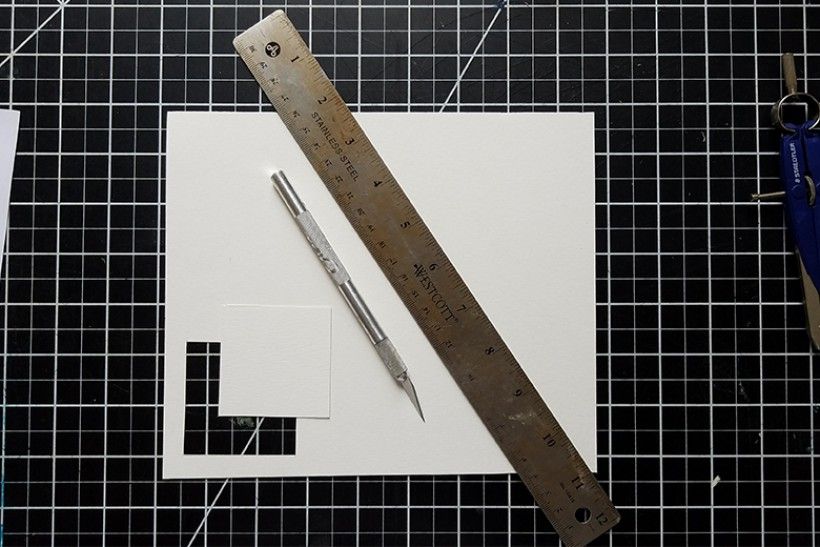
Supplies for paper platonic solids craftGather your supplies:
Cutting mat (if you don’t have one, stack some pieces of cardboard and tape them to the table for stability—a 12x18” workspace should suffice, but feel free to go bigger if you have the cardboard for it)
A pencil
A straightedge
A few sheets of heavy card stock or watercolor paper, no smaller than 8.5x11”
Coloring materials (watercolor, pencil, and crayons all work—avoid anything that will smear too much)
A glue gun
A twig or two
Twine
Image
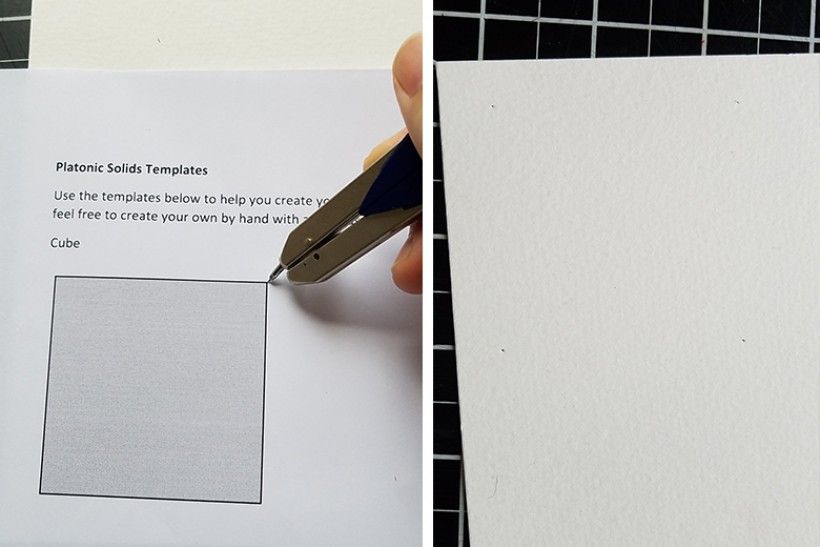
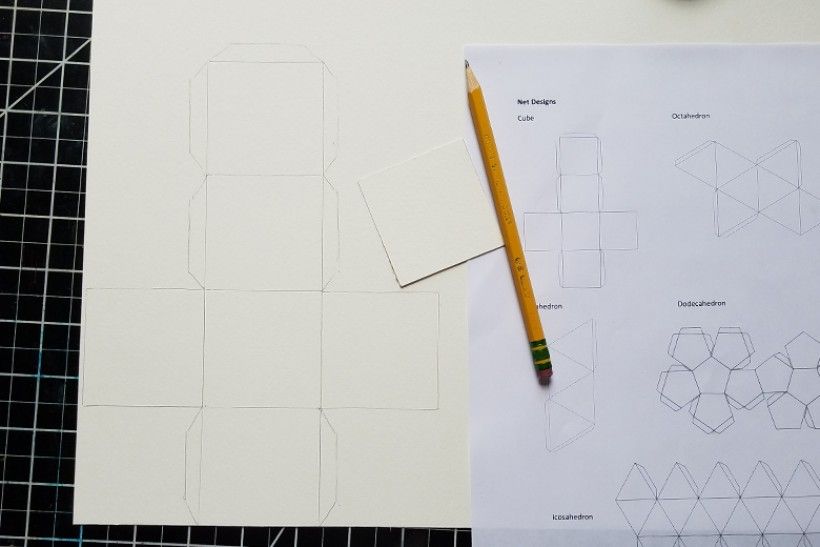
paper platonic solids - step 1Step 1:
To make our platonic solid, we will need to draw a 2-D representation of the solid, called a “net,” which is then folded up and glued together to make the 3-D solid. (Diagrams of these nets are on page 2 of the Platonic Solids Template.) To get started on this process, we need to make a stencil of a single shape that we can trace multiple times to create the net.
Choose which solid you want to make, then find the corresponding face template on the first page of the Platonic Solids Templates printout. I decided to make a cube first—it’s one of the easier solids to construct—so I began with the square face template. Generally, I’d suggest starting with simpler solids and working toward more complex ones.
Use something with a sharp point to poke holes through the corners of your chosen template shape and into your heavy cardstock or watercolor paper. I used the pointy end of my compass, but an X-acto blade or a sharp screw can also do the trick. You just need to be able to clearly see the holes you are poking into your heavy paper.
Pro tip: It’s very important to be as precise as possible in this first step so that everything comes together cleanly in the end. Make sure you don’t let your template paper shift while poking holes—it can be a good idea to tape the template down if you’re having trouble holding it still. Small mistakes here will add up, especially with the more complex shapes, so be as careful as you can!
Alternatively, if you want to use a compass and a straight edge to construct your own square, triangle, or pentagon, you can search YouTube for plenty of online tutorials.
Image
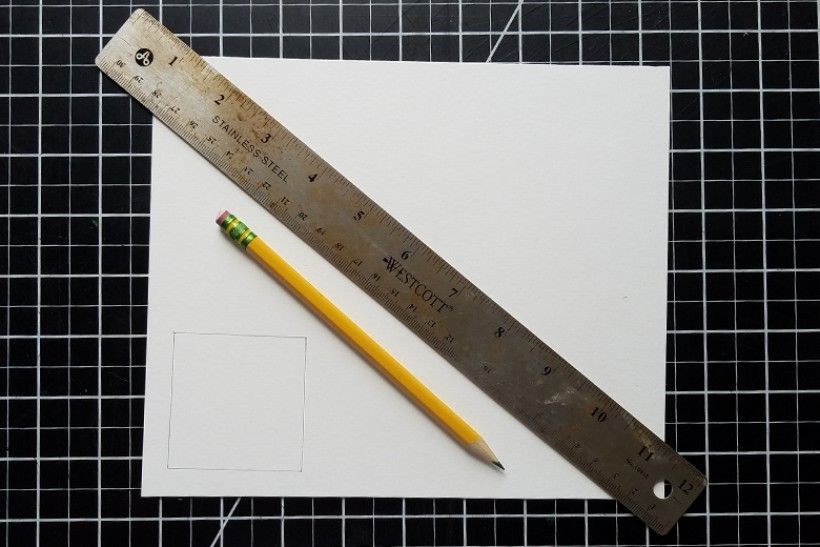
paper platonic solids - step 2Step 2:
Using a straight edge, carefully connect each point with a straight pencil line.
Image
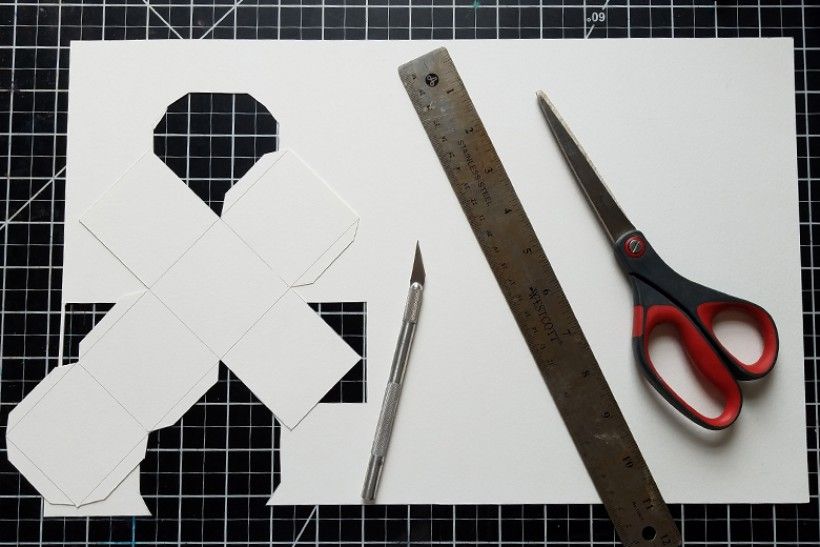
paper platonic solids - step 3Step 3:
Cut out the stencil with a straight edge and an X-acto blade (or use scissors—but make sure to cut exactly on the lines you have drawn!)
Image
paper platonic solids - step 4Step 4:
Carefully trace your stencil with a sharpened pencil in the formation of the net you have chosen. Add tabs to the edges as indicated in the net diagram.
Pro tip: It can be helpful for the gluing process to angle these a little less than 45 degrees off the edge of the actual face, in order to prevent tabs from overlapping with each other.
Image
paper platonic solids - step 5Step 5:
Cut out your net carefully—a straight edge and an X-acto blade will get you the most precise cuts, but if you’re nervous with the blade then scissors are fine. Be as precise as possible!
Image
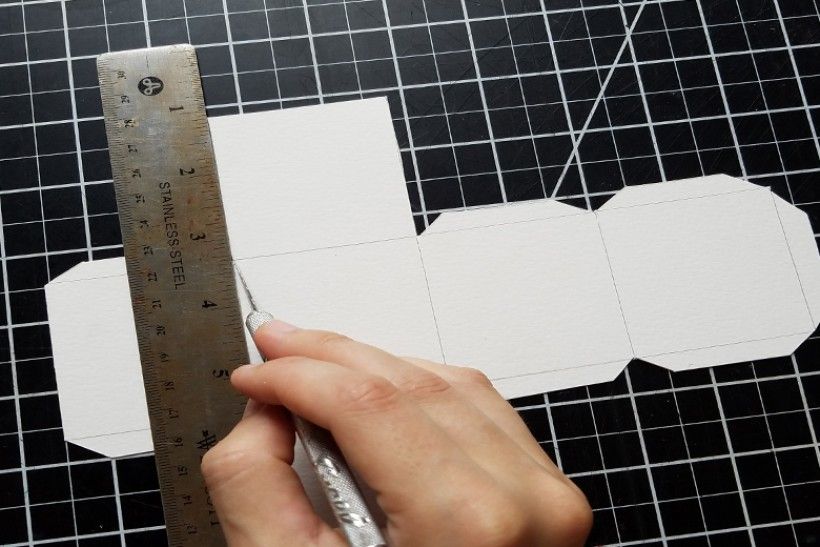
paper platonic solids - step 6Step 6:
Once the outlines are cut, gently score the inner lines between faces and tabs to make folding easier. This will need to be done with an X-acto blade, so if you’re nervous about this, ask an adult to help. Be sure not to fold it up yet once everything is cut and scored—we still need to color it first!
Image
paper platonic solids - step 7Step 7:
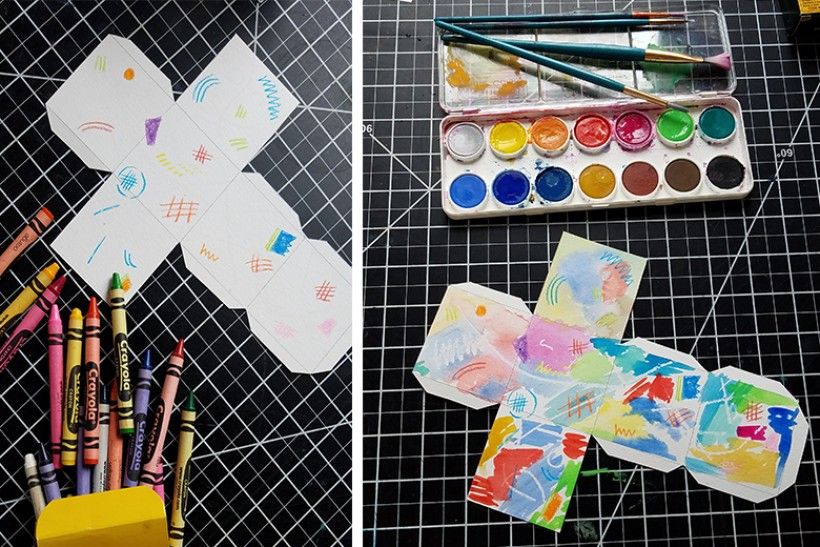
Color! We want to color on the same side that we scored all our edges. I like to start with crayon, then move into color pencil and watercolor. The wax of the crayon acts as a resist, especially to the watercolor, and can help to create vibrant, crisp edges of color. Using a white crayon can add exciting white lines that appear only once painted over with watercolor. Design your cube in whatever way you want—especially if you have some other purpose for it!
Image
paper platonic solids - step 8Step 8:
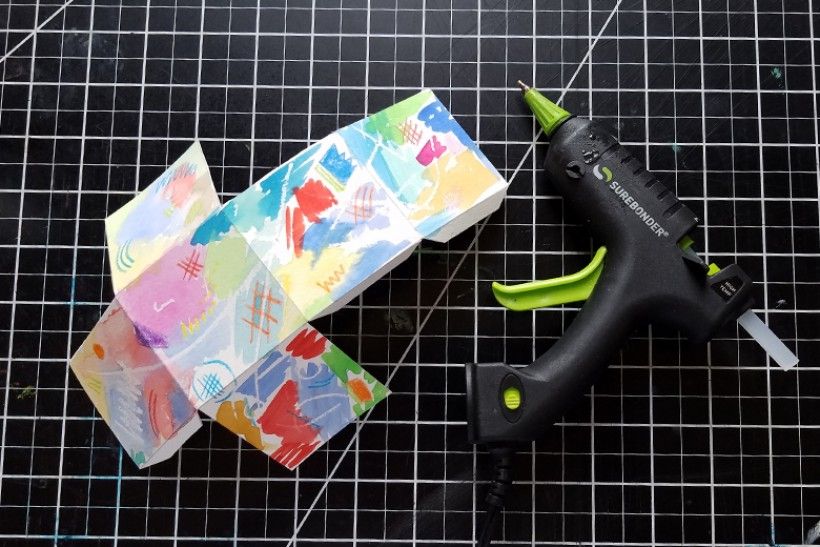
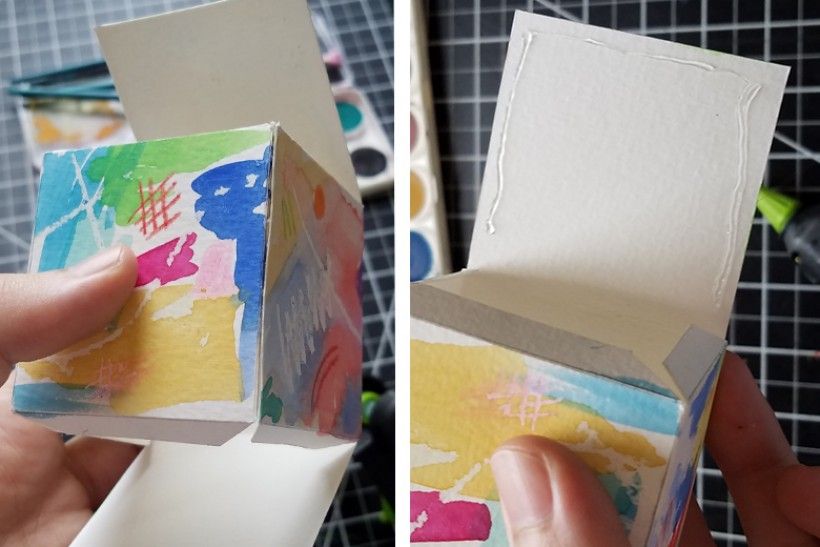
Plug in your hot glue gun and gently fold all of your scored edges so that you can more easily glue them together with the hot glue. If you find that some parts aren’t folding easily, very lightly score them again.
Take note of where the tabs land when the shape is completely folded together. If your net is accurately measured and cut, it should fold up easily into the form of the solid. Every face edge should either have a tab already connected to it or touch a tab once folded up. If you ever accidentally cut off or forget a tab, you can make a double-sided tab scored down the center, and glue it directly to the edge of the backside of the face it’s missing from.
Image
paper platonic solids - step 9Step 9:
Once all your scored lines are folded, start gluing your tabs to the faces to which they correspond! When it comes to the cube, I like to start with the “center” tab, then glue the top and bottom which can be easily pressed right onto the three top and bottom tabs. If you’re working on other shapes, it can be a little trickier—you may have to do some glue-gun surgery!
Image
paper platonic solids - step 10Step 10:
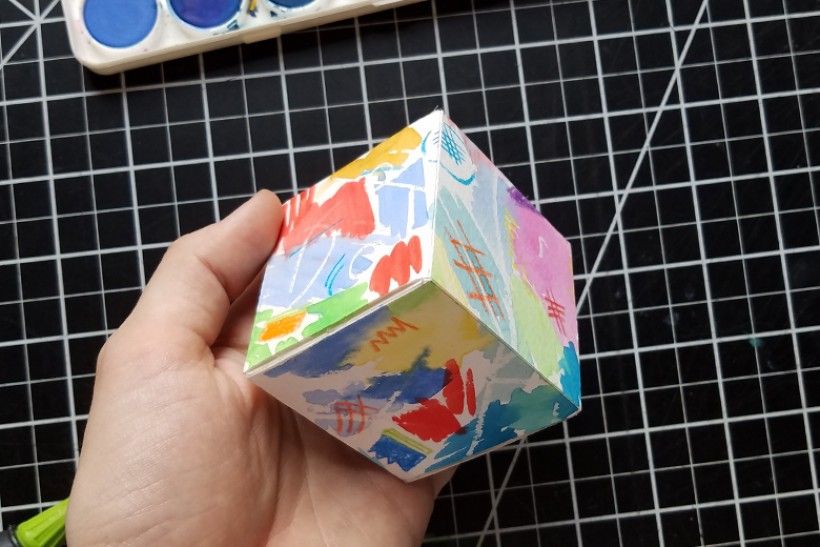
You did it! Admire your solid! Then make another—you can do any one you want, but it’s always fun to make more than one!
Image
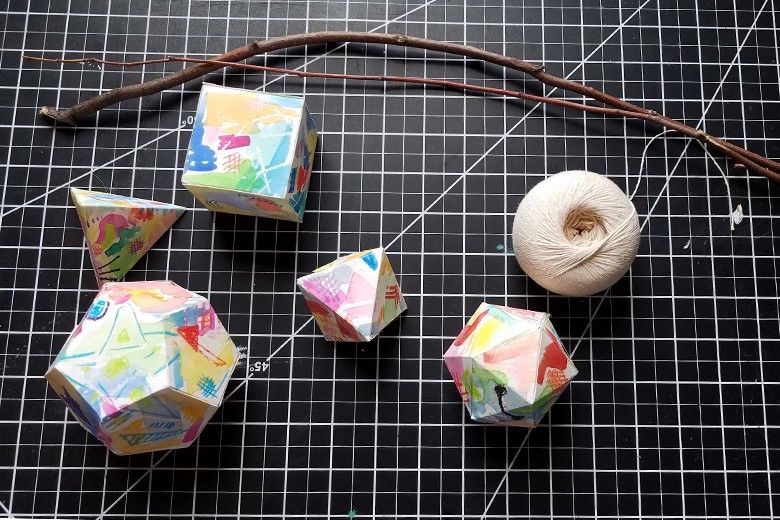
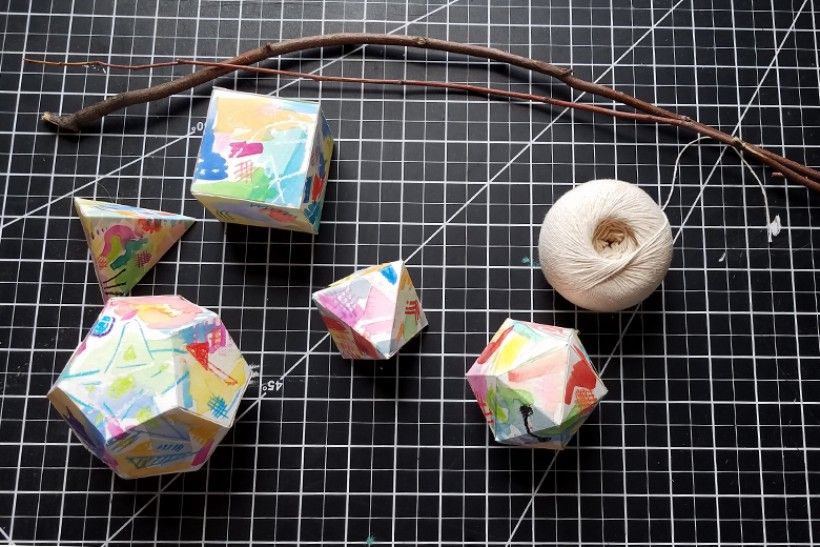
An arrangement of 3-D platonic solid shapesStep 11:
Bring together all your finished solids, along with your twine and twig(s).
This step and all following are completely optional—again, you can do whatever you want with your solids. These steps are for bringing them together in a single mobile.
Image
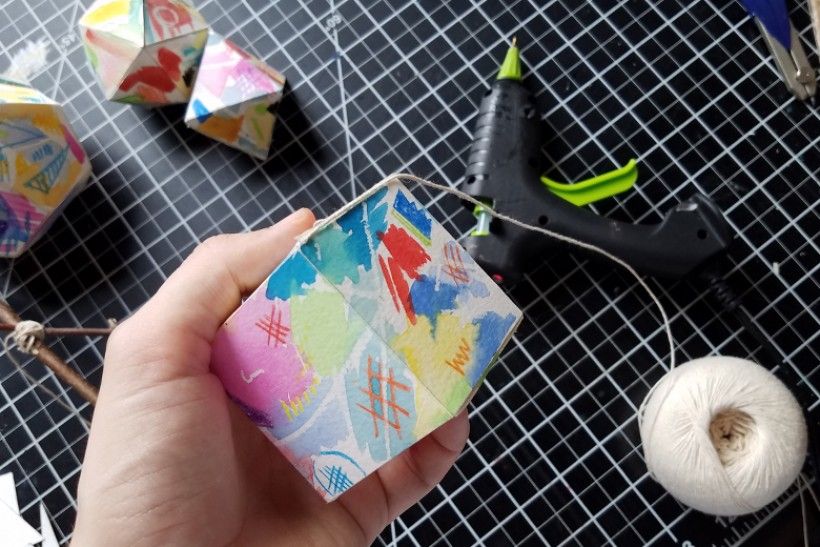
paper platonic solids - step 12Step 12:
Glue a length of twine to the edge of each solid. I like to glue the twine all the way down the length of the edge to make sure it’s affixed securely.
Image
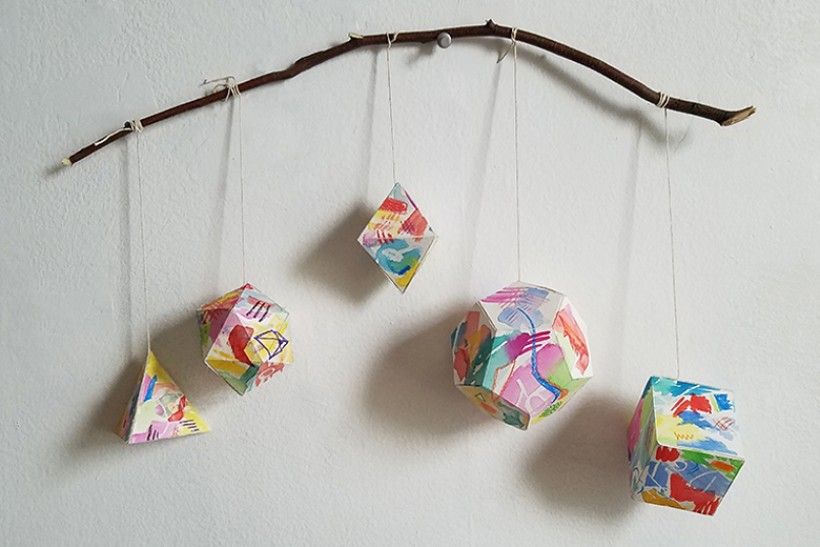
paper platonic solids - step 13Step 13:
Tie all your solids to your twig and find a place to proudly hang your platonic solids mobile!