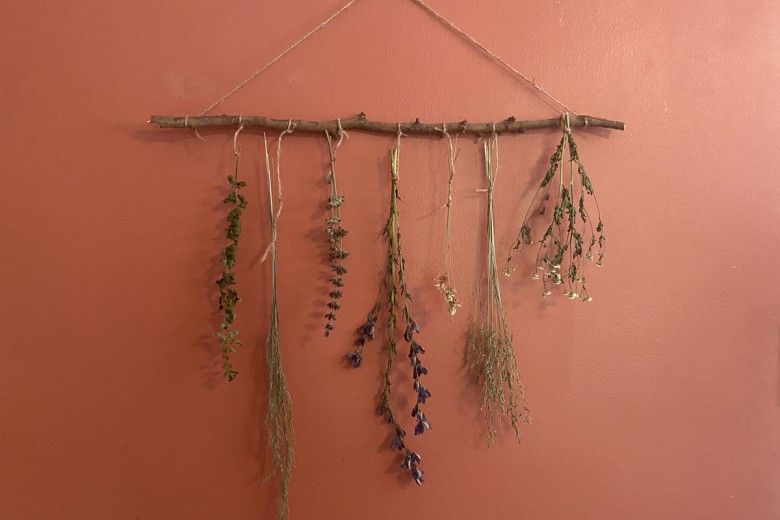
Transform pieces of nature into a beautiful wall hanging with this fun project that uses dried flowers and plants from your own backyard. Look around for different textures and colors that complement each other and that will remind you of summer all year round. Get creative and put your own spin on it!
Image
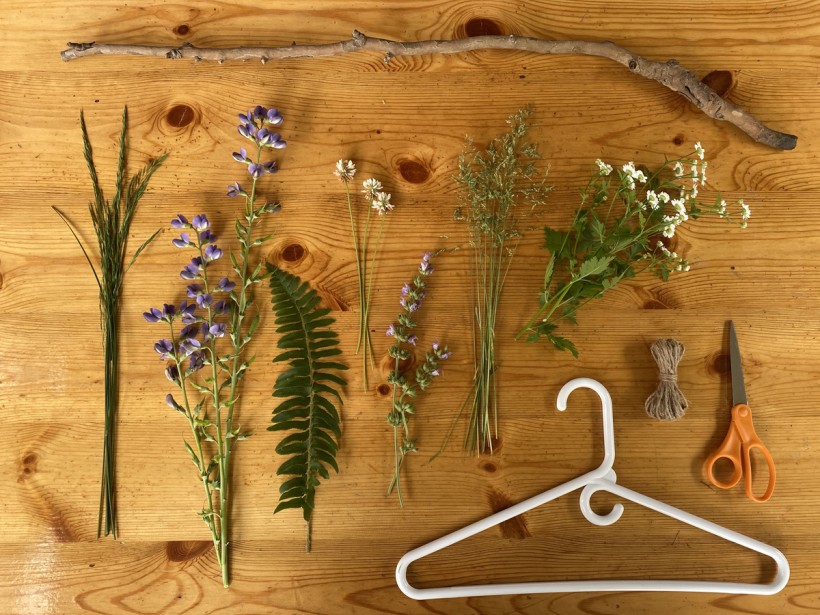
Gather Your Supplies:
Plant clippings (sturdier flowers and plants will work best)
A stick or wooden rod
Twine or thread
Scissors
Clothes hangers
Step 1:
Image
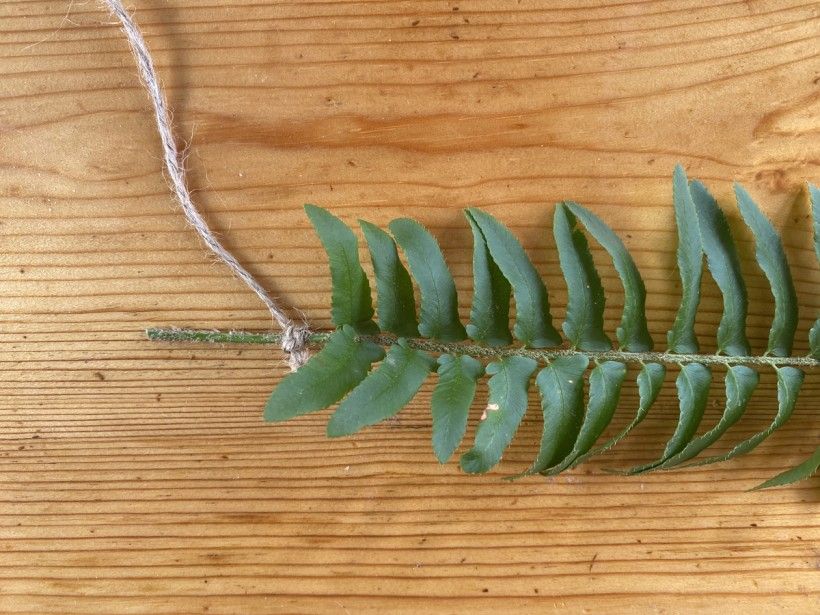
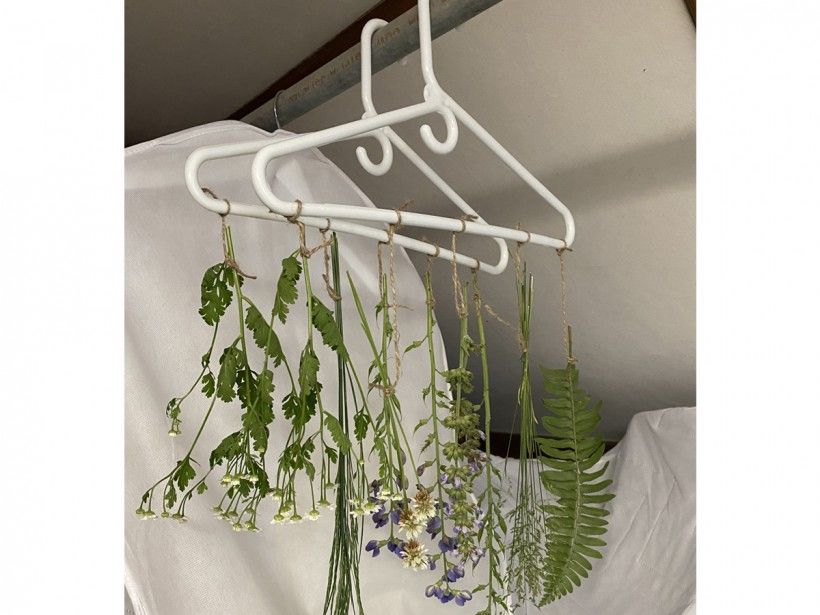
After you've gathered your plant clippings from outside, you will need to let them dry out before they get hung on the wall. Tie twine to the cut end of each plant. If you have a bunch of thinner plants, you can tie them together as a group. The other end of the twine will be tied to the clothes hanger, so be sure to leave enough length for the plants to hang.
Step 2:
Image
Image
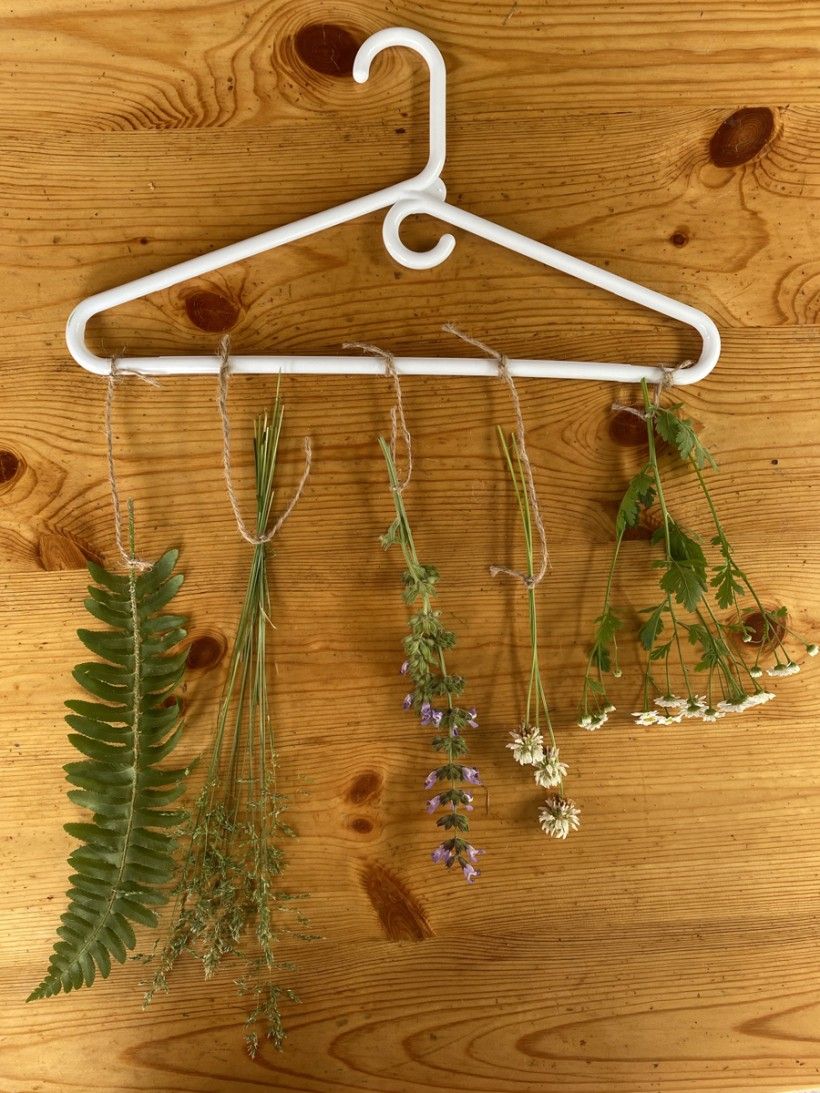
Tie each plant or group of plants onto the hangers. For best results, space out the groups of plants with room on either side, to make sure they don’t get stuck together while drying.
Step 3:
Image
Place the hangers in a dark space where they will not be disturbed much—such as a closet or attic. Leave them for a couple days or until each plant is dried.
Step 4:
Image
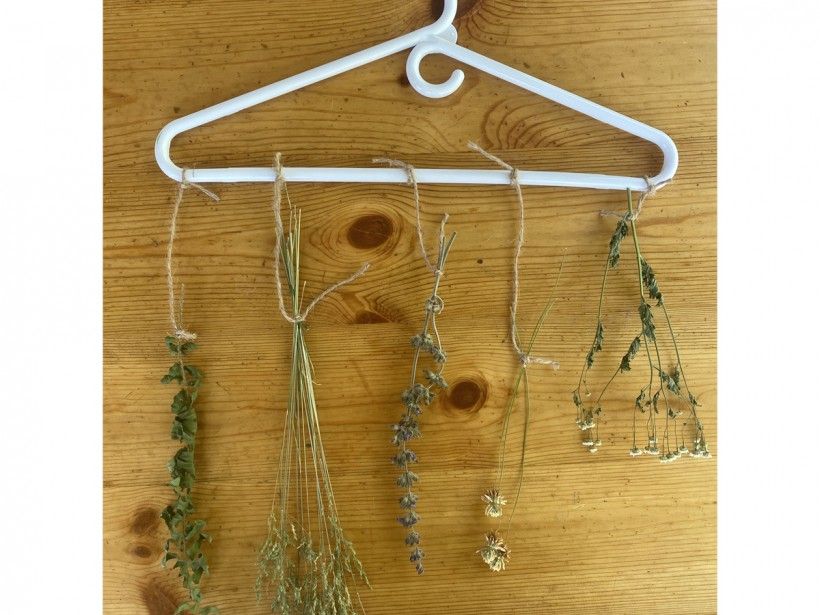
Once the plants have dried, bring them back out to your workspace. You can see how some of the flowers and plants look very different after they are dried! Their color or texture often change.
Step 5:
Image
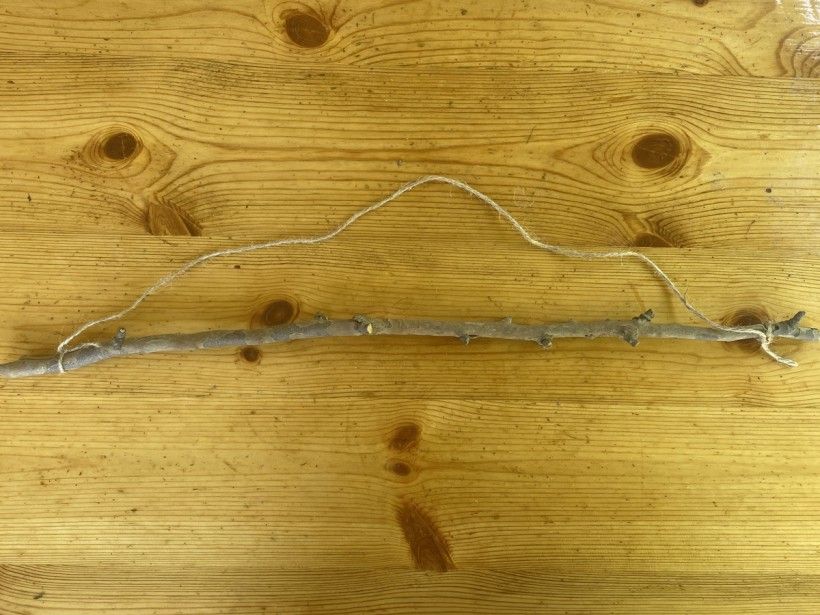
Take the stick and tie a long piece of twine at each end. This will allow you to hang up your wall art when it is finished.
Step 6:
Image
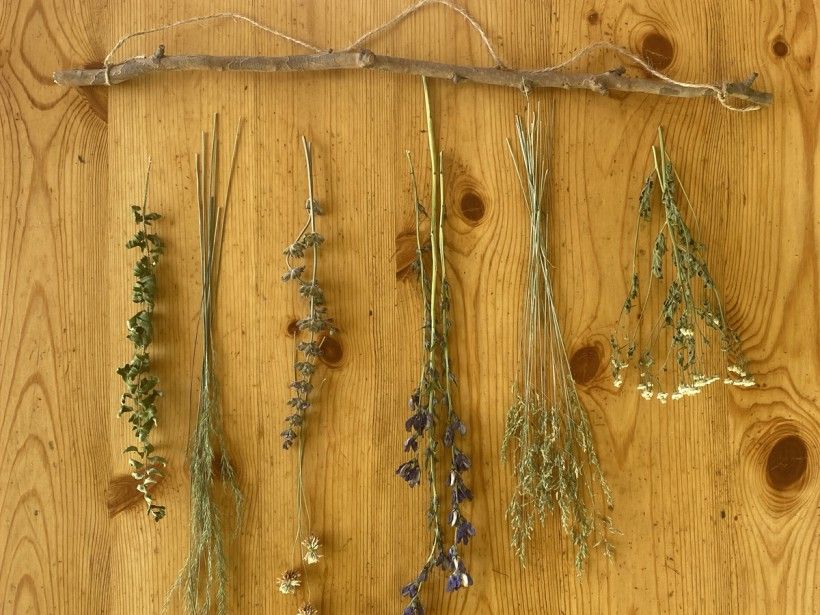
Take your different plant clippings and try out different combinations until you figure out what looks best! They can be at different levels, all lined up, or mixed together. Once you’re happy with your layout, place the plants underneath the stick in the order you choose. You might need to trim some of them to get the desired height.
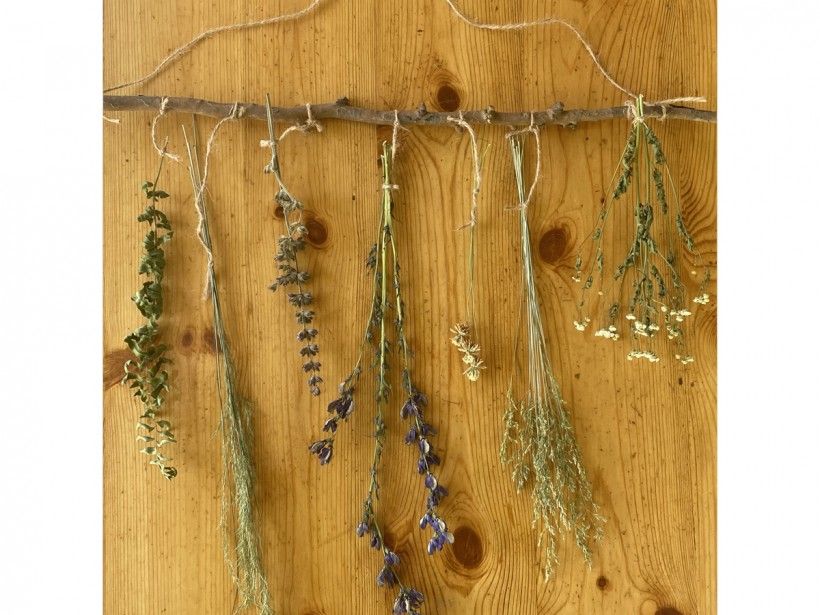
Step 7:
Image
Tie each flower or bundle of plants to the stick, placing them as close or as far apart as you choose.
Step 8:
Image
The last step is to hang the beautiful dried flower art you just created on the wall and admire your handiwork!