By: Liesl Mahoney, Associate Educator for School & Family Programs
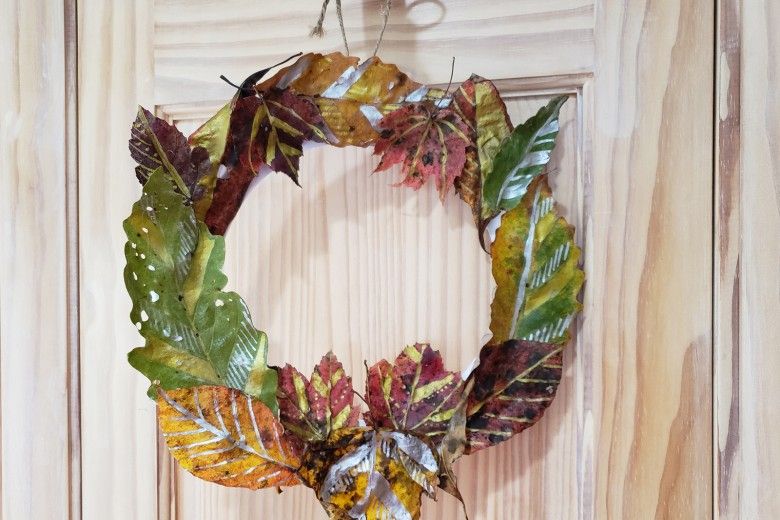
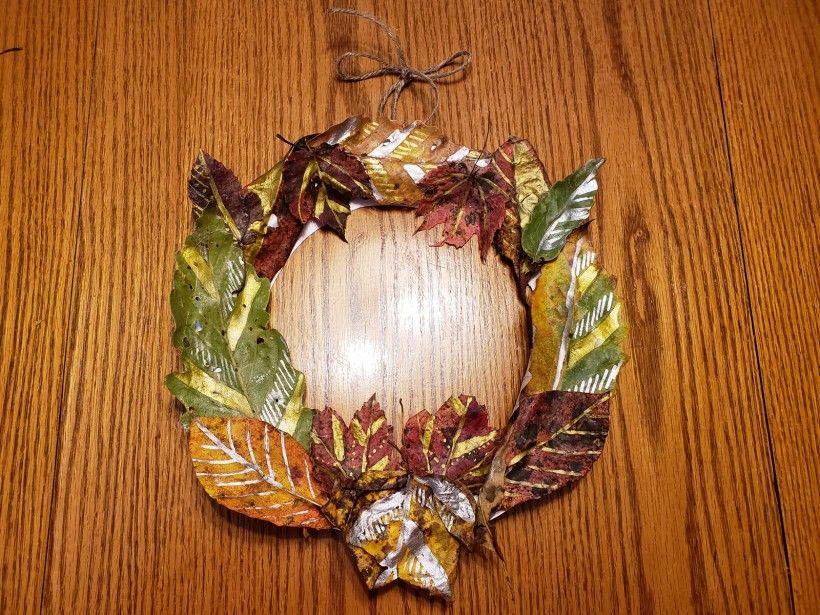
With the heat and humidly finally behind us, it's the perfect time of year to enjoy the great outdoors before it gets too cold. One of my favorite things to do with kiddos is to explore the trails around the Brandywine River Museum of Art and collect some of the beautiful leaves that have fallen on the path. The below craft gives you something fun to do with all those collected leaves, plus a perfect decoration for the fall.
Image
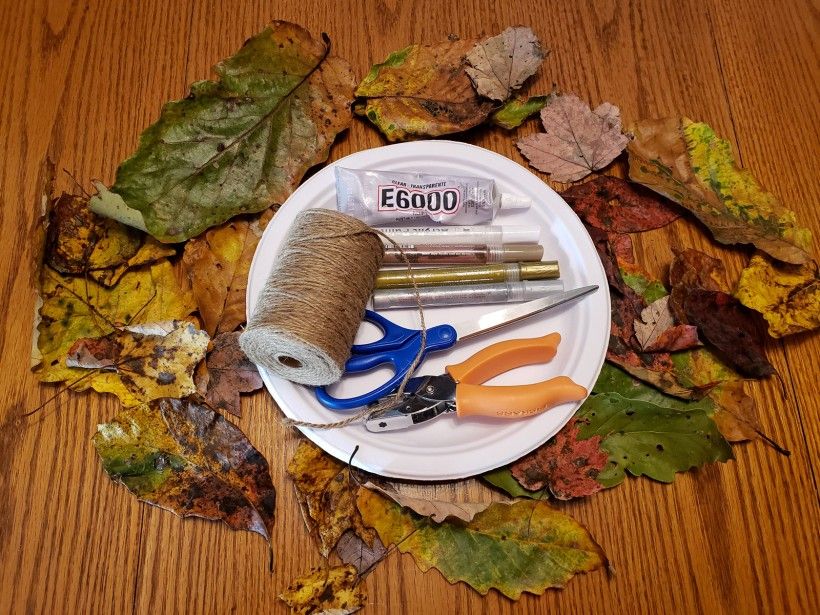
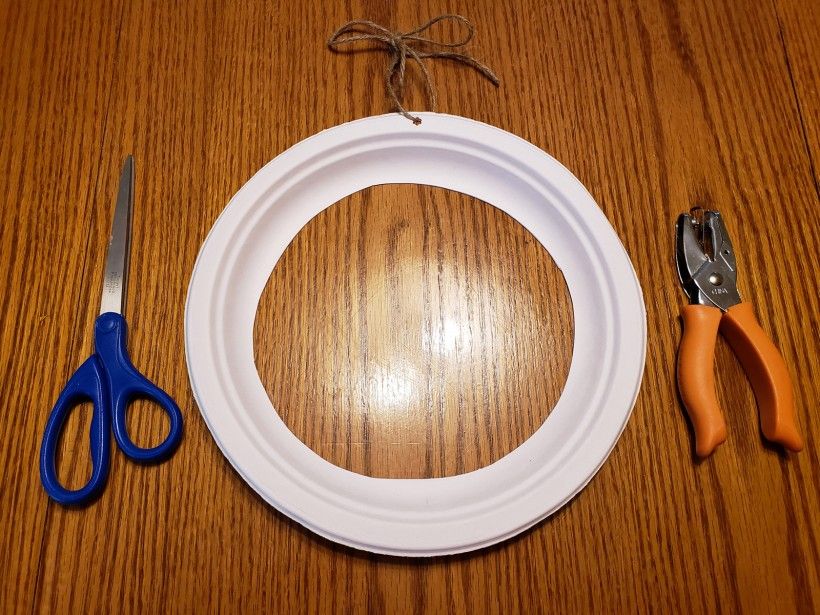
Supplies:
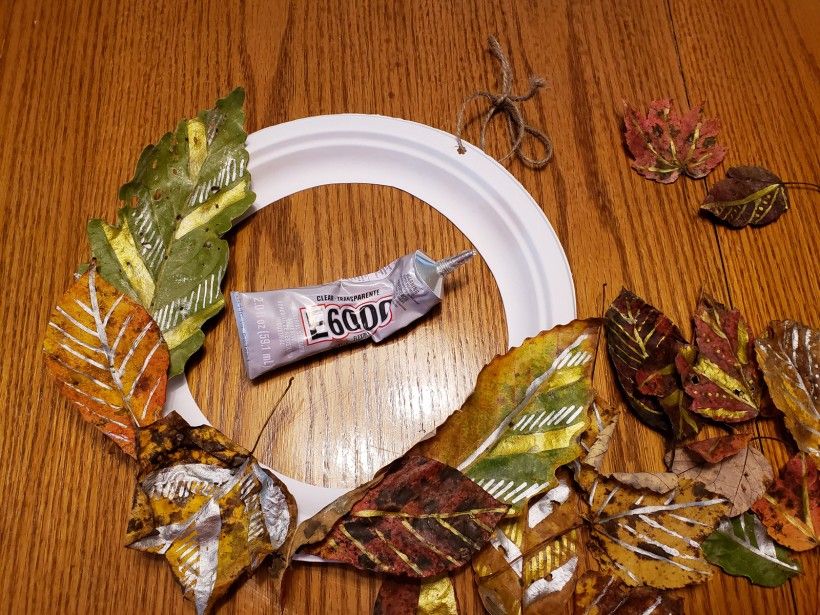
An assortment of leaves (the flatter and more colorful the better)
Paper plate
Hole punch
Scissors
Glue (a stronger glue, glue dots, or glue gun work best for this craft)
String, twine or ribbon
Optional: permanent markers, chalk markers or paint markers.
Image
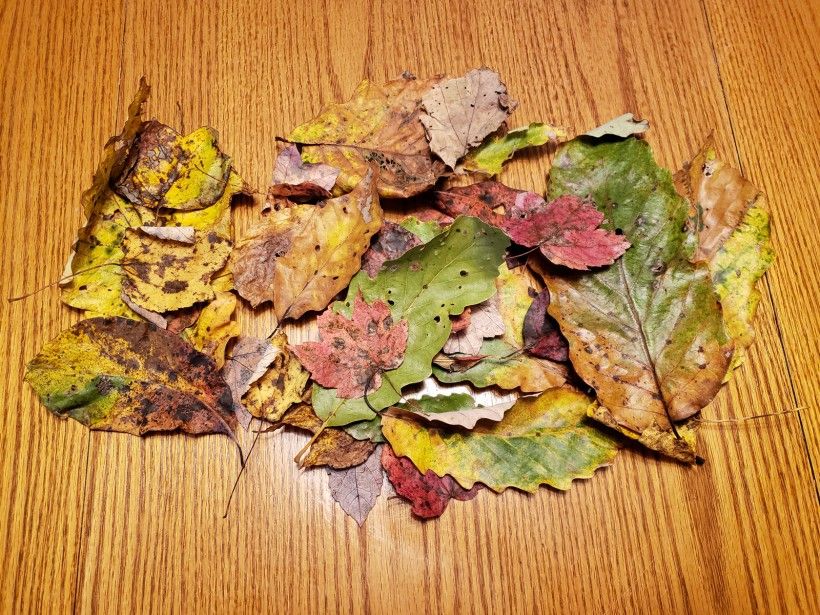
Step 1:
Collect your leaves! Head to a favorite walking spot to find and gather leaves for your wreath. Try to find colorful leaves that are flat—these will glue easier. For those who are local, try walking along the paths around the Museum or, if you're a Brandywine member, take a stroll on the trails at the Laurels Preserve.
Image
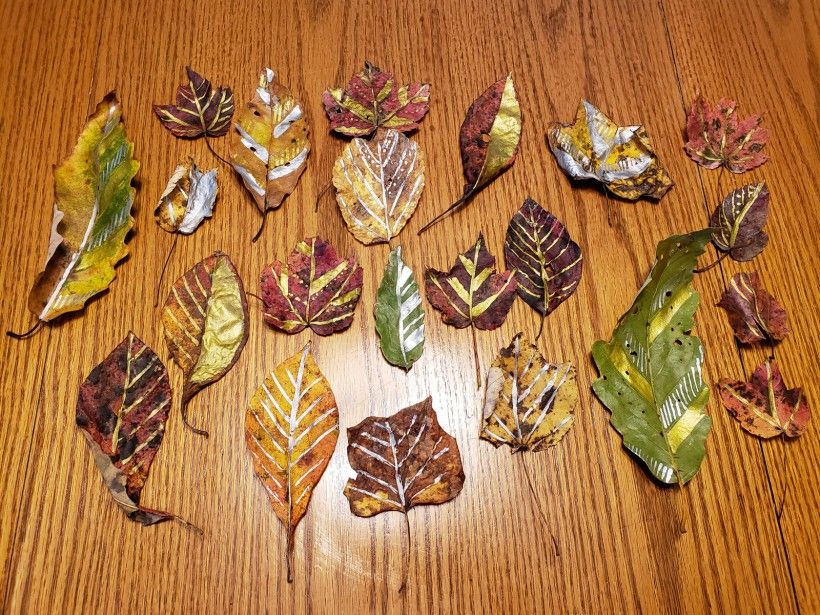
Step 2:
Draw designs on your leaves using paint, chalk or permanent markers. This step is optional, but it really makes the leaves pop! Make sure to press lightly so you do not crack the leaves. I really like using gold and silver markers for this as they stand out great against the fall colors.
Image
Step 3:
Cut out the center from your paper plate using scissors. Use a hold punch to make a hole at the top of the plate. Thread your ribbon or twine through the hole and make a loop for hanging your wreath once it is finished.
Image
Step 4:
Glue your leaves down. Try and cover as much of the plate as possible.