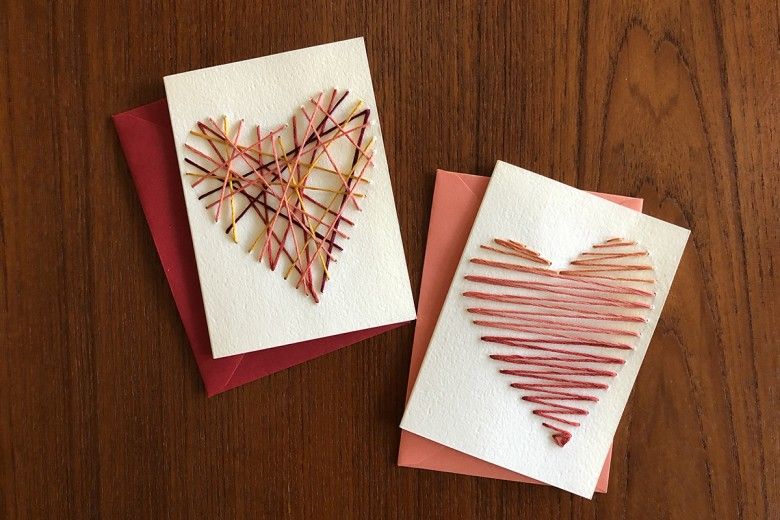
Hand-stitched cards are a fun and easy way to take your Valentine’s Day cards to the next level this holiday. This activity can be taken in many different directions, so use the following instructions as a guide. Add your own unique twist by experimenting with different colors of thread, stitching techniques and colored papers.
Image
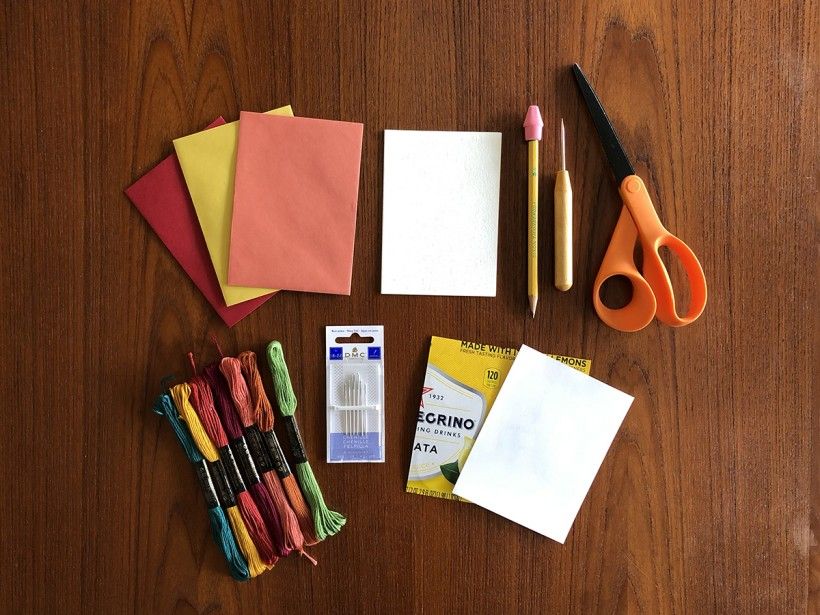
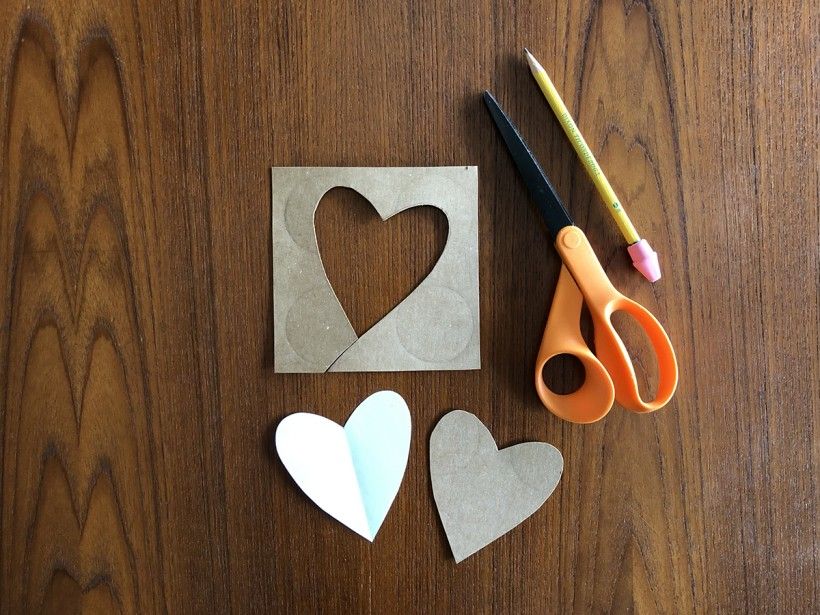
Gather your supplies:
White cardstock or heavy paper (precut to 3.5 x 5” or 4 x 6”)
Colored embroidery thread
Embroidery needle (smaller works best)
One piece of thin cardboard (snack/cereal boxes work great)
Small piece of white copy paper
Pencil
Scissors
Book awl or large sewing needle (to poke holes)
Optional supplies:
Envelopes
Colored paper
Glue
Image
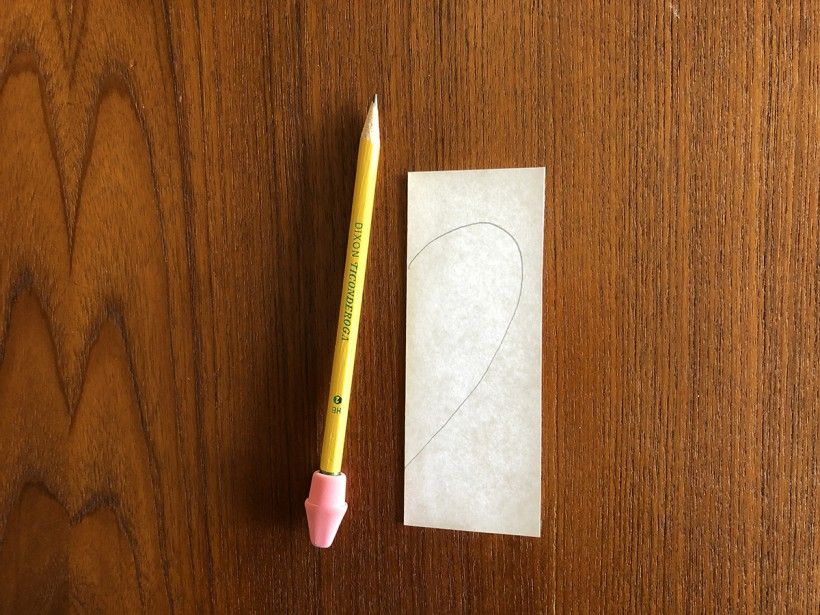
Step 1:
Fold a small piece of white copy paper in half. You’ll want the paper to be the size of the card you are using so it fits nicely when tracing. Draw half of the heart along fold of paper.
Image
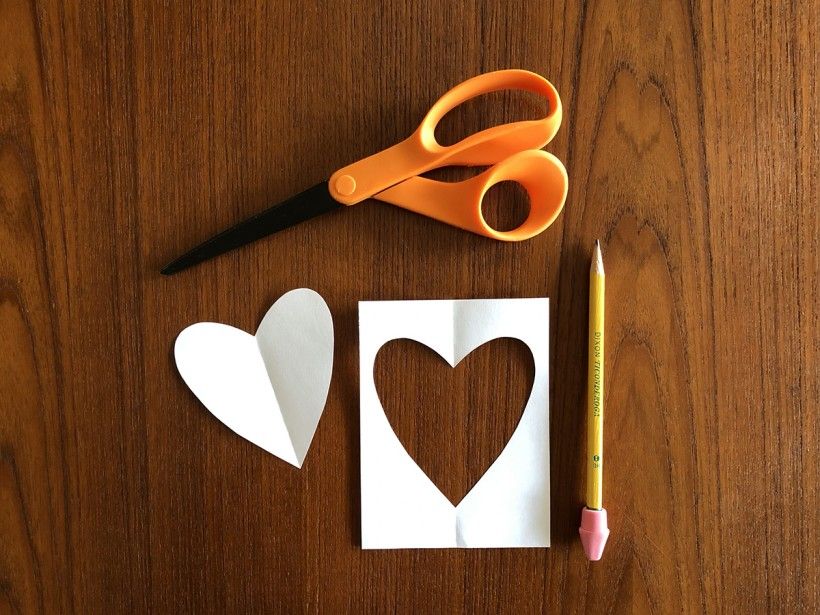
Step 2:
Cut out the heart along your drawn lines and open the paper.
Image
Step 3:
Trace the paper heart onto piece of cardboard. This will act as your stencil so you can make multiple cards using the same heart. Cardboard will hold up better than just using the paper stencil.
Image
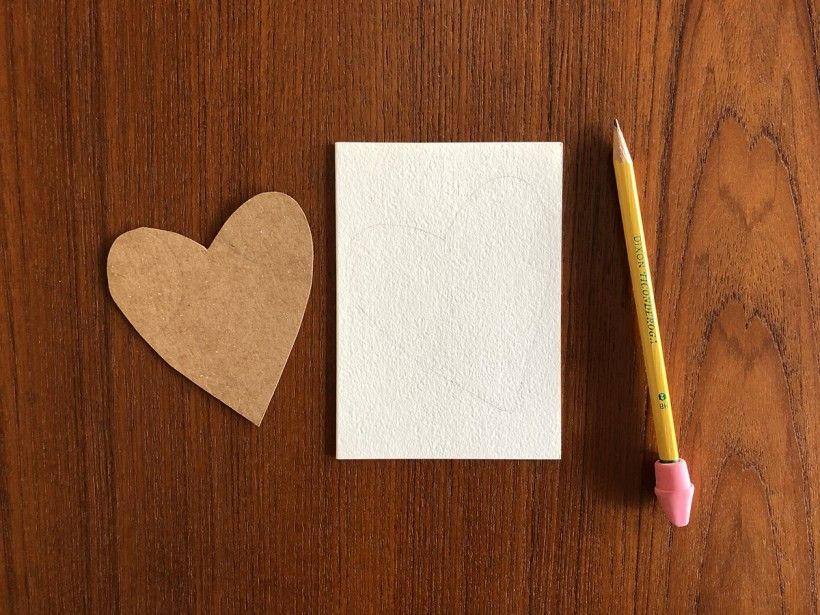
Step 4:
Trace your cardboard heart stencil very lightly onto your card using a pencil. You’ll want to make sure your line is very faint, so you don’t see it when you finish stitching.
Image
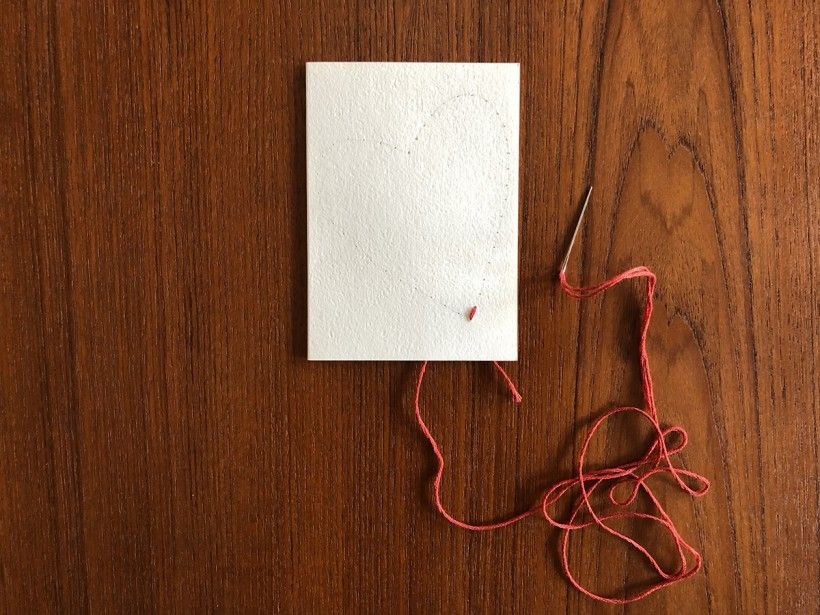
Step 5:
Open your card and use an awl or sewing needle to poke small holes around the heart following the pencil line (you may want to place card on a rubber mat or scrap piece of cardboard so you don’t ruin the surface underneath). Your holes should be roughly ½ cm apart.
Image
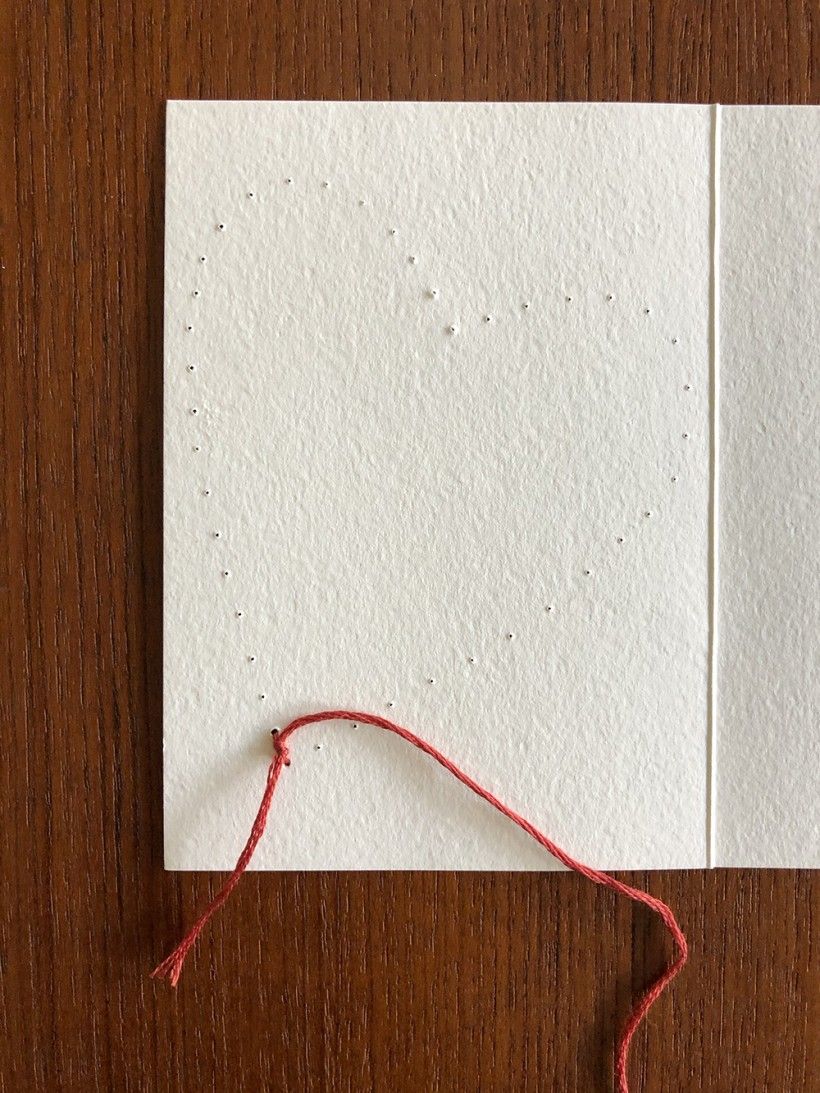
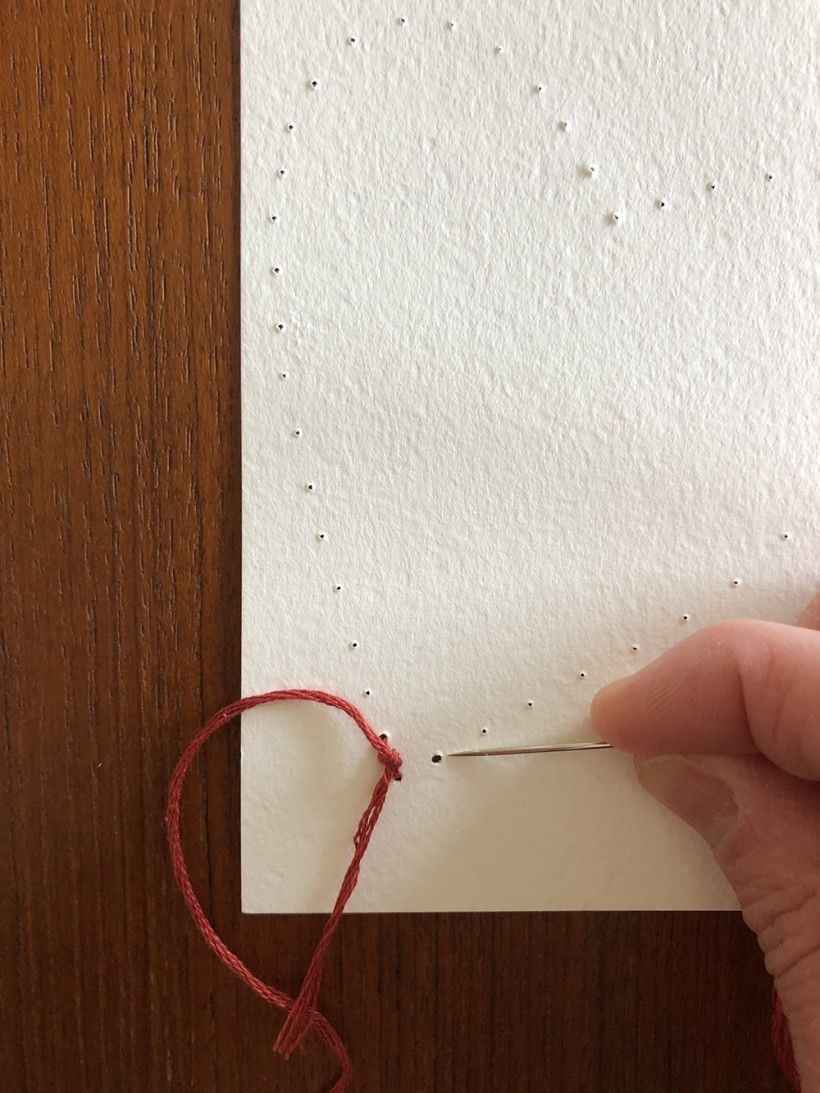
Step 6:
Thread a needle with embroidery thread. If you plan to switch colors, 18-24" of embroidery thread will be plenty to start with. Start stitching using the hole at the “v” of the heart. Bring the needle up through the back of this hole (inside the card) and then take your needle back down the next hole to the right.
Pro tip: Think of it as a fish jumping out of and back into the water!
Image
Image
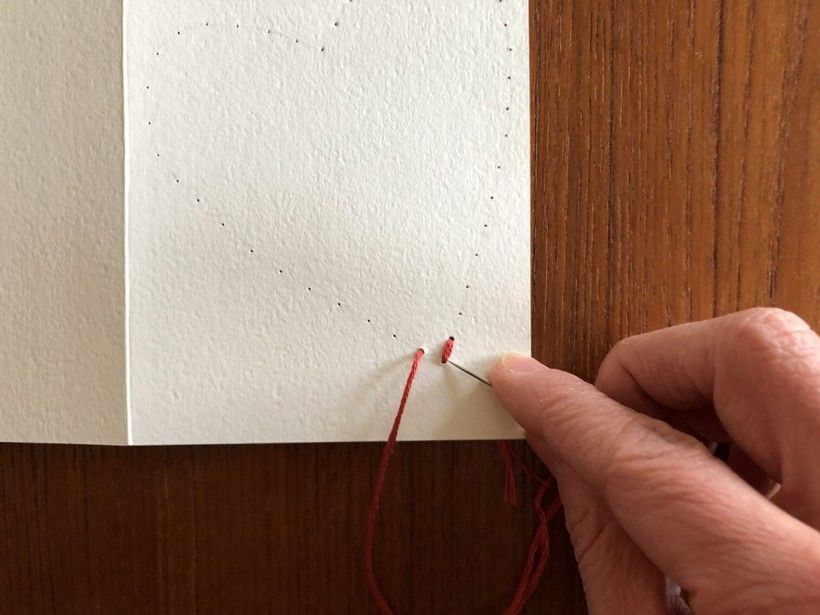
Step 7:
Tie a knot on the back side of the card to secure the embroidery thread. Next, insert your needle through the hole to the right of the knot. Pull the needle through. It should now be on the front of the card.
Image
Step 8:
Finish the “v” by inserting your needle back through the first hole you started with (at the point of the “v”).
Image
Image
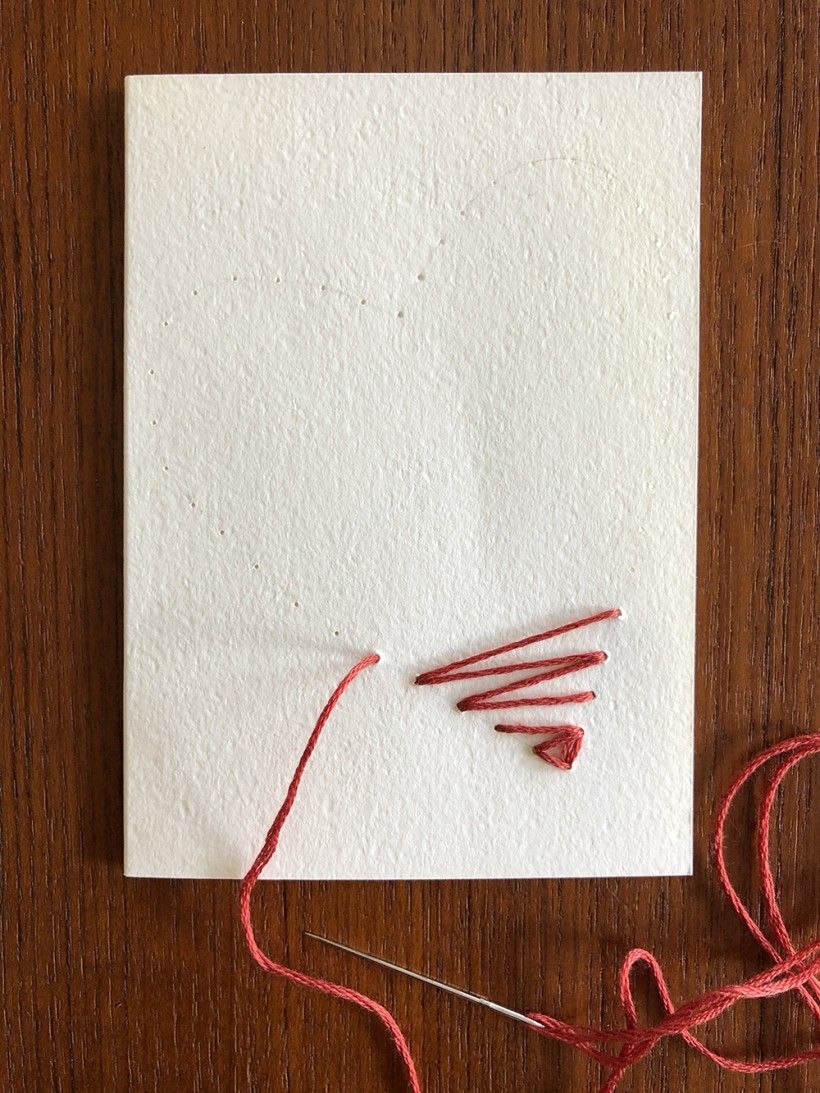
Step 9:
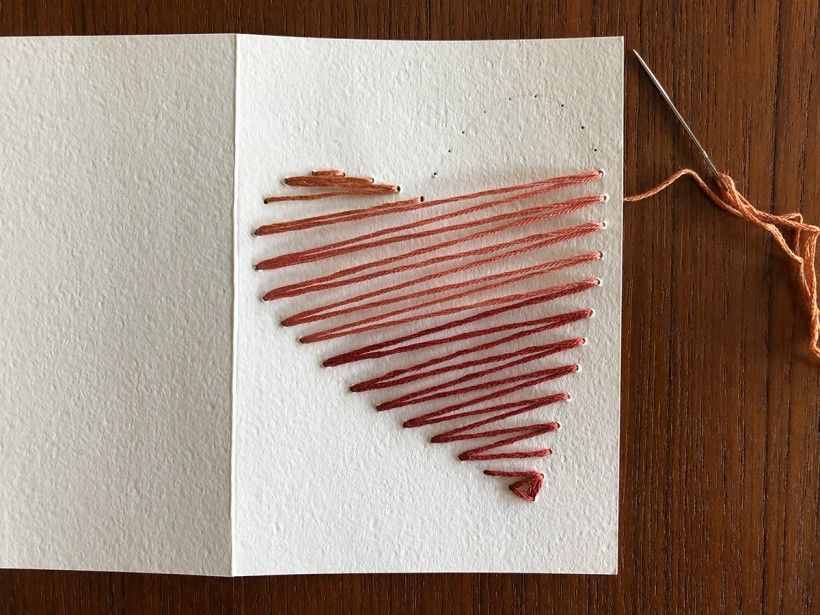
You are now ready to begin stitching the rest of your heart! Simply zig zag back and forth, working your way up and making sure to stich each hole around your heart.
There really are no rules with this. Play around and see what designs you like. You may choose to go straight across rather than having a zig zag pattern. Replace your thread as needed when you only have a couple of inches of thread left (this is a great time to switch colors). Make sure to switch threads on the back side of your card and tie the knot as securely to the card as possible so you don’t have a loose thread. Cut off the excess thread.
Image
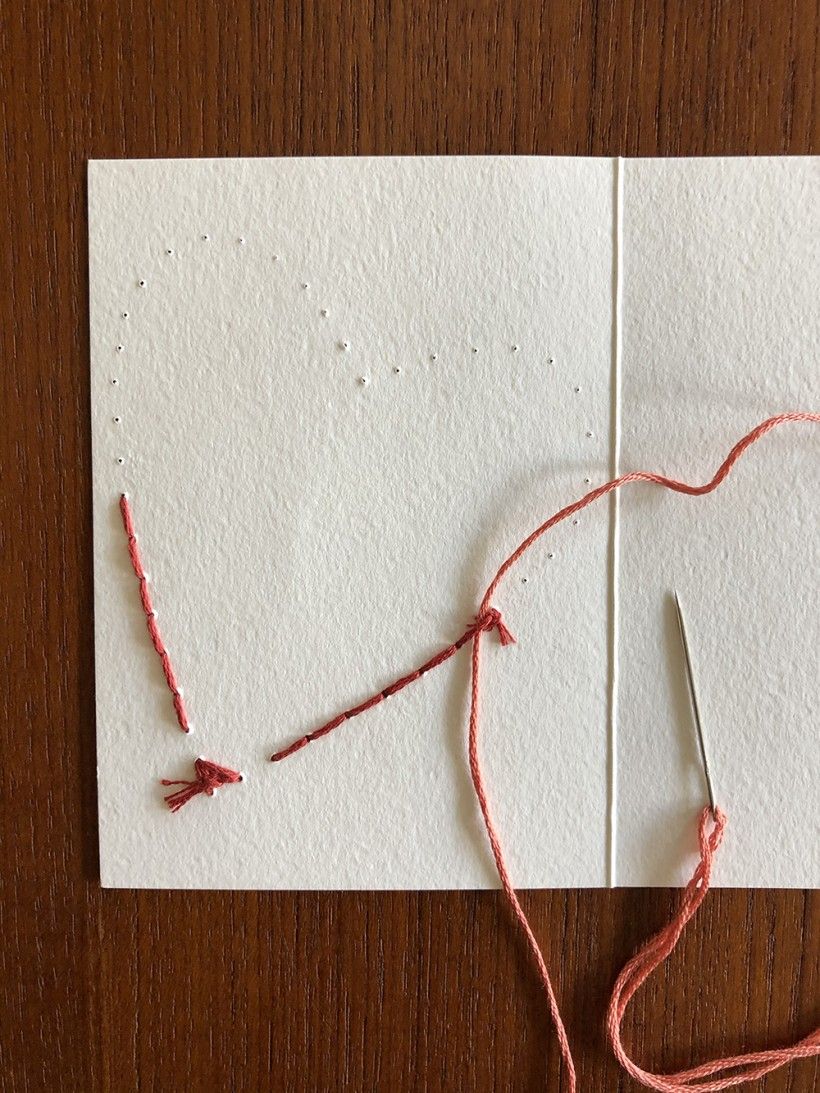
Step 10:
When you reach the top, you will complete the top left of the heart first, then finish the top right. Finish the heart by sliding your needle and thread under the closest stitch and pull it through the loop formed to create a knot. Gently pull the knot to secure and trim end.
Image
Step 11:
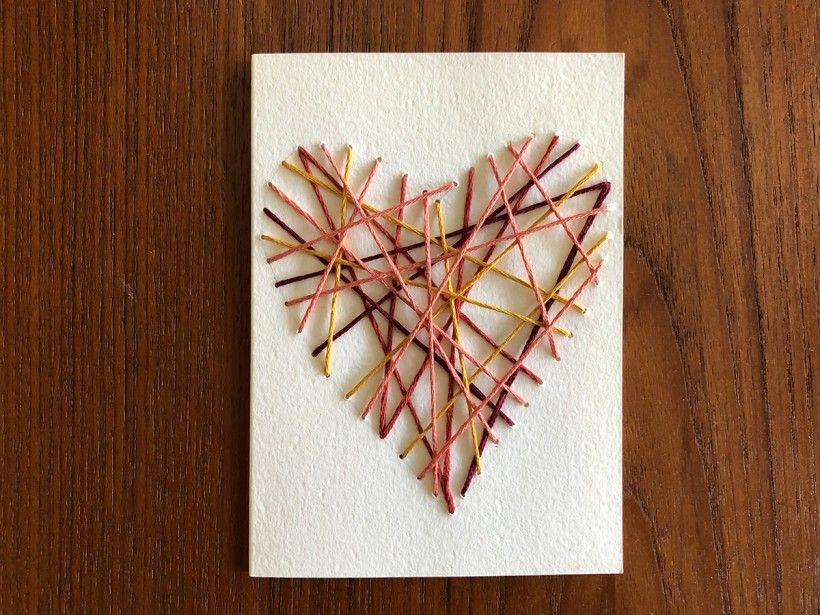
The designs you can create using the stitch method are endless, so definitely experiment with every card you make—they will all take on a unique design of their own. If you choose to go rogue, just remember to stitch every hole to maintain your heart design. This is a great way for younger children, who are beginning to sew, to stitch their own heart cards.
Image
Step 12:
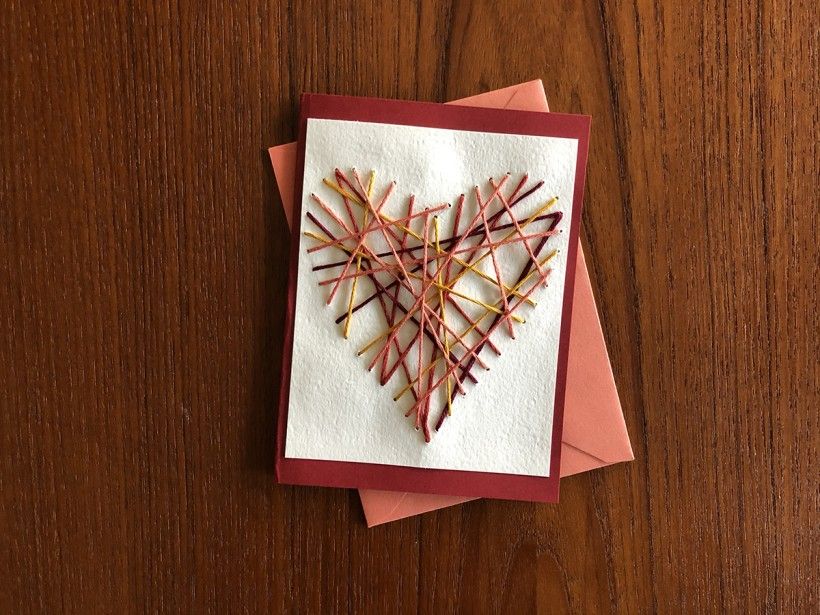
If you don’t like the raw look of the stitches on the back side of your card, mount it to another piece of colored cardstock. Another great option is to cut out the heart and then mount it.