How to be a Forest Steward in Your Own Backyard
Tackling invasive species on your property or taking on a reforestation project can often seem like daunting tasks. Margaret Moore, an easement landowner with the Brandywine Conservancy, knows the challenges of this process all too well. Over the past several years, she’s been diligently working to remove and control invasives in the woods on her property, while also reintroducing and planting native species. It’s been an ongoing process, but by breaking things up into manageable steps with clear goals, Margaret has already made a huge dent in the battle of her backyard woodlands. In the guest article below, read all about Margaret’s process and helpful tips to inspire you to become a forest steward in your own backyard.

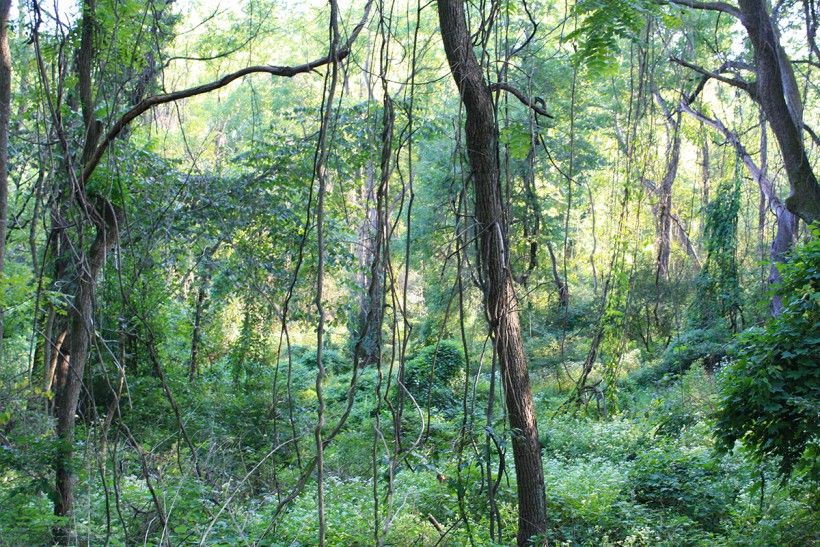
I have spent the past four years trying to eliminate invasive plants and then reforest my woods. Why, you might ask? Most of our woodlands are disturbed and full of invasive plants that do not support our native wildlife as well as native plants do. Heavy vines cover the canopies, choking the trees and blocking the light needed for photosynthesis. Native vegetation, however, creates healthier forests and supports more of our native fauna (including mammals, birds, reptiles, amphibians, spiders and insects). Over the years, I’ve worked to clear invasives and reforest with natives to create a robust ecosystem in my woodlands.
I have about 20 acres of property, including about three acres of meadow, one acre of wetlands, and the rest in woods—mostly sloping from a high ridge down to a swamp. The Brandywine and Mason-Dixon Trails wind along the ridge, and the railroad runs along the bottom border. When I moved in, the woods were choked with multiflora rose and Japanese bush honeysuckle, and the trees were smothered in vines and dying. From there, I began my process of forest stewardship.
The Reforestation Process
The main steps in my process are:
- Assess the land carefully and determine priorities and plan of attack
- Kit yourself out with tools to make the work easier, safer, and more fun
- Break work up into manageable areas and targets
- Work at a pace comfortable for you
- Celebrate minor victories along the way
- Hire help when needed
- Monitor afterwards: Walk through and assess each season and note issues
- Create a planting plan: Determine reforestation area and density
- Place order for native trees for reforestation, considering ecosystem characteristics
- Plant out saplings, protect with tubes or cages
- Repeat!

Step 1: Assess the land carefully and determine priorities and plan of attack
To start a reforestation, you must first assess the problems and the scale of the job. If you have a large area, break it down into manageable areas. Mark the areas off and take notes on forest conditions. Try to walk around thorny thickets, using loppers to cut through in the easiest areas. Research in advance what invasive plants look like so you can identify your enemies.
Figure out what your biggest problems are, and decide on a small, manageable area to clear to start. If you have a topographical map of your land, you can flag where conditions change, from steep ridge to moist bottom lands, forest edge to interior. The larger the infestation, the bigger the problem.

I assessed my forest and decided that invasive vines and shrubs, along with a few native vines, were the biggest threat to the health of my woods, so I prioritized removal and control of these plants.
Some of the most common invasive plant species are bittersweet vines, Japanese honeysuckle, multiflora rose, privet, burning bush, Japanese barberry, callery pear, mulberry, Russian olive, ailanthus, Norway maple, porcelain berry, golden bamboo, and garlic mustard.
I started with vine removal because the large canopy trees are the forest’s treasure. The vines were killing or threatening the trees, so saving them was my first priority. Then, bit by bit, I cleared an area of bush honeysuckle, privet and multiflora rose. Looking at the scale of the problem, I realized it would take several years to tackle everything.

Step 2: Kit yourself out with tools to make the work easier, safer, and more fun
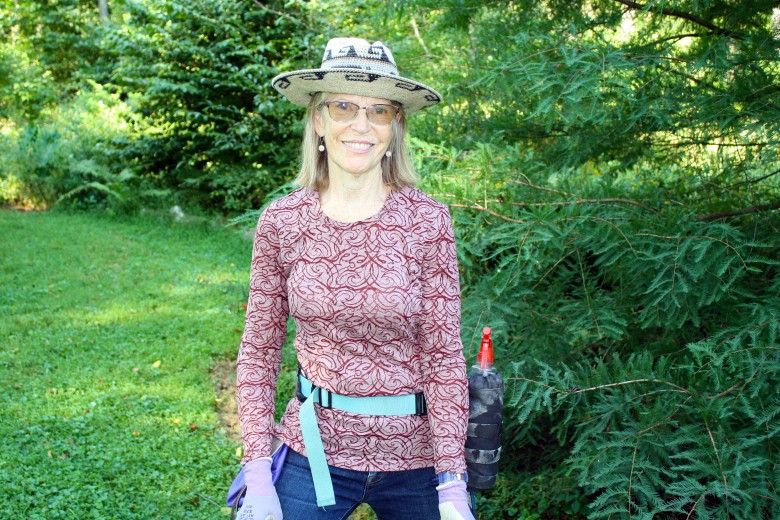
I took a course at Mt. Cuba Center on Invasive Management and hired Bill Haldeman of Horticultural Consulting, LLC to teach me how to dress for success in this job. He showed me his choices of tools and gear. I learned to strap on a work belt with tools hanging from it, boots and hat for protection, and light and sharp tools. I also bring along a cellphone charged up and loaded with podcasts and audiobooks to keep me entertained, plenty of water, snacks and lunch. If it does not hang off a waist belt, it goes into a bright bucket. I wrap all my tools in bright duct tape—otherwise, they get lost in the leaf litter when I lay them down. Invariably, they disappear instantly, and I waste much time searching for a tool I just put down.
I use herbicides to kill the plants completely. The consultant showed me his herbicide mixing protocols, and system of protection and labeling. I add a blue dye and surfactant to the herbicide so I could see what I had covered, and the surfactant helped to adhere to the surface target. Always follow mix proportions exactly. Goosing up proportions of active ingredient does not hasten the death spiral. Wear gloves and safety glasses when mixing and be sure to label every container. The loppers I use get dull quickly and need sharpening and oiling periodically. The hand saw blade can be replaced easily. I also used a lithium-ion battery-charged hand saw at times. It is much heavier than the hand tools, but it makes quick work of the larger trunks.

Step 3: Break the work up into manageable areas and targets
I mapped out my plan of attack to target vines first, then area-by-area I went after honeysuckle and multiflora rose. The largest culprit in my woods was Asiatic bittersweet, with huge old gnarly vines that were 10 inches in diameter. I also cut native grapevines when they were very large and ropey and harming tree canopies. I removed poison ivy vines—also native—as I and many others suffer from exposure. I learned to wear a hat because detritus rained down as I sawed away.
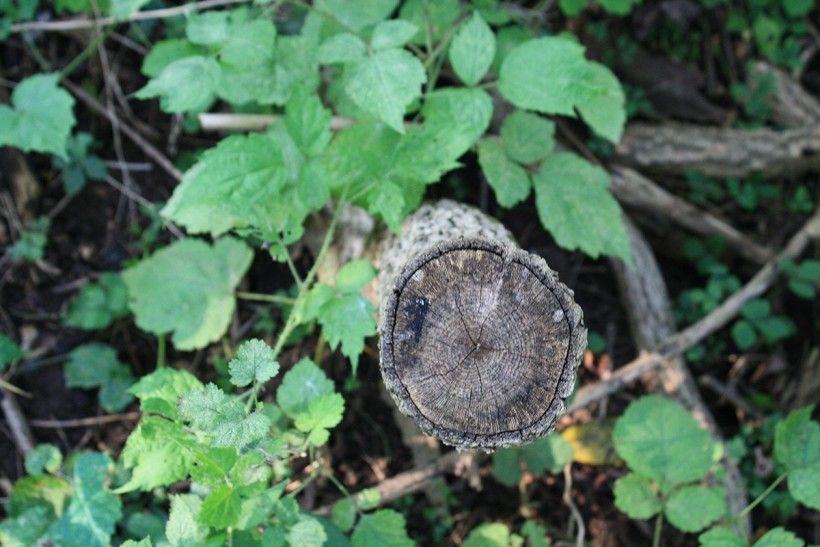
When removing vines, I cut as high up as I can reach, and then again at ground level, and spritz the cut surface with herbicide. With the larger vines, I also scrape away the outer dermis of a huge vine and spritz the cut patch. You do not want to cut just once low down on the vine because any re-sprouting vines will twine back up the dead hanging vines and recapture the canopy.
Sometimes it is hard to tell if a vine-infested tree is still alive. In some cases, I would cut all the vines from a tree and when I returned after the vine leaves had wilted, I discovered the tree was already dead. Most memorable was a large black cherry (Prunus serotina) that had been so heavily festooned with vines that you could barely see the trunk. Now, the tree is thriving, but the old vines still hang from the branches high up as a testament to their former bondage.

My second largest job was non-native bush (Amur) honeysuckle. The land was probably a dairy farm 100 years ago, as I find remnants of fence posts and barbed wire for the cattle here and there. When farming ceased, instead of native trees regenerating, the bush honeysuckle took over. The result was basically a monoculture of bush honeysuckle 15-feet high, with trunks 8-inches in diameter. This was either slow handsaw work or quick chainsaw work from my trusty helper. Once cut down, the key to success is to spritz the cut area quickly with herbicide. It is far less effective if you cut one day and spritz the next. Once I have tackled the vines in an area, I saw down the large bush honeysuckle. I can use loppers for smaller diameter branches. Again, I spritz the cut base, and let the branches fall wherever they lie. I try to eliminate all the large woody invasive plants.
Next, I attack wineberries and multiflora roses, by lopping at the base and spritzing. If the rose is huge and sprawling, I will cut off the upper branches first to make it more manageable. I do not try to untangle—just spritz the cut base and gingerly push the thorny mess together to reduce its bite. After a long soaking rain, I go out and pull up the small seedlings. The soft wet soil releases the shallow young roots easily—thus, I can reduce the amount of herbicide used.
Once the vines are cut, you can see the leaves wilting within a day. After the large shrubs and thorny brambles are cut down, the space opens up significantly. Then, the final run through pulling the smaller seedlings out is the final coup de grace.
Each specific step shows a huge change in the landscape. Don’t forget to step back and assess the change, and celebrate a job well done. Of course, birds and other fauna will seed the invasives back in, so you will never have a completely clean forest.

Step 4: Work at a pace comfortable for you
I tend to work in spring and fall. For me, summer is too hot, humid and oppressive. The invasive plants tend to leaf out earlier in the spring and shed leaves later in the fall, making them easier to identify in those seasons. In the fall, the plants absorb nutrients back into their roots at season’s end, so the herbicide works most effectively at that time. In spring, it is cooler for working, and the invasives tend to leaf out earlier so they are again easier to identify. Mornings are cooler, especially in areas without shade. Plug away as long as you can, but don’t knock yourself out.
Step 5: Celebrate minor victories along the way


At day’s end, I step back and savor the change I have wrought. I encourage you to take before and after photographs and show off your accomplishments to others. My ultimate goal—to clear all that acreage—seemed almost impossible, but I tackled one patch at a time. It took 4 years to finally get the worst of the invasive plants removed. I was encouraged by the change I saw in each area, which motivated me to keep on going.
Sometimes I would cut away huge vines and discover a young holly tree, dogwood, or viburnum hiding underneath the brush. Also underneath vines, I found a grove of redbud that finally bloomed in subsequent years. Tulip trees and oaks are now seeding in. Wildflowers and ferns have appeared. Without the brambles, I can walk through my woods. I discovered a Prohibition-era still underneath an immense tangle of multiflora rose. The thicket wall at the top of the ridge was cut to reveal a beautiful vista. I can now enjoy the view of my stream fringed with ferns. I can access the sedge tussocks in the swamp. These are examples of small victories that make the work worthwhile.

Step 6: Hire help when needed
Bill Haldeman of Horticultural Consulting LLC instructed me in the best way to tackle the job. It was very helpful to learn the tricks of the trade so that I had less wasted effort. I also hired Craig Waegerlie of Craig Property Management LLC to help wield a chainsaw to cut the larger shrubs and vines. That work went very fast, and it was money well spent. Even so, it was many days of hard work to finish the chainsaw clearance. Craig went so fast that I missed some of the cut stump herbicide spritzing and had to spray the regrowth the following season.
Step 7: Monitor afterwards: Walk through and assess each season and note issues
Monitor the cleared area. Mark where regrowth needs to be checked and treated once more. Invasive plants will seed in as easily as natives and have the advantage of not being targeted by white-tailed deer. Thin canes of multiflora rose can be weed whacked, then spritzed.

Step 8: Create a Planting Plan; Determine reforestation area and density
Take a victory lap walk through the area cleared. Assess the quality of the canopy cover. I use marking flags to note canopy gaps where I need to reforest. In some areas, once the aliens are cleared out, there is practically nothing left. I plant replacement trees at least 10 feet apart from each other—as well as 10 feet from the drip line of any existing trees
If the space needs more than 60 trees, I will reforest in increments, as I can’t get them all planted, watered, and protected within the seasonal slot. I plant trees with an eye to the size of the tree at maturity. In nature, trees will grow very thickly—more thickly than they can grow to full size. By planting at lower density, the cost will be lower.

Step 9: Create a planting plan; Place order for native trees for reforestation considering ecosystem characteristics
I plant replacement native trees in the spring and fall. I order about 60 trees at a time from Octoraro Native Plant Nursery. I choose a diverse variety of trees so I will not have a monoculture, and I select different species for each type of habitat within my forest ecosystem. I choose oaks, hickories and beech to go along the top of the ridge; Black locust and understory hawthorns by the meadow. Sugar maples and blackgum will go on the upper slopes; red maple, sycamores, linden and sweet gum will go farther downslope where the soil becomes moister. The valley bottom gets bald cypress, river birch, alder, red and silver maple, willow oak, pin oaks and swamp white oaks. Tulip trees will go along the trail and wherever I need shade quickly. I plant more tulip trees than anything else as they are an early succession tree. They will grow quickly and provide shade, reducing the ability of invasives to re-establish. Eastern red-cedar and American holly create privacy screens from neighbors. I also choose some understory trees: flowering native dogwood, redbud, hop hornbeam, muscle wood (also called American hornbeam) and hawthorn. Spicebush dominates the tall shrub layer.
I pay particular attention to the riparian buffer areas of a stream that empties into the wetlands. Originally it was hidden behind a wall of rose brambles. Once they were cut down, I wanted to reforest with species that would tolerate “wet feet” and intermittent flooding yet provide shade and erosion control along the banks. I used river birches, buttonbush, summersweet (clethra) and ostrich ferns.

In addition to the large canopy trees, the forest contains some native shrubs and understory trees: in my woods, primarily viburnum, spicebush and blackberry. The spicebush is most prevalent as deer dislike it. Holly also is unattractive to deer. Neither of these plants needs protection. The blackberry has wicked thorns, but I retain many large patches, particularly in the wetlands. I have also found redbuds, dogwoods and holly trees hidden under all the vines. After the vines were removed, the redbuds started to bloom in the spring again. Spicebush is very noticeable in the autumn with deep yellow foliage. To add to existing understory trees, I design my planting plan to include dogwood, redbud, hawthorn and witch hazel—all spring flowering trees that captivate the hikers on my trails.
I like to create a simple map or diagram to help me put the saplings out when it comes time to plant. After I purchase the saplings, I keep them in a protected area free of deer, wind and full sun, and I make sure to water them every other day.
I don’t just buy the trees that I plant. Some of the trees are saplings that I find, protect and replant elsewhere. You may notice native tree seedlings in your forest, yard or garden. When I see them, I mark them with orange plastic tape, and in spring or fall pot them up. I grow them on in my vegetable garden in full sun for a season or so and then plant them out in the woods. I get many black walnut, tulip poplar, Eastern Red Cedar and black cherry seedlings. If I find them in the woods, and don’t have any tubes to protect them, I mark them with tape, and pile up the cut branches all around them. The deer are lazy, and if it is too much work to get through all that dead brush, they will give up and move on.
Step 10: Plant out saplings, protect with tubes or cages if subject to deer browse


When I am ready to plant, I first go out to the forest planting area and dig the holes where I have previously placed flags. I label the flags with the tree species from my plan and then I walk out and thrust them in, according to my plan. I use a tractor cart to carry the sapling pots, tree guards, wire fence roll, water jugs, stakes and rebar up to my staging area.
I like to save milk bottles to transport water to my staging area. I ensure the sapling pots are thoroughly watered before hauling them out to the forest area, bringing out only as many as I can plant that day. I keep them in the shade, so they don’t dry out. Not all survive, but almost all do. I do not water after the initial drink.
Every tree needs deer protection, either mesh tubes or a 4’ tall wire cage cut from fencing. I use fiberglass stakes or pieces of rebar and attach the tube to the stake with plastic wire tabs. Eventually, the trees will outgrow the tubes. Initially, I pull out the stake to reuse elsewhere. I use twine to loosely attach the tube to the thick trunk, so the young bucks will not rub off the bark as they grow new antlers. Eventually, the trunk will no longer need protection. I use wire cages for multi-stemmed or bushy trees and shrubs as they will not easily fit in a tube.
, which came back on its own once invasive plants were reduced.")
Step 11: Repeat!
Having succeeded at reforesting one area, I move on to the next and repeat the process.
The Next Stage of My Woods Stewardship Plan

It is exciting to see how much my woods have improved now that I’ve removed vines and invasives and began planting natives. By working in manageable stages, I have built on small successes that add up to a big picture of healthier woods. Next, I will plot out some small trails down to the river and along the wetland edge over to the railroad tracks. The deer have already done most of my work for me, but they have tough hides, so I will clip branches to widen the paths a bit. I will continue to plant ferns and fill in pockets with saplings from my inventory of saplings. I expect the spicebush will continue to spread around. I don’t know if the benefits can be quantified in such a small area. The neighboring areas are not changed, so represent a control for comparison. I am interested in trying to measure insect or bird density in the two adjacent areas to see if my efforts made a difference. Stay tuned!
A Note from Brandywine’s Natural Resource Manager, Kevin Fryberger
The wonderful thing about developing and implementing a stewardship plan for your own land is that you get to make all the decisions. Margaret is doing a wonderful job and clearly loves her property and the work she is doing. When you are creating a restoration plan for your property, you need to determine your goals and your priorities and evaluate the resources you have at your disposal (time, materials, energy and money). Margaret has clearly done this and is implementing her plan beautifully.
The ultimate goal for restoration is to have an intact system (woodland, meadow, wetland or successional) that is functioning on its own, without disturbance. Being methodical with removal and minimizing disturbance is paramount for success.
Restoration projects can be divided into three steps:
1. Site preparation,
2. Restoration (planting or protecting what is there), and
3. Maintenance
Restoration is only going to be successful if you have the appropriate site prep and adequate follow-up maintenance. The quickest way to establish a functioning system is to actively plant, but if resources are limited you can rely more on natural succession. If you don’t have the budget to replant right away, you can step back from the process and rely on what comes back naturally. Once an area is “cleaned up” and maintained, native trees, shrubs and wildflowers will all come back. At the Brandywine’s Waterloo Mills Preserve, I have seen slippery elm, tulip tree, hackberry, sassafras, box-elder, blackhaw, spicebush and sweetgum all come back on their own after an area is cleared of competing invasive vegetation.

Margaret has made the decision to remove native grapevine (when it is very large) and poison ivy. For me, having an intact system also means providing adequate food for wildlife. Grapevine is native and its fruit provides one of the highest sources of lipids to migrating birds in the fall. Usually, grape isn’t so extensive that it will kill a tree. Most likely, it is the combination of other invasive vines (Asiatic bittersweet, Bush honeysuckle, and porcelainberry) that is causing the damage. I will always cut non-native vines and leave the grape. Likewise, poison ivy fruit is a highly sought-after food source for birds and even some mammals. I leave it and learn to avoid it. If it is growing along a popular trail, it can be addressed. For the most part, if it’s native, it should be kept.
Like Margaret, I do not water trees after the initial planting. This is why fall plantings tend to be more successful. They rely on natural watering from frost/thaw, snow and rain. Native species also need less water as they are adapted to our climate. Using native plants with a local genotype is also helpful in this regard. Using plants propagated from sources as close as possible to where you are planting or seeding ensures plants that are well adapted to our region and overall ecosystem. Exotic plants that evolved in other parts of the world or were cultivated by humans into forms that don’t exist in nature do not support our local wildlife as well as native plants.
If you are interested in starting a restoration project on your own land, there are resources available on our website to help, such as management sheets on common invasive species in our region and lists of native trees and shrubs for both upland and wet areas. We can also offer recommendations for contractors and professionals who can help you through the process. For more information, contact Kristen Frentzel at [email protected].
Photos in this article were taken by Margaret Moore and Kristen Frentzel.
The header image features Margaret Moore displaying her chosen attire for a day spent in the woods.